Windows 10 Printing
CLASSE Managed
CLASSE Domain computers running Windows 10 will create printer queues for you automatically when you login. If the printer you need isn't available, please submit a service request. Printer Queues are managed by a cloud service called PrinterLogic. To provide this, an agent is deployed in your system tray.
CLASSE VPN - Pritunl
If your computer is connected to RedRover or any other non-CLASSE network, you'll have to use a VPN connection. For information about how to configure Pritunl to access the CLASSE networks, see https://wiki.classe.cornell.edu/Computing/ClasseVPNNon-CLASSE Windows 10 computers
To add a printer to non-CLASSE managed Win 10 systems:
Modern Method
- Browse to PrinterLogic Cloud using Vivaldi:
- Log in with your CLASSE credentials.
- When prompted install the browser extension.
- Then install the PrinterLogic cloud client software.
- This will require a CLASSESpecificPrinterLogicCode - click here to get it.
- Browse by building for the printer you want to add.
- Click on the Printer Name you want to add.
- Say "Yes" to install the printer.
Legacy Method (Before 10-May-2022)
You may need a professional version of Windows 10 for this to work. Currently we have setup Windows 10 to work with generic Postscript printing to most CLASSE printers.Make sure LPR/LPD is enabled
Install the Windows Components- Click on the Start button, then Control Panel
- Click on Programs and Features then click Turn Windows features on or off, from the left sidebar
- Expand Print and Document Services, and make sure the boxes next to LPD Print Service and LPR Port Monitor are checked
- Click OK and follow the on screen instructions until the components are installed.
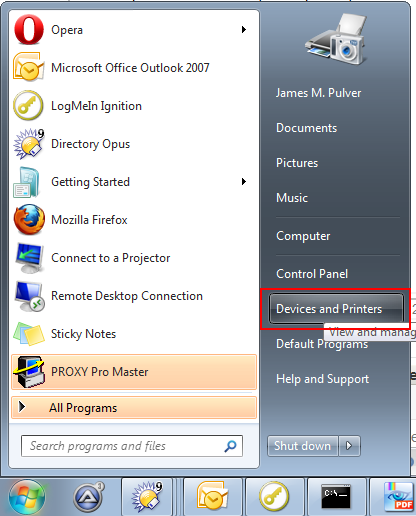
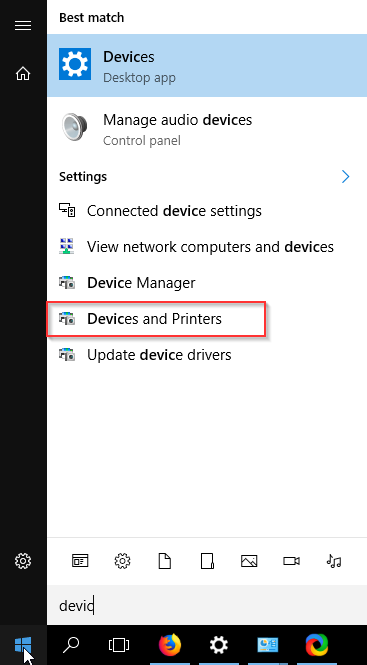
- Go to the Start Menu, search for "devic" and select "Devices and Printers"

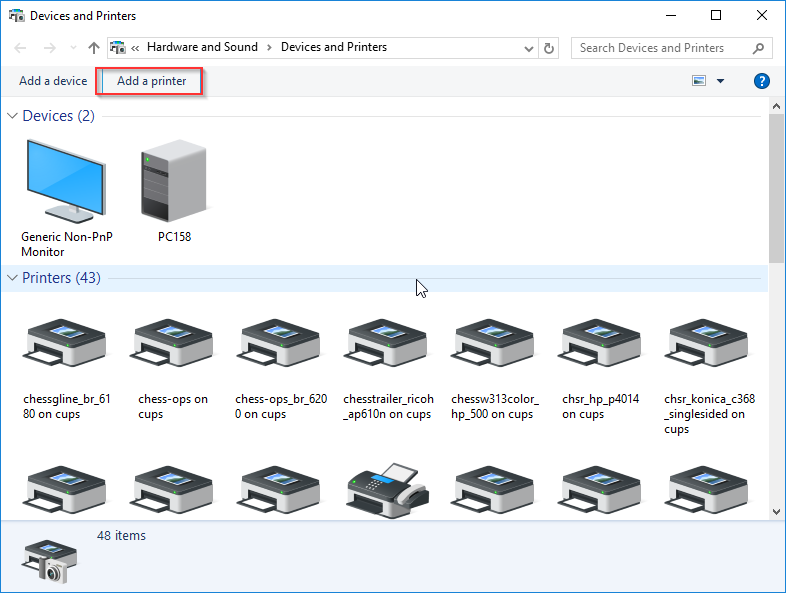
- Select Add a printer

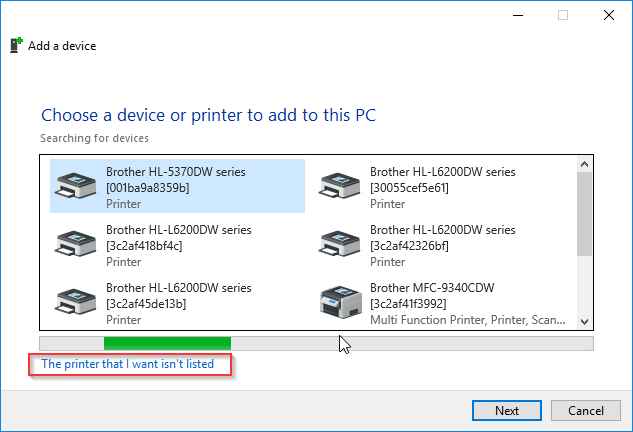
- Select "The Printer I want isn't listed"

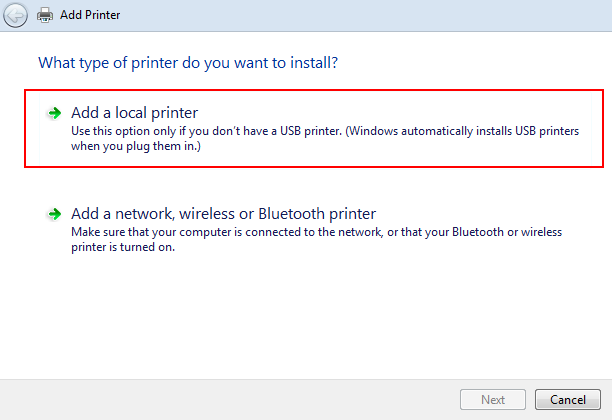
- Choose Add a local printer.

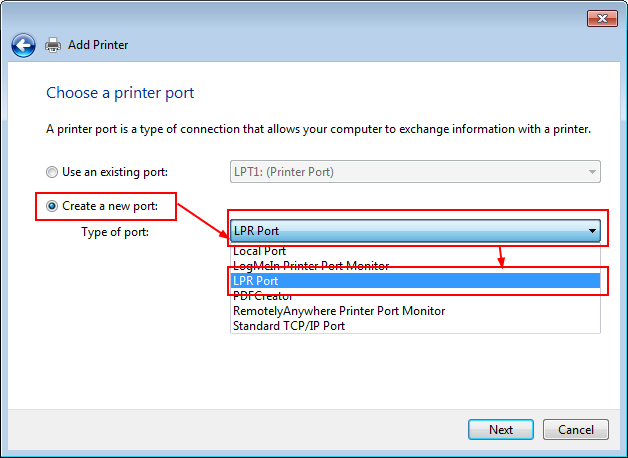
- Select Create a new port.
- Then choose LPR Port from the dropdown.

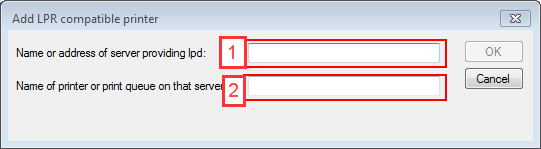
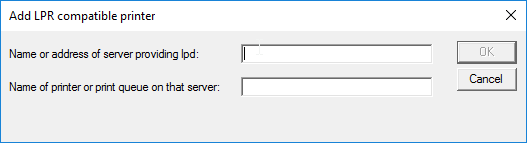
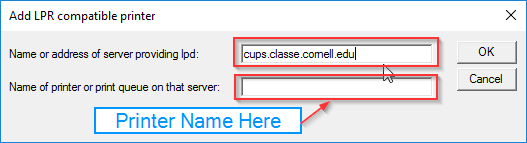
- In the pop-up enter
cups.classe.cornell.edu

- In the pop-up enter the printer queue name.
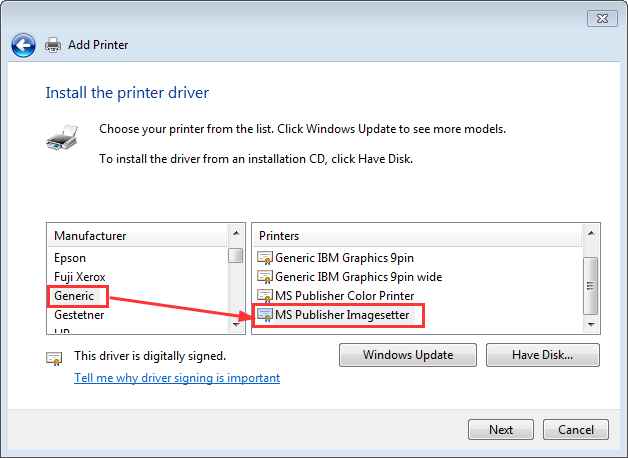
- For the driver, select Generic and then scroll to MS Publisher Imagesetter.
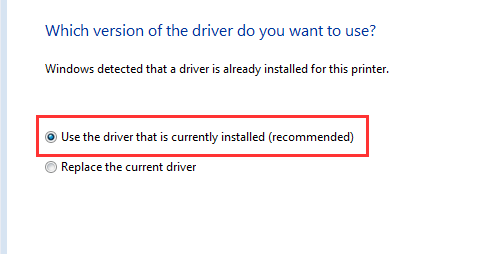
- If asked, select Keep the installed driver.
- Name the printer appropriately, such as the queue name.
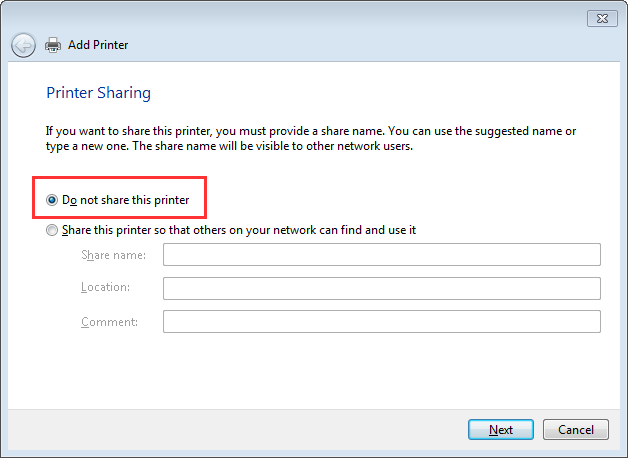
- DO NOT SHARE the printer.
- Print a test page to make sure it works properly.
- Click finish.


Ideas, requests, problems regarding CLASSE Wiki? Send feedback