Tunneling VNC through SSH from Windows
We recommend using the VNC VPN Instructions. These are older manual instructions. Please see our updated details at https://wiki.classe.cornell.edu/lepp/bin/view/Computing/RemoteLinux#LEPP_VNC_connection_bundlesUsing Putty (Recommended)
Another choice for an SSH client in Windows is Putty. You can download this from http://the.earth.li/~sgtatham/putty/latest/x86/putty.exe.Instructions:
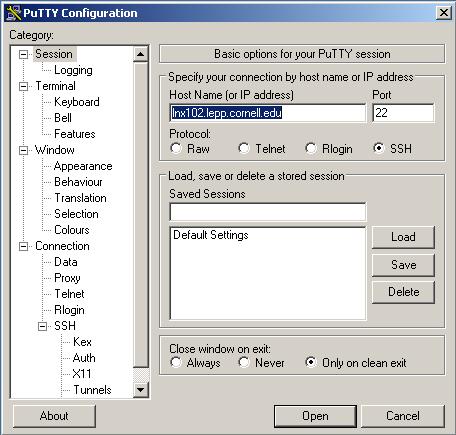
- First, use RunXMing to launch PuTTY, or run PuTTY manually. Connect in and start a VNC server as described here.
- For Host Name (or IP address) enter: the computer you connected to above. LNX201 is a good choice.
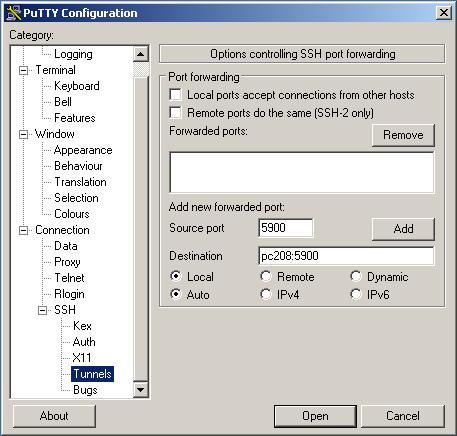
- Click on Tunnels in the menu on the left called Category (under Connection->SSH->Tunnels).
- For Source Port enter: source port as found above.
- For Destination enter: ComputerName:5900 (e.g. pc208:5900). If you have multiple sessions / servers, you'll have to increment the port number.
- Click the Add button.
- In the Category menu on the left go back to the Session choice (you may need to scroll up to see Session).
- For Saved Sessions give a name and click Save. (The next time you run Putty you'll just need to select the saved session and click on Load to restore these settings.)
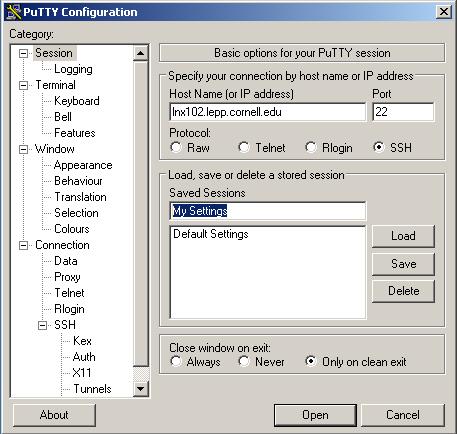
- Next, click on the Open button.
- You'll see a command window and then a Security Alert about the host key not being cached. Answer Yes to the security alert (as a rule this should not show up in the future when you launch Putty).

- You will then be prompted for your CLASSE user name and password. Enter them.
Using Cygwin
If you are using Cygwin, you can follow our instructions for tunneling VNC through SSH from Linux.

This topic: Computing > WebHome > UserInformation > WinTunnelVncSSH
Topic revision: 01 Jun 2022, JamesPulver
Topic revision: 01 Jun 2022, JamesPulver
Ideas, requests, problems regarding CLASSE Wiki? Send feedback


