You are here: CLASSE Wiki>Computing Web>WindowsSupport>Win7 (10 May 2022, JamesPulver)Edit Attach
Windows 10 Printing
CLASSE Managed
CLASSE Domain computers running Windows 10 will create printer queues for you automatically when you login. If the printer you need isn't available, please submit a service request. Printer Queues are managed by a cloud service called PrinterLogic. To provide this, an agent is deployed in your system tray.
CLASSE VPN - Pritunl
If your computer is connected to RedRover or any other non-CLASSE network, you'll have to use a VPN connection. For information about how to configure Pritunl to access the CLASSE networks, see https://wiki.classe.cornell.edu/Computing/ClasseVPNNon-CLASSE Windows 10 computers
To add a printer to non-CLASSE managed Win 10 systems:
Modern Method
- Browse to PrinterLogic Cloud using Vivaldi:
- Log in with your CLASSE credentials.
- When prompted install the browser extension.
- Then install the PrinterLogic cloud client software.
- This will require a CLASSESpecificPrinterLogicCode - click here to get it.
- Browse by building for the printer you want to add.
- Click on the Printer Name you want to add.
- Say "Yes" to install the printer.
Legacy Method (Before 10-May-2022)
You may need a professional version of Windows 10 for this to work. Currently we have setup Windows 10 to work with generic Postscript printing to most CLASSE printers.Make sure LPR/LPD is enabled
Install the Windows Components- Click on the Start button, then Control Panel
- Click on Programs and Features then click Turn Windows features on or off, from the left sidebar
- Expand Print and Document Services, and make sure the boxes next to LPD Print Service and LPR Port Monitor are checked
- Click OK and follow the on screen instructions until the components are installed.
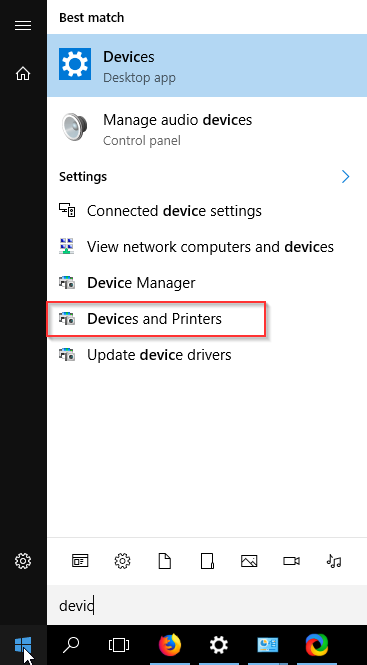
- Go to the Start Menu, search for "devic" and select "Devices and Printers"
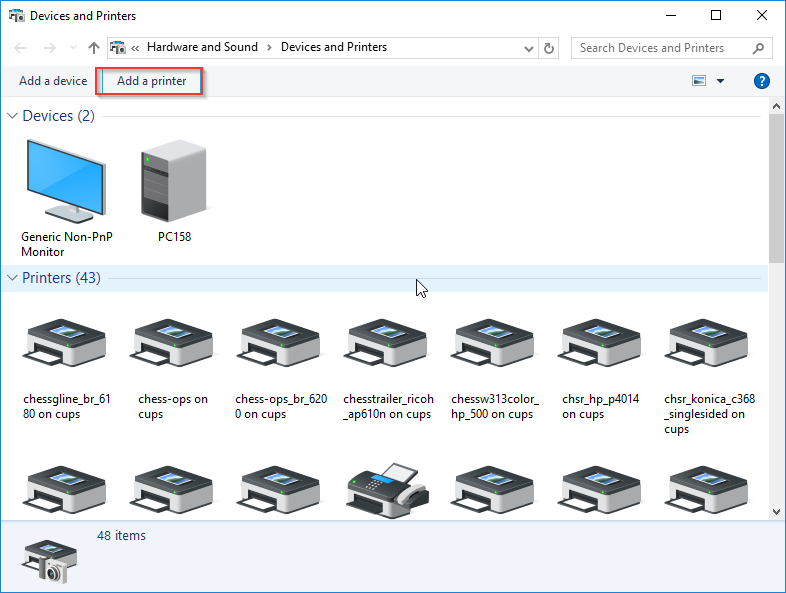
- Select Add a printer
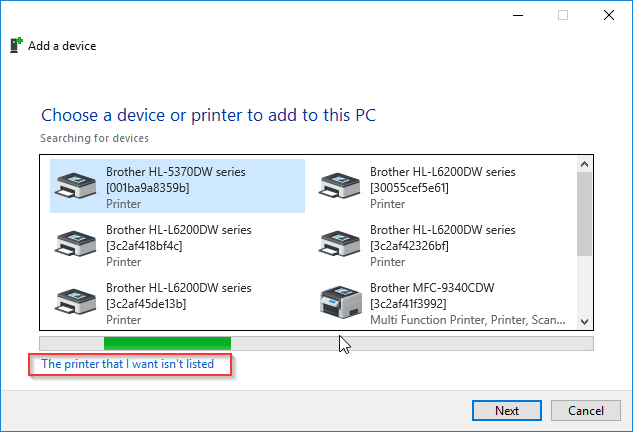
- Select "The Printer I want isn't listed"
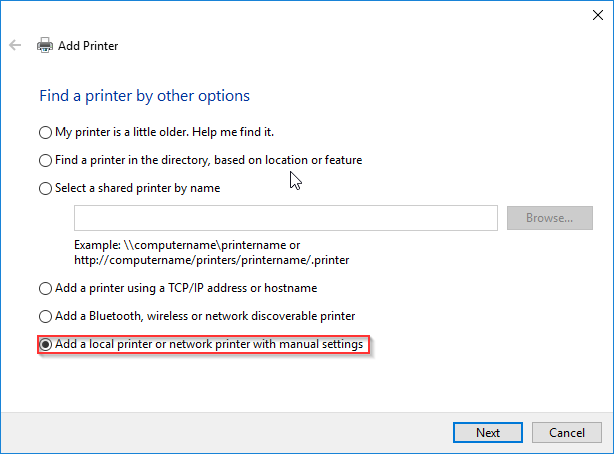
- Choose Add a local printer.
- Select Create a new port.
- Then choose LPR Port from the dropdown.
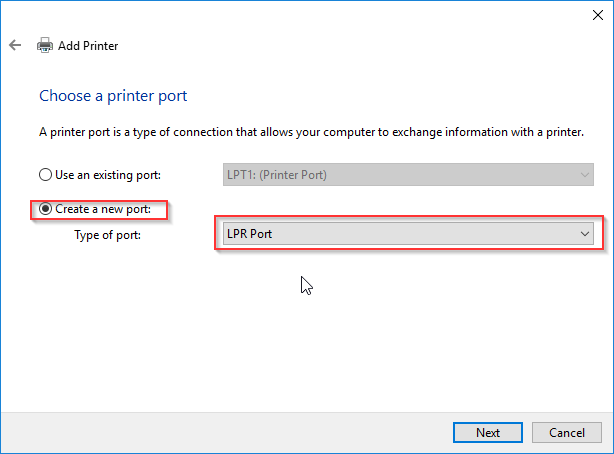
- In the pop-up enter
cups.classe.cornell.edu

- In the pop-up enter the printer queue name.
- For the driver, select Generic and then scroll to MS Publisher Imagesetter.
- If asked, select Keep the installed driver.
- Name the printer appropriately, such as the queue name.
- DO NOT SHARE the printer.
- Print a test page to make sure it works properly.
- Click finish.
Edit | Attach | Print version | History: r15 < r14 < r13 < r12 | Backlinks | View wiki text | Edit wiki text | More topic actions
Topic revision: r15 - 10 May 2022, JamesPulver
Quick Links
Usage Information
Collaboration
IT Communications
 Copyright © by the contributing authors. All material on this collaboration platform is the property of the contributing authors.
 Ideas, requests, problems regarding CLASSE Wiki? Send feedback
