You are here: CLASSE Wiki>Safety/Handbook Web>PrefacE>CompleteHandbook (28 Jul 2020, dww3)Edit Attach
- CLASSE Safety Handbook
- Introduction
- Emergency Numbers
- Dos & Don'ts
- General Safety
- Tour Safety
- Emergency Response
- Fire Safety
- Radiation Safety
- Radiation Overview
- Origins of Ionizing Radiation
- Exposure to Ionizing Radiation
- Controlled, Uncontrolled, and Exclusion Areas
- Interlock Systems
- Area Radiation Monitoring
- Radiation Shielding
- Request a badge
- Radiation Badges
- Personal Radiation Protection
- Pregnant Workers and Radiation Exposure
- Radioactive Source Handling
- Magnetic Field Safety
- Electrical Safety
- Laser Safety
- Cryogenic Safety
- Compressed Gas Safety
- Chemical Safety
- Biological Safety
- Facilities
- Safety Documents
- Who's Who in CLASSE Safety
- Glossary
CLASSE Safety Handbook
Introduction
Cornell University Health and Safety Policy
Cornell University strives to maintain a safe living, learning and working environment. Faculty, staff, students, and other members of the Cornell community must conduct university operations in compliance with applicable federal, state, and local regulations, University Health and Safety Board requirements, and other university health and safety standards. The full Cornell University statement applicable to health and safety policies and related responsibilities is Policy 8.6 (pdf).CLASSE Safety Committee
Safety administration for all CLASSE activities is the responsibility of the CLASSE Safety Committee (membership). A minimum of seven votes is required to implement new policy, and full consensus of those present for such decisions is desirable. This body has a chair, Safety Director, and key representatives from many facets of the Laboratory. The CHESS User Safety Subcommittee (membership) manages safety policy and procedures for CHESS operations and reports on its deliberations and decisions to the CLASSE Safety Committee.From the Director
 CLASSE is committed to protecting the health and safety of all our faculty, staff, students and visitors, the broader Cornell university community, and the environment. The research mission of CLASSE can only be successful if pursued in a completely safe manner. Safety at all times must be our highest priority. Safety is the responsibility of everyone, and we look to each of you to support a safe research environment, to resist complacency, look out for your colleagues, and to continually improve upon our safety culture. The CLASSE Safety Handbook describes the potential hazards in our laboratory and summarizes the policies and procedures that have been worked out by experts for our protection and for the protection of our environment. It is critically important that each of you be familiar with the Handbook and observe its rules and recommendations. If any issues or hazards are not properly detailed in the Safety Handbook, please immediately inform the CLASSE Safety Director.
Nigel Lockyer, Director of CLASSE
Scope of Handbook
This CLASSE Safety Handbook is for the use of employees, faculty, students, and visitors of LEPP and CHESS during their work in any of the CLASSE facilities at Cornell University. This Handbook acts as a guide to the basic principles of working safely in these environments, and should be consulted before any potentially hazardous activity is undertaken. New personnel are required to attend an in-person, CLASSE-specific Basic Safety Training session prior to commencing work. There are also online and/or in-person trainings required by Cornell University policy. Short-term visitors should acquaint themselves with this Handbook as well as request guidance from their local host for further information. We strive to establish a culture of safety, which entails much more than simply compliance with a set of rules. A culture of safety is embodied by the following practices:
 - Each of us takes responsibility for our own safety and that of people we work with, supervise, or host.
- Safety is valued on par with (or above) scientific achievement and/or task completion.
- Safety concerns are always taken seriously and addressed.
- Safety challenges are approached with intellectual rigor.
- New activities are planned from the start with safety in mind.
- New participants receive relevant safety training immediately & are inculcated with the values of a positive safety culture.
- Every person values and strives for continuous improvement of laboratory safety
According to realdictionary.com, "Safety-first as an accident-prevention slogan first used in Britain in 1873" and may have originated with the US railroads.
According to a Letter to the Editor of the New York Times on Sept. 28, 1915 from Arthur Williams, then President of the American Museum of Safety, the "first organized work in accident prevention in this country was done in 1900 through the Museum of Safety Section of the American Institute of Social Service" (Copyright, The New York Times).
OSHA was founded in 1970.
How to Use this Handbook
This Handbook not only has internal links for cross-referencing terms and concepts (including links to entries in the Glossary), but also has hidden content (absent in most printed versions of this document) that can be expanded by clicking on the appropriate this hidden content does not appear in the printed version unless expanded . Likewise, such content can also be collapsed. The Handbook is organized so that each chapter, by default, has the most crucial overview information viewable and more detailed information collapsed. This collapsed content will not show up in a printed version, nor will the indication that there even is any collapsed content (except for extra spacing). May 2012 marked first release of a CLASSE Safety Handbook (predecessors include several versions of a printed LEPP Safety Handbook and a CHESS Safety website). The CLASSE Safety Handbook is maintained by the CLASSE Safety Director. Please report any error in content or web-functionality so it can be rapidly corrected. Suggestions for changes or additions to both content and web-functionality are also welcome. If you are reading this as a printed document, it could be out of date, so check the vintage printed at the top right of every page and compare it to the dates at the top right of the top menu bar for the web Handbook. Clicking on those dates in the menu bar, one each for the public and private chapters, will bring you to lists of the most recent changes. If you are reading this as a printed document less than 60 pages, it is an abridged version, so please be sure to consult the full version for additional detailed information. Links to sites outside CLASSE are provided for reference only. CLASSE and Cornell University can take no responsibility for content of external websites. AcknowledgmentsEnd of Introduction
Emergency Numbers
- An Emergency is a situation that requires immediate police, fire, or medical response to preserve life or property. The Cornell Police dispatcher should make the decision on who to send; first responders sent by Cornell police should be on-site within about 2 minutes. Longer response times are likely if a different (non-Cornell) dispatcher is called.
- From any 253-, 254-, and 255- prefix campus phone, call 911; this will bring you to the Cornell Police dispatcher.
- From a cell phone or pay phone, call (607) 255-1111. This will connect you to the Cornell Police dispatcher. (Calling 911 from a cell phone will go to the NY State Police dispatcher; 911 from a non-Cornell landline phone will go to the Tompkins County dispatcher.) DO NOT dial the Ithaca Police Department or the Ithaca Fire Department.
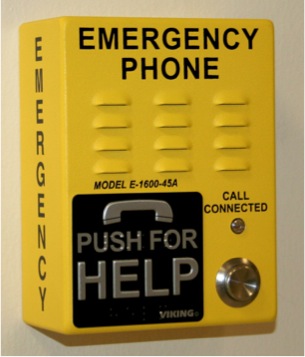
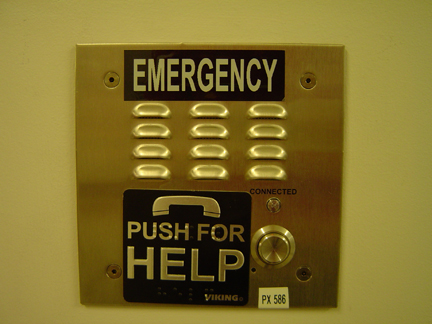
- Direct lines to Cornell Police are available in Wilson Lab and the Physical Sciences Building. They are chest-high, pushbutton-activated, and mounted along exit routes, typically near exits, doorways, or stairwells. Using one of these may be a more convenient way of dialing 911, depending on your location.
| Building | Address to give 911 operator |
|---|---|
| (These are not postal or delivery addresses!) | |
| Machine Laboratory (Annex) | 488 Pine Tree Road, Town of Ithaca |
| Newman Laboratory | 153 Sciences Drive, City of Ithaca |
| Physical Sciences Building (PSB) | 142 Sciences Drive, City of Ithaca |
| Wilson Synchrotron Lab & Ring, G-Line | 161 Synchrotron Drive, Town of Ithaca |
| East Modular Unit (Computer Group, Elec Shop) | 142 Synchrotron Drive, Town of Ithaca |
| Center Modular Unit (Stockroom, Exploration Station) | 150 Synchrotron Drive, Town of Ithaca |
| West Modular Unit (CHESS Trailer) | 177 Synchrotron Drive, Town of Ithaca |
Link to Cornell Police
Link to CLASSE safety personnel & phone numbers
Link to Cornell Police List of Emergency & Counseling numbers
| Emergency. | 911 (Campus phone only) |
| (607) 255-1111 (cell phone or pay phone) | |
| Receptionist for Wilson Lab (ask to page) | (607) 255-4882 |
| Receptionist for Newman Lab (ask to page) | (607) 255-4952 |
| Cayuga Medical Center Emergency | (607) 274-4411 |
| Cornell Police Non-emergency | (607) 255-1111 |
| Cornell Environmental Health and Safety | (607) 255-8200 |
| Gannett Health Center | (607) 255-5155 |
| Poison Control Center | (1-) 800-222-1222; (1-) 800-252-5655 |
| Suicide Prevention & Crisis Service | (607) 272-1616 |
End of Emergency Numbers
Dos & Don'ts
- DO: Know where the nearest exits are from your present location
- DO: Call 911 (campus phone or direct hallway line) or (607)255-1111 (cell/pay phone) in an EMERGENCY
- DO: If you hear a fire alarm, immediately, but calmly, exit the building, using stairways if necessary, not elevators
-
DO: Take responsibility for establishing your own safe working environment
- DO: Consult this Handbook, your supervisor, or the Safety Director on safety issues
- DO: Ask your supervisor how to safely accomplish any assigned task
- DO: For any task you assign, provide the worker(s) proper training & information
- DON'T: Perform any hazardous task alone: observe the : No operation involving a known risk shall be carried out by any person working alone; risk shall be considered eliminated only after two competent people have agreed to this judgment
- DO: Ask someone to stop working if you think he or she is not working safely; you should both agree on proper procedures
- DO: Follow tour guidelines when hosting visitors, including carrying your radiation badge and a dosimeter and obtaining contact information for your guests
- DO: Learn where the various research areas are and the specific hazards in ones that you may enter
- DO: Take the required specialized training for your task
- DO: Learn what the many warning signs and different audible alarms mean
- DO: In off-hours, bring questions to the CESR/CHESS/ERL operator/control rooms (page/visit)
- DO: Learn what areas are designated as "controlled" for radiation purposes (they can change)
- DO: Wear your radiation badge in controlled areas: it can document your (lack of) exposure, but only if it's on you
- DO: Immediately report any injury, illness, potential hazardous exposure, or near-miss accident to your supervisor; then later, file the Cornell EHS online Injury/Illness/Exposure Report
- DO: Use monitoring & personal protection appropriate to a radiation hazard
- DO: Read and understand the SDS for any hazardous chemical/gas/material you work with or near
- DO: Use personal protection appropriate for the chemical hazard
- DON'T: Bring hazardous materials (chemicals, biologicals, gases, radioactive sources) into a building without authorization, notification, or proper packaging
- DO: Understand proper disposal methods for hazardous materials
- DON'T: Dump chemicals down the sink or hazardous materials in the trash
- DON'T: Use shops, cranes, fork lifts, lasers, chemicals, or radioactive sources without specialized training
- DON'T: Work on potentially hazardous electrical/mechanical equipment without LockOut/TagOut training
- DON'T: Remove someone else's Safety or Lockout padlock
- DO: Use personal protection appropriate to the electrical hazard
- DO: Understand that uncontrolled release of gases or liquid cryogens can deplete oxygen in enclosed spaces
- DO: Use personal protection appropriate to the cryogenic hazard
- DON'T: Start new and significantly different hazardous activities without an approved Safety Plan
- DON'T: Try to use a fire extinguisher without training
- DON'T: Smoke inside any campus building nor within 25 feet of any entrance
End of Dos & Don'ts
General Safety
Wellness
Cornell recognizes the importance of maintaining a healthy work-life balance and actively supports the health and well-being of all members of the campus community. CLASSE encourages you to give strong attention to wellness of mind, body, and spirit. Your state of wellness can affect your judgment and ability to concentrate, thus affecting your own safety and that of those around you. A surprisingly large fraction of on-the-job injuries occur while walking, reaching, lifting, climbing, or crawling; be aware of your personal limitations and avoid working past them. For more information regarding Cornell's many wellness-related programs, please consult the Cornell University Wellness Program resource page.Awareness & Personal Protection
Pay attention to your surroundings as you move throughout the CLASSE facilities, and adapt your behavior and personal protections accordingly. Areas may not be the same as when you last saw them, and temporary work may restrict passage or maintain a safe perimeter. For example, it is not permitted to enter laboratory areas (labs, high bay areas, shops) without closed-toe shoes (no flip-flops!) and protective apparel appropriate to the space, such as eye protection for a chemistry area or a hardhat if a crane is in use. Watch for signage and listen for warnings and alarms.STOP WORK AUTHORITY
In CLASSE facilities, all personnel have the authority and obligation to stop any activity that appears to pose an immediate safety hazard. Likewise, all personnel in CLASSE facilities must cease their own work if asked to do so for safety reasons. It is also an obligation of anyone stopping work to immediately bring such conditions to the attention of the supervisor(s) of those involved and the Safety Director, and to resume work only after a satisfactory resolution is established.Working Alone
Some of the work areas or the jobs that are done at the Lab have hazards associated with them. For this reason new personnel are not permitted to work alone in the tunnels, shops, laboratories or anywhere with hazards, or after normal working hours anywhere, until they have had a safety orientation and any relevant training for the tasks at hand. Everyone involved in activities that involve substantial hazards must abide by the Two-Person Rule: No operation involving a known risk shall be carried out by any person working alone; risk shall be considered eliminated only after two competent people have agreed to this judgment . Examples of hazardous situations are: using machine shop equipment, working with or near exposed voltages (greater than 50V peak), high-current buswork, or highly corrosive chemicals, moving heavy equipment, and operating a crane when the point of operation is not in full view of the operator (these are only examples; there are many other other hazardous activities).Safety Plan
Many hazardous activities are associated with a specific Safety Plan developed for and by previous researchers, frequently in consultation with experts, and approved after review. You can ask your supervisor if such a plan exists and if there are written procedures associated with it that identify the hazards and how to accomplish tasks safely. (You can search for previous safety plans and procedures among the CLASSE safety documents.) New activities with significantly different hazards than previously encountered, or done in a location significantly different from previous ones, require approval. The Safety Director can provide assistance, as can reference to previous safety plans. Procedures that can be simply described and associated hazards easily mitigated are generally approved directly by the CLASSE Safety Director after review of the submitted Safety Plan. Complex and/or more hazardous activities require full Safety Committee approval; such plans must be presented to the Safety Committee by someone, generally a senior researcher or principal investigator with knowledge of and authority over all aspects of the project. For temporary approval (to last until the next Safety Committee meeting) or for activities of intermediate complexity and hazard, the Safety Director may appoint an ad hoc committee of two or more people to review the Safety Plan. In all cases, researchers are expected to submit a Safety Plan sufficiently prior to commencement of potentially hazardous work in order to allow time for review.Injury/Illness/Exposure Reports
Immediately report any injury, illness, potential hazardous exposure, or "near-miss" incident to your supervisor, who should, generally within 24 hours, file a Cornell EHS online Injury/Illness/Exposure Report. The existence of such an incident report ensures employees that they will be covered through Workers' Compensation for any injury that occurs while at work. Even if an injury seems relatively minor when it occurs, serious complications may develop at a later time. Thus, it is in each employee's best interests that a report is filed soon after the incident occurs. Doing so promptly ensures that details are accurate and that both the employee and the University are protected if any complications arise. Incident reports also help CLASSE and Cornell to identify safety problems and plan for safety improvements. The online report (https://ehs.cornell.edu/campus-health-safety/occupational-health/injuryillness-exposure-reporting) is typically filed by your supervisor, but if for some reason this does not occur, you should complete the form within 24 hours of the incident. This form is indexed by your Cornell NetID and your personal information is filled in automatically. Near the end of the form where you can enter additional people to be notified of your report, please enter the NetID's of your supervisor, the CLASSE Safety Director, Jim Shanks (js583) and the CLASSE Administrator, Katerina Malysheva (evm23). The report can be supplemented with additional information later on, beyond the 24-hour window, if, for example, the medical prognosis or after-effects change with time. If the injured/ill individual does not have a Cornell NetID (e.g. short term visitors), please contact the CLASSE Safety Director or the CLASSE Administrator to find out how to file an incident report.Reproductive Health
Those concerned about reproductive health and related workplace hazards may avail themselves of services and training from EHS. (Services from CLASSE relevant to ionizing radiation and pregnancy can be found here.) EHS offers a individualized assessment of hazards based upon a form, interview, and workplace inspection. Training is available as EHS-3275 Reproductive Hazards.
Short Term Visitor Policy:
Short Term Visitor Safety Policy
This policy sets out safety-related responsibilities of CLASSE personnel hosting short term visitors, contractors, or vendors to the lab, and those of such visitors once they are here.- Applies for any Laboratory visit extending beyond one working day. It does NOT apply to those already trained and vetted as collaborators or CHESS users. It does not apply to Cornell staff from Facilities, EH&S, or C.I.T.
- A CLASSE host should assist each visitor in completing a short online form, after arrival but prior to commencing observation or work. This form gathers identifying information and a confirmation of safety training provided. (Part of this form replaces the paper "CLASSE Guest Agreement", which is no longer required.) For contractors, vendors, Cornellians, or an external committee, the CLASSE host may choose to fill out the online form on behalf of the individual or group.
- A stay of longer than 7 working days involving experimental, shop, or technical spaces or activities requires taking the CLASSE Safety Orientation (and perhaps other training) through arrangement with the Safety Director, preferably prior to arrival on site (clarification: taking the CLASSE Safety Orientation is not required for PSB visitors who do not frequently access laboratory or technical spaces during their stay).
- A CLASSE host must accompany the visitor at all times when first entering laboratory, shop, or technical work areas. This host function may be shared among several individuals or passed from one to another, but the host(s) must be explicitly aware of their role and responsibilities.
- The CLASSE host or contact should instruct the visitor prior to arrival to enter the building through a public reception area and not to enter laboratory or technical areas unescorted . At Wilson Laboratory visitors should check in at the second floor CHESS reception desk.
- A CLASSE host must show the visitor two emergency exit routes from any likely work area, and summarize hazards and relevant procedures local to those areas. In Wilson Laboratory, if likely work areas include areas on the first or second floor, relevant entrances to controlled areas should be pointed out so they can be either avoided entirely or consciously crossed.
- A visitor may only observe unless provided with task-specific training consistent with CLASSE policy on that task and location. Vendors and contractors may work on designated equipment if they are familiar with it or receive appropriate training.
- A radiation badge should be issued if the individual is likely to enter controlled areas over the course of more than one working day, and used for the entirety of the visit; otherwise, a host may sign out a dosimeter and accompany the visitor while inside controlled areas. If work in controlled areas is estimated to exceed 8 hours, the visitor must satisfy one of
- take an in-person training (contact the Safety Director or Safety Manager), or
- take the online CLASSE General Radiation Safety Training through arrangement with the Safety Director, preferably prior to arriving on site.
- if the work is deemed by a CHESS staff member to be CHESS-user-like, take the CHESS User online safety training
- If work is to occur in the CESR tunnel, a CLASSE host should contact one of Facilities Engineer, Safety Director, or Safety Manager to arrange for specialized (online or in-person) training.
- A visitor already briefed on this policy and safety information may be left alone in work areas not requiring additional training if a designated CLASSE host in the building (e.g. an operator) is aware of the visitor, and the visitor understands how to request immediate assistance (designated host) or summon emergency services (911, nearest pushbutton call boxes, fire alarm pulls). If there are imminent safety hazards involved in the visitor's activities, or such hazards are in close proximity, the visitor may not work alone.
- Special considerations apply to any short term visitor under the age of 18. For such individuals, please consult at least one of: CLASSE Administrator, CLASSE Safety Director, CLASSE Safety Manager.
Hazardous Materials
Before you begin any task, consider possible safety hazards of materials involved. Obtain, read and understand the Material Safety Data Sheets (SDS) for any new materials you use, machine, or handle in any way. Binders containing the SDS for chemicals in use are kept in the administrative offices, with a second copy nearer to likely workspaces. Smaller sets are kept in the shop areas and outside the Newman Chem room for convenient access. Be sure to give copies of the SDS to anyone else who will work with the chemical or material. List any additional hazards such as flammable or pressurized gases, large quantities of solvents or other chemicals, lasers, or radioactive sources. Decide what precautions you should take. If there are possible hazards to you or others or if you are unfamiliar with a new material or process, before you begin, you and your supervisor must take your plans to the Safety Director for a review. You may also consult the EHS SDS pages. Sometimes the quickest way to the SDS that you need is a web search for "Equipment Hazards
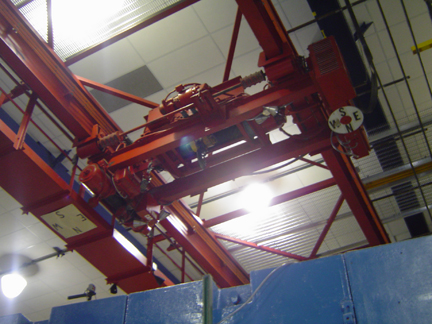 Wilson and Newman Labs are full of machinery and equipment that keep the experiment running. Alertness and preparation are imperative in order to ensure that the equipment remains helpful rather than hazardous. If you work with or around large machinery, be sure you know how to use it and how to avoid its hazards.
 - Forklifts: Forklifts operate on the experimental floors at Newman and Wilson Labs. Stay clear of their paths. You must not operate a forklift unless you have been trained according to OSHA standards (see Safety Training).
- Overhead cranes: Overhead cranes are used to move heavy materials. When cranes are in use, lights flash and bells ring to alert those in the area, but hard hats are still required. Stay clear of overhead loads. Cranes must be operated only by properly trained personnel.
- Consult the EHS Mobile Equipment page
Shop Safety
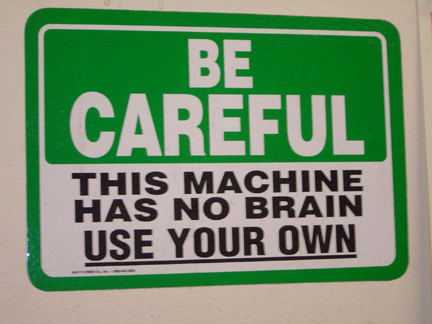
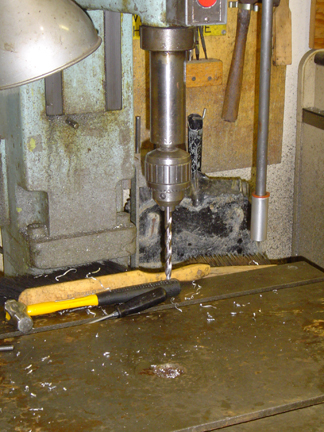 Before using any machine tool, you must first be given explicit authorization from the Machine Shop Supervisor for that particular shop or piece of equipment. You should make an appointment with the shop supervisor to have one-on-one training. Analyze each job before you begin and consider how you can protect yourself from injury. It is crucial that you pay attention to potential hazards.
The following safety tips apply to both the machine shops and the experimental areas.
 - Consult the EHS Tool & Machine Safety pages.
- Eye Safety: You must wear safety glasses when you are in any of the machine shops. Grinding, cutting, and drilling generate particles of metal, wood, lead, and other substances that could cause eye injuries in the absence of appropriate eye protection. You can use the safety glasses located near the shop entrances, or you may obtain a personal set from the stockroom. Check with the business office at Wilson for information about prescription safety glasses.
- Foot Safety: When you regularly work in the experimental areas or shop spaces, you must wear footwear with a protective-toe to protect your feet from being crushed. You may obtain safety shoes and boots from the periodic shoe truck visits, or you may purchase them on your own and be reimbursed (up to a certain amount) through the Wilson business office. Check with your supervisor to see if your job requires that you wear safety shoes. In addition, no open-toed shoes are permitted in experimental or machine shops (e.g. L0, L0E, CESR tunnel, any room in use as a lab).
- Hand Safety: Keep the following tips in mind in order to avoid hand injuries:
- Remove watches, rings, and bracelets before you start to work, especially if you work with moving machinery
- Use gloves that are job-rated for the kind of work you do
- Follow lockout/tagout procedures when cleaning, inspecting, or repairing machinery
- Check tools and equipment for excess wear and dull cutting blades before using them
- Do not ignore safety guards, which are on machines to protect you
- Be aware of doorways and narrow spaces when you carry objects or push them with a handcart. Keep your hands where they can not get crushed
- Keep your hands on the sides of objects when stacking them, not underneath, to avoid crushing your fingers
- Use the right tool for the job, and be sure to use it correctly
- Clothing: hair and clothing can be snagged or grabbed by machinery, especially those with moving parts
- Tie back long hair away from your face; hair still hanging below the collar must be tucked into a cap or hairnet if near moving parts
- Remove neckties or other dangling clothing
- Roll up long sleeves
- Wear a safety apron to protect your body from flying particles of metal or wood
Other Hazards
Other potential hazards include the following:- Back Safety: Before attempting to lift a heavy object, assess how to do so safely:
- Is there a way to reduce weight or reconfigure the object(s) with handles?
- Is the weight more than you can usually lift safely?
- Is there a crane or other assisting device appropriate to the task?
- Is there a safe way to share the lifting with another worker? Do not hesitate to ask your supervisor for a recommendation
- Utilize lifting techniques that place minimum stress on the lower back
- Use the OSHA Back Disorders website as a resource
- Musculoskeletal injuries: Proper workplace ergonomics can prevent such injuries, and Cornell has a free prevention program.
- Unexpected events or emergencies: see Emergency Response
End of General Safety
Tour Safety
Arranging Official Tours of Wilson Laboratory
To arrange a tour of Wilson Laboratory for members of the general public, please consult Tour Information.Giving Tours
Even if a last minute, impromptu visit motivates you to give a tour, consult Tour Information for assistance and recommendation of a tour guide. However, if you choose to guide a tour yourself, you must follow all these rules:- Tour only areas you know.
- Know the layout of the controlled and uncontrolled areas so you can lead a safe tour.
- Check with the CESR Operator (usually in the CESR control room) concerning any special conditions (magnet testing, ERL on, specific hazards) to confirm what areas are restricted, and tell him/her where you intend to go.
- Each and every visitor must sign in on Group Dosimeter Signout sheets in a Dosimeters notebook (available just outside the CESR Control Room adjacent to the elevator, or in the CHESS Control Room); we have a legal obligation to obtain identifying information and a method by which to contact each individual at a later date.
- You must obtain a dosimeter there (at either of the CESR or CHESS control rooms); enter its id and initial reading onto the signout sheet before the tour begins and the final reading afterwards: Hold the dosimeter up to the light and look into the viewing end where there will be a scale ranging from 0 to 200 mrem. Rotate the dosimeter so that the scale is level to the floor, and then note the value. Take care not to drop the dosimeter: doing so may alter the reading.
- When touring controlled areas, you must wear your radiation badge with your name printed on it (i.e. not just a Visitor badge) and carry the tour dosimeter.
- Keep visitors away from the linac (do not enter LS1) and the transfer lines; i.e. do not go beyond L5 in the west tunnel or the first CESR RF cavity in the East Flare
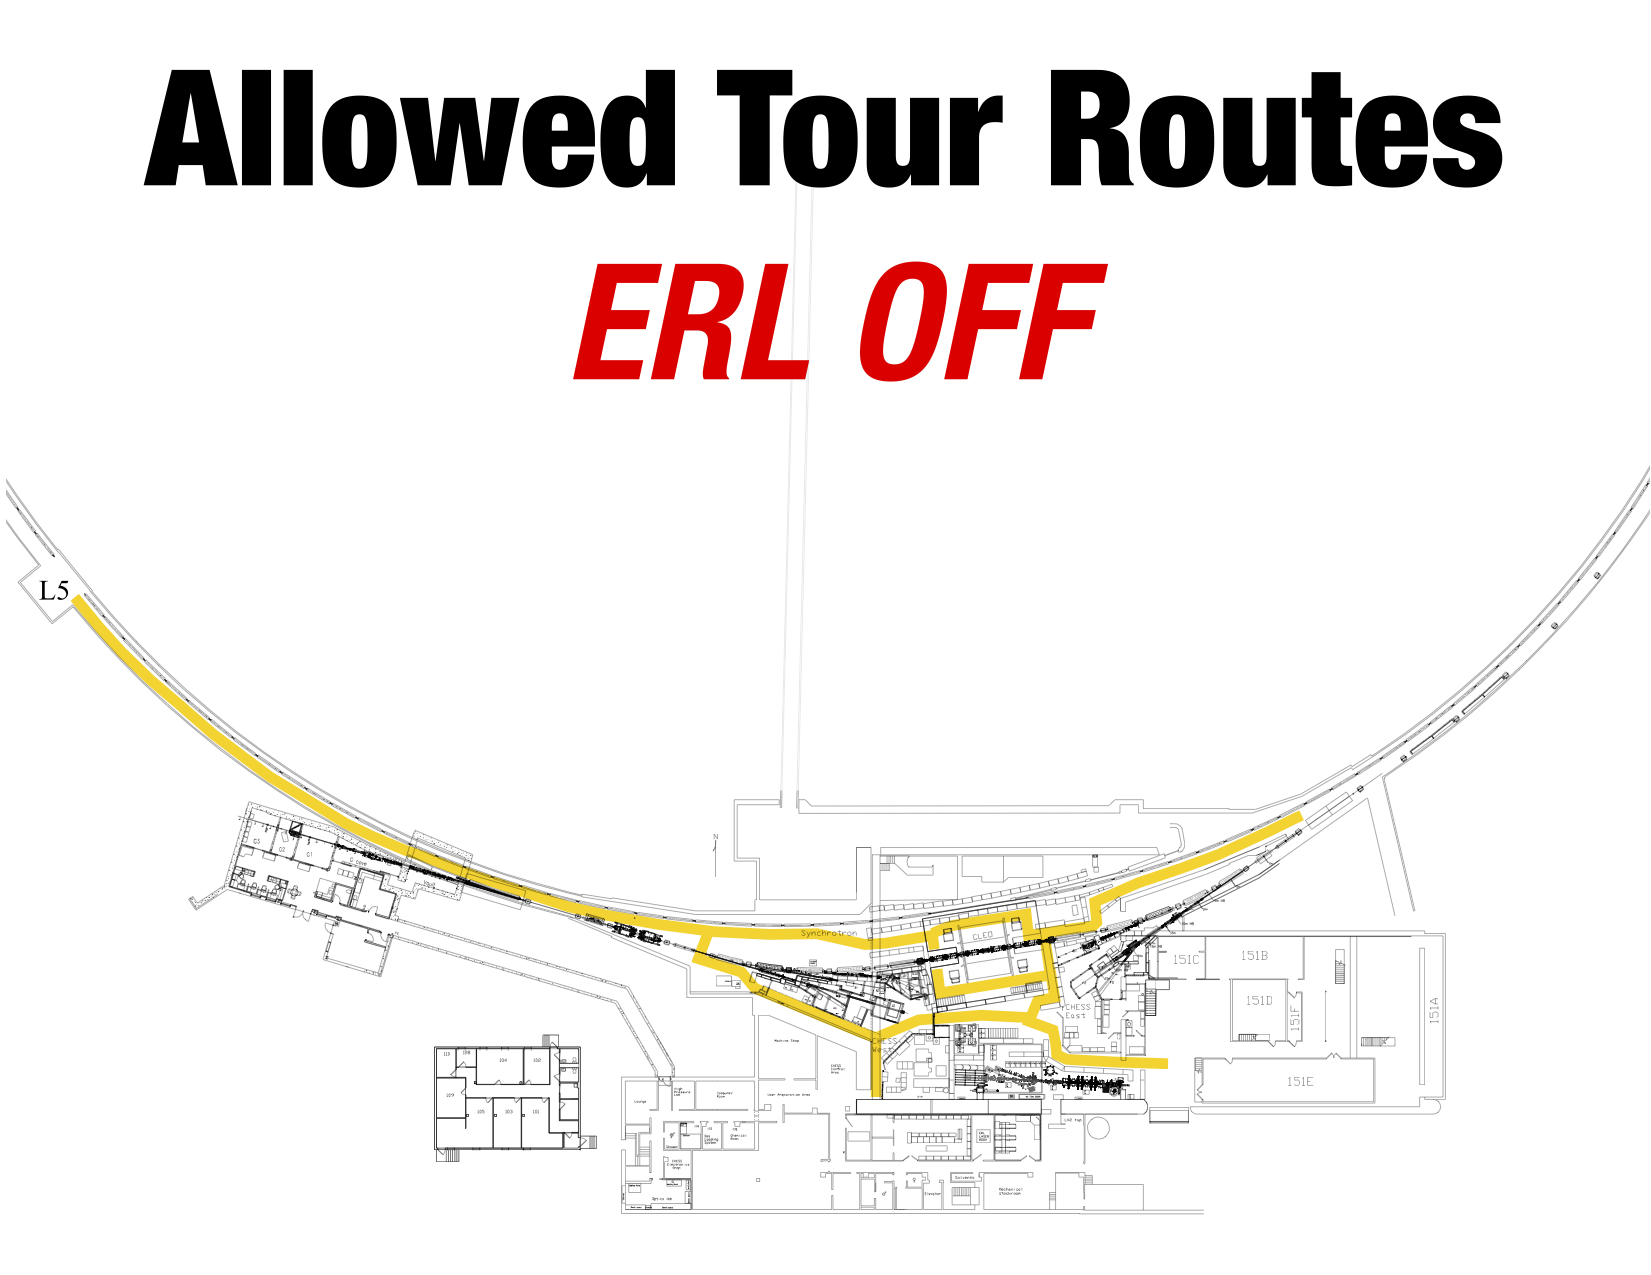 ; (Senior staff members giving tours to accelerator- or safety-related professionals, or equipment vendors who may serve the Laboratory interests better by examining the environment first-hand may visit generally prohibited areas; all other rules still apply)
- Obey any signs posted throughout the experimental areas, such as those warning of residual radiation, and stay clear of roped-off areas.
- Stay clear of any active work area, and request permission of workers to pass by such activity.
- If the synchrotron and CESR are OFF and SAFE, but the ERL is ON, further restrictions apply to your tour route.
During ERL running, formal Lab tours into CESR controlled areas will be allowed only if there has been a radiation survey demonstrating no hazard, and then only on the CHESS/West Flare/CLEO North route shown below. If the ERL is ON, tours shall not proceed into 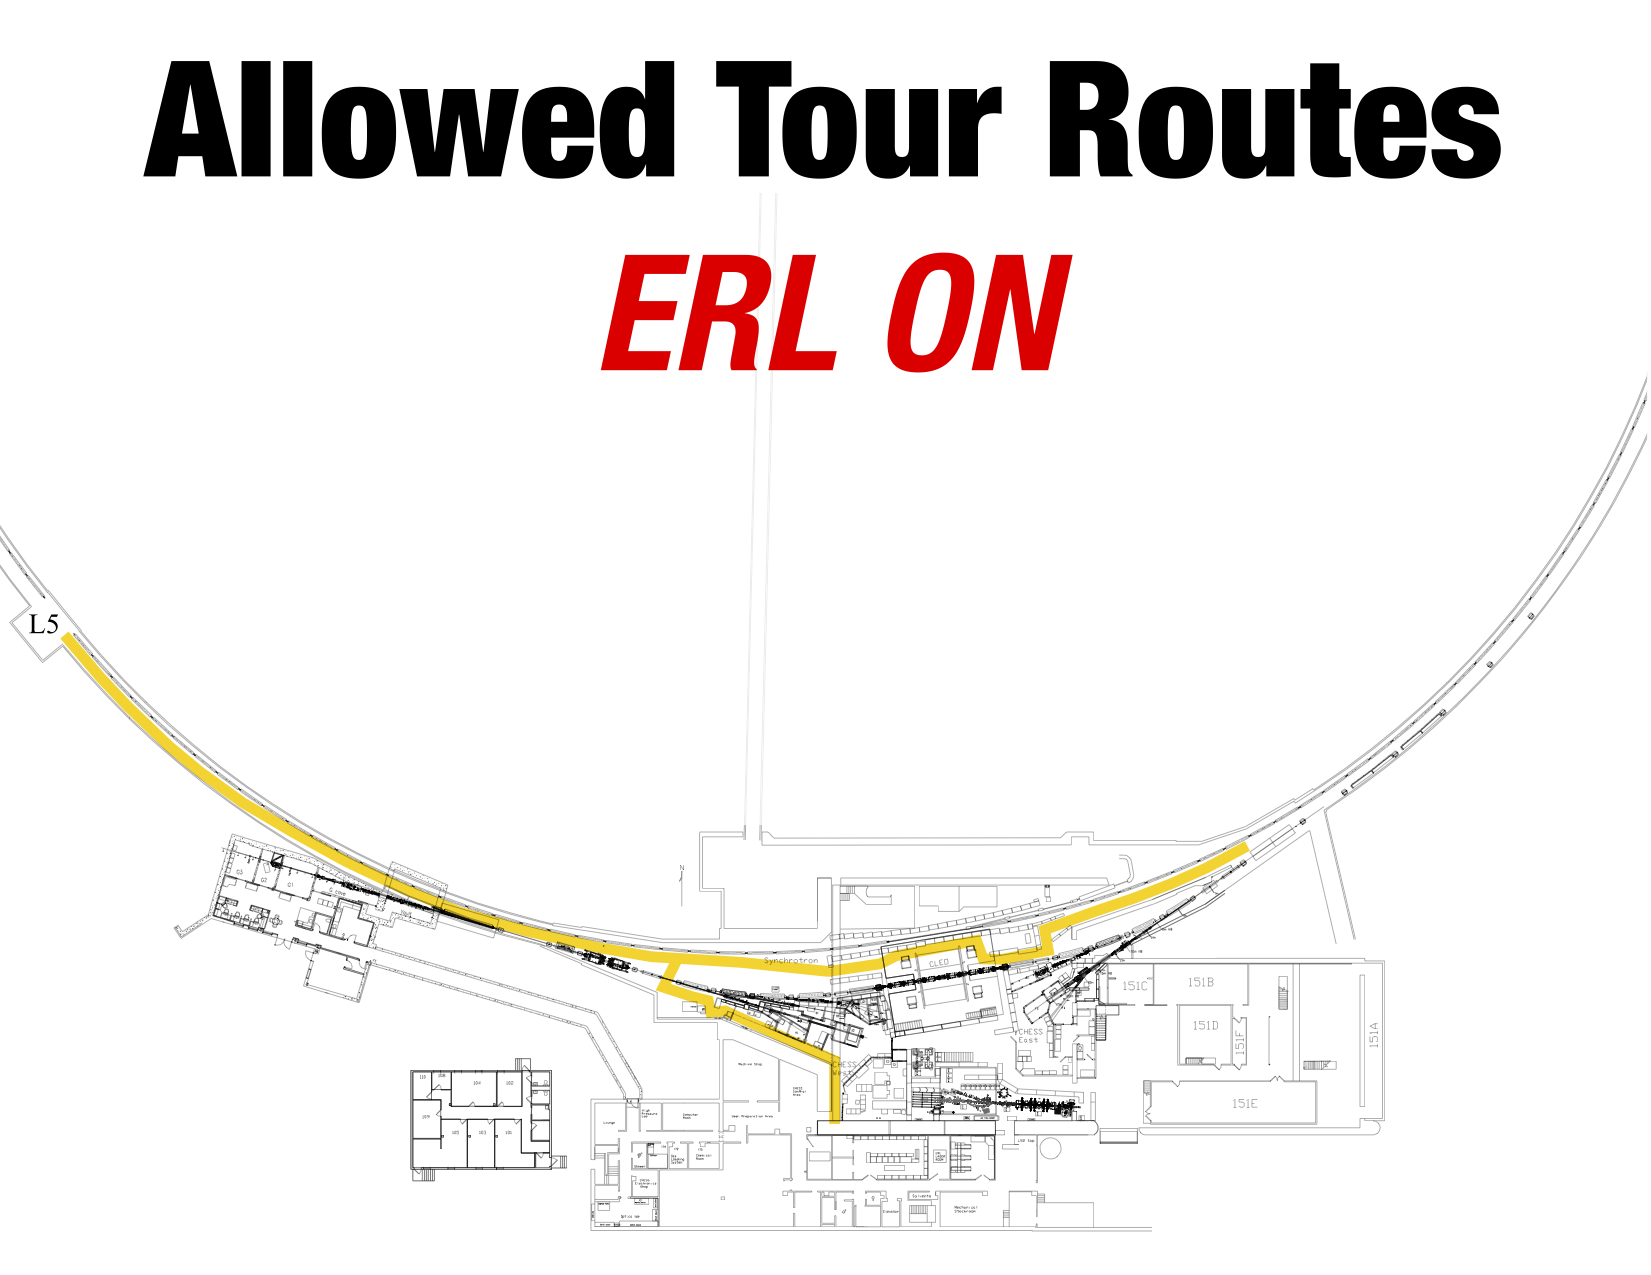
- the east-west corridor adjacent to ERL
- the west tunnel beyond L5 (see floorplan)
- the east tunnel beyond the first RF cavity (see floorplan)
- the South side of CLEO
- the L0 second level stairs/catwalk/etc.

- If CESR interlocks are set to ON, but the synchrotron and CESR are OFF, it is unlikely you will be allowed inside the CESR or CHESS experimental areas.
If CESR interlocks are ON but CESR is OFF
- Tours are normally permitted only during access or down days when a radiation survey has been done and magnet power systems have been secured.
- A tour of the CHESS area may be possible if that area is in Bypass; check with the CHESS operator.
- In rare situations the possibility of a tour in specific CESR locations (most commonly only to the L0 catwalk, not beyond the chained-off section just south of the stairway to CLEO) during an interlock-set access should be discussed with the CESR operator, preferably well ahead of the tour time. Granting of permission for such a tour should not be assumed, may depend on several conditions, and specific limitations may be imposed.
- If interlocks are set, each tour participant would need a white key to enter the CESR-synchrotron perimeter and understand how to use it: each key holder is responsible for the timely return of the white key after the tour.
- At the CESR operator's discretion, only the guide would carry a white key and intentionally break the interlock on the way into a controlled area. In this situation both the guide and operator would independently keep headcounts prior to entering and after exiting the controlled area, verifying that everyone is accounted for.
- If they are available, get expert information from the CHESS Operator for the CHESS portion of your tour and from the ERL Operator for the ERL portion; you are more likely to have success in this regard if you speak to them in advance of the tour.
- Explain to your visitors the function of the dosimeter as a required record-keeping device which will verify the absence of radiation exposure during the tour.
- Obtain verification from one or more visitors of the initial and final dosimeter readings.
- Take advantage of the displays, photographs, line art, and posters in the second and third floor hallways and the Commons area that catalogue the development of the laboratory research.
End of Tour Safety
Warning: Can't find topic Safety/Handbook.TraininG
Emergency Response
During an emergency, a few minutes could mean the difference between life and death. Knowing what to do and whom to call in case of an emergency could save a life. Emergency phone numbers are listed in this Handbook (Reminder: In emergency, call Cornell Police from either a pushbutton emergency phone, dial 911 on Cornell land-line phones, or (607)255-1111 from a cell phone). You are encouraged to become trained in First Aid procedures by taking a certified course either through the Red Cross, the American Heart Association (AHA) or New York State. First aid and CPR courses are offered on campus by Cornell EHS and Cornell EMS. If you would like more information about emergency procedures or First Aid training, contact EHS. Please consult the Cornell University Emergency web page.Alerting First Responders
The first step to take when trying to help an injured or ill person is to get trained responders to the victim as soon as possible. The Cornell Police dispatcher coordinates all emergency responses on campus. In the event of an emergency, dial 911 from any campus phone and have the following information in mind to tell the dispatcher:- The nature of the emergency
- The address and phone number of the emergency
- The specific location of victim in the building
- Whether chemicals, hazardous materials, or fire are involved in the emergency
- The victim's age and sex
- Any other medical information about the victim
What to expect after you have called in an emergency
- Emergency personnel from Cornell should be on the scene in a few minutes
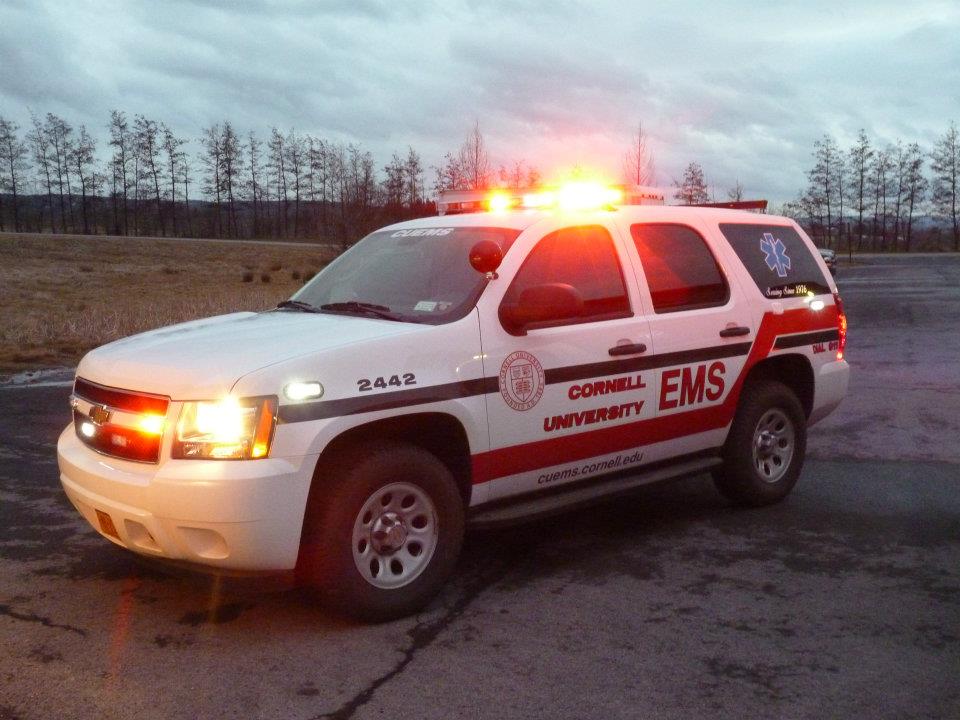
- Depending upon the Dispatcher's evaluation of the situation, between three and five types of responders may arrive
- Cornell Emergency Medical Services (CUEMS) team of Emergency Medical Technicians (EMTs)
- Cornell Police
- Cornell EHS
- (if called by Dispatcher) Bang's Ambulance (a private ambulance service for transport to medical facilities off campus)
- (if called by Dispatcher) Ithaca or Cayuga Heights Fire Department
- The injured person may refuse treatment at the scene, but will be asked to sign a statement to that effect
- If the ambulance is not sent initially, it may be requested by emergency responders after arriving at the scene and evaluating the situation
- By law, CUEMS cannot provide transport to any medical facilities; that is the role of the ambulance service
- Individuals treated at the scene may decline ambulance transport and utilize other modes of transportation to seek further treatment at a medical facility (Gannett, Convenient Care, Urgent Care, Cayuga Medical Center, or personal physician).
- CUEMS, Cornell EHS, and Cornell Police are unable to provide transportation to medical facilities.
- Potential modes of transportation include: Lab vehicle (see below), taxi, personal/family/friend vehicle, bus, or walking.
- It is CLASSE policy that lab vehicles MAY BE USED to transport CLASSE personnel to a medical facility in a work-related injury situation. However, this should not be used for serious injuries that require an ambulance in order to stabilize the patient during transport. Such use must be consistent with Cornell University Vehicle Policy, meaning that a driver of a University-owned vehicle, must, among other requirements,
- not be the injured party
- hold a valid driver's license
- be registered with the Unviersity as a lab-vehicle driver
- fill out the vehicle log for off-campus driving
- wear seat belts
- assume responsibility for fines or traffic violations.
Preparation
You should prepare yourself for unexpected events by consulting the Cornell University Emergency Action Guide. Such situations include:- Fire
- Power outage
- Weather emergency (Cornell Weather & links)
- Earthquake (see below)
- Workplace violence
First Aid
While we are fortunate to have help only minutes away, care provided by bystanders before professional help arrives could mean the difference between life and death. While no CLASSE employee is required to provide emergency care to the sick or injured, we encourage you to take First Aid and CPR classes so that you will know what to do if you want to help. Most locations are equipped with First Aid cabinets that contain all the basic First Aid materials such as gauze, adhesive strips, adhesive tape, scissors, eye washes, breathing masks, cold compresses, iodine washes, cotton balls, triple antibiotic ointment, latex gloves, and cotton swabs. Each cabinet is equipped with a Red Cross First Aid Manual, but it is best to take a First Aid course and not rely solely on a First Aid guide. The First Aid cabinets can be found in the following locations: In Wilson Lab:- first floor between the men's and women's bathrooms.
- first floor outside the accelerator tech room.
- second floor men's room.
- third floor kitchen.
- fourth floor on the first wall past the double doors in the vending machine area.
- basement chemical room, on the ground floor.
- first floor, second floor, and third floor, directly above the drinking fountains by the elevator.
Immediate First Aid
The first few minutes after an accident can be the most important. Learning how to help yourself or others in an emergency situation at CLASSE is often a matter of knowing what to do while waiting for help to arrive. The following sections describe appropriate steps to take during emergencies, including how to care for injured people while waiting for help to arrive. The first and most important thing to do is to call 911 and notify Cornell Police that an ambulance, officer and/or the fire department is needed. Then, at Wilson lab, send someone to the loading dock, or at Newman lab, to the main lobby, to meet the responders and lead them to the victim.- Remember that some people at the lab are trained in emergency medical care, and therefore may be more qualfied than you are to assist injured people during an emergeny. Therefore, do not feel obligated to assist during an emergency if you do not think you are qualified: untrained bystanders who attempt to help can make the problem worse.
- Before attempting to help anyone, be sure you are not putting yourself in danger. Common dangers include electrical wires, falling objects, chemicals, fires, and noxious fumes.
- Do not move sick or injured people unless their positions put them in immediate danger (i.e. fire, explosion, poisonous conditions). People who have suffered spinal injuries can be seriously hurt if they are moved.
- Cover victims with blankets to conserve heat.
- Keep emotional and noisy bystanders away from victims.
- Call the dispatcher back and update him or her on any changes in the patients' conditions.
- Determine responsiveness. Ask, "Are you OK?"
- If there is no answer, have someone call 911
- If you have been trained and believe you are qualified to do so, check the vicitm's ABCs:
- Is the victim's Airway open?
- Is he or she Breathing?
- Is there Circulation?
- Check for a medic alert tag.
- Have someone call 911
- Use the latex gloves in the First Aid kits to avoid contact with infectious diseases.
- Apply gentle, firm, direct pressure to the wound using a clean cloth or bandage. Maintain pressure for at least 10 to 15 minutes or until bleeding stops. Elevate the injured area.
- Do not try to remove any embedded objects from wound.
- If bleeding soaks through bandage apply more bandages and pressure, but do not remove old bandages from the wound.
- Wait for help to arrive.
- Never touch a victim who is still in contact with a power source.
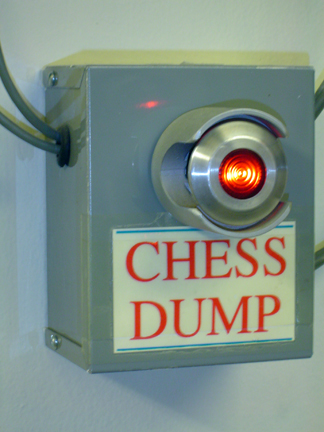
- Disconnect the power at the source. Within the building, shut off a main breaker. In the tunnel, activate the crash cord or crash button. This will shut off most high voltage power, except for a few sources which must be shut off manually.
- If you can't turn off the power at the source, stand on a dry surface and disconnect the victim from the power source using a long, non-conductive object such as a broom or a rope.
- Have someone call 911. If you have been trained and believe you are qualified to do so, check the ABCs (that the victim's airway is open, that he or she is breathing, and that he or she has circulation). If wounds are evident, cover them with sterile dressing.
- Wait for help to arrive.
- Have someone call 911, and remember to say that chemicals are involved.
- Remove any contaminated clothing. Never let the contaminated clothing come into contact with your own skin.
- Flush the burned area quickly and thoroughly with lukewarm water for at least twenty minutes or until help arrives. Be sure to wash chemicals away completely.
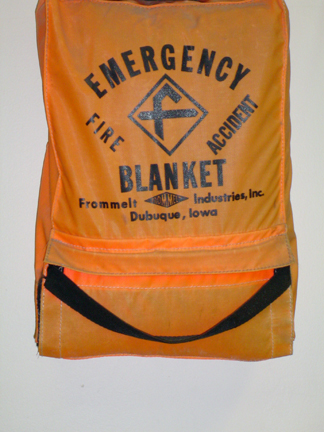
- If the victim is still on fire, attempt to extinguish the flames by pushing him or her to the ground and making the him or her roll over. If you can't get the victim to the ground or you can't get him or her to roll, try to use a wet coat, or preferably a fire blanket, to smother the flames. Fire blankets are located on the first floor of Wilson Lab, near the elevator and in the machine shop area.
- Stop the burning process by removing ignited clothing and all jewelry from the burn area. However, never remove clothing from an individual who has suffered third degree burns. If extremities are burned, remove all jewelry beyond the burn where swelling could cause the jewelry to cut off circulation.
- Have someone call 911
- Do not apply creams, oils, sprays, or any other type of home remedy to burns
- Give First Aid appropriate for the degree of the burn
- Wait for help to arrive
- Have someone call 911 for help.
- Do not let the victim rub his or her eyes. If the victim has chemicals in his or her eye(s), quickly flush the eye(s) with lukewarm water for at least fifteen to twenty minutes. Eye washes are located in the chemical rooms at Wilson and Newman Labs and in the forklift area at Wilson lab. All First Aid cabinets should be equipped with an eye wash bottle. Position the victim so that no chemicals wash into the other eye.
- If eyes have been exposed to chemicals, remove contact lenses. If a foreign object is in the victim's eye, do not remove his or her contact lenses unless rapid swelling occurs.
- If a foreign object is in either eye, cover both of the victim's eyes to assist him or her in keeping them still, and do not attempt to remove the object.
- Wait for help to arrive.
- Call 911 for help
- Calm and reassure the victim. If the victim is unconscious, see the following section for unconscious heart attack victims....
- Encourage the victim to rest in a comfortable (perhaps seated) position, unless it is too painful to make such a transition. If the victim is having breathing problems, do not force him or her to lie down. It is more difficult to breathe when lying down
- Loosen clothing around the victim's neck, chest, and waist
- Keep the victim warm
- Find out if victim has prescribed angina medication (e.g. nitro-glycerin) on hand, understanding that the victim may be unable to speak (e.g. the victim might point to a pocket if you ask "Do you have heart medicine?"). If you find medicine, assist him or her in taking it
- If you have been trained and believe you are qualified to do so, check the victim's ABCs (airway, breathing, and circulation)
- Stay with the victim until help arrives
- Call 911 for help
- Check for a medical alert tag
- Stay with the victim until help arrives
University Closing
The Cornell administration ultimately decides when weather conditions warrant cancellations, evacuations, or closing of Cornell facilities. The Associate Vice President for Facilities and Business Operations makes this decision after he or she has consulted with the Cornell Police, the Superintendent of Ground Care, and local law enforcement agencies. When an impending natural disaster makes it necessary to close the University, you will be notified by local television and radio announcements. During business hours, supervisors will be notified of closings and cancellations, and they will then relay this information to their staff. You can also check the Cornell University operating status web page.Earthquake Response
Many of us do not know how to respond to an earthquake because they have been relatively rare (until the Virginia quake in 2011 which was felt in Ithaca). Hence the relevant information from the Cornell Emergency Earthquake Guide is reproduced here: While earthquakes are not a high risk in the Ithaca area, they are possible here. If you feel the ground shaking, it could be due to an earthquake.- If you are in an experimental area, move away from stacked radiation shielding blocks/bricks and unsecured equipment.
- Duck or drop to the floor
- Cover yourself under a piece of heavy furniture, a stairwell or a doorjamb (beware of the door swinging back and forth). If that is not possible, position yourself against an interior wall, protecting your head and neck with your arms. Keep away from appliances, large windows and heavy hanging objects.
- Hold on securely and stay covered until the shaking stops
- Evacuate the building as soon as the shaking stops, following your units emergency plan and evacuation procedure
- If you are outdoors, move to a clear area away from trees, signs, buildings and electrical wires and poles. If you cannot get to an open area, take shelter in a doorway to protect yourself from falling debris
- If you are driving, pull over to the side of the road and stop. Avoid overpasses, power lines and other hazards. Stay inside the vehicle until the shaking stops. Once the shaking has stopped, proceed cautiously. Avoid bridges and ramps that may have been damaged.
- Anticipate aftershocks, and plan where you will take cover from them
- Check for injuries. Give first aid as necessary. Remain calm.
- Avoid broken glass
- Check for fire - Take appropriate actions and precautions
- Check gas, water and electric lines. If they appear damaged, or if you smell gas, open windows and leave the building immediately
- Contact Facilities Customer Service at 5-5322 immediately (or 255-5322 from a cell phone)
- Replace all telephone receivers and use the phone for emergencies only
- Tune to an emergency broadcast station on radio or television. Listen for emergency bulletins
- Stay out of damaged buildings
End of Emergency Response
Fire Safety
Fire Alarm Procedures
General
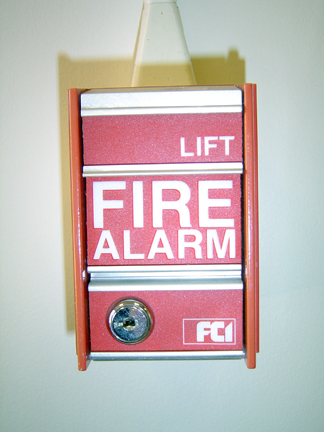
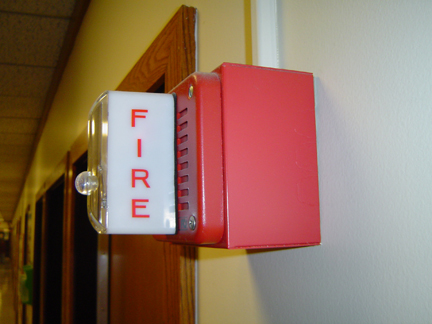 Report any fire immediately by pulling the nearest alarm; do not assume someone else will do so. When a fire alarm is activated a building-wide alarm sounds automatically; there will be an ear-piercing audio alarm and flashing light at the location of the fire alarm stations. If the alarm sounds, you must leave the building through the nearest exit, closing room doors and windows as you leave. Equipment should be left in a stable, preferably powered-down state. Personal protective equipment should be removed and left at the worksite. You should also take any nearby personal effects like coats and keys with you because the building could be closed for an extended period of time. Never use an elevator when a fire alarm is sounding; take the stairs instead. No matter how important your project, failing to leave the building during a fire alarm is dangerous for both you and rescue personnel who must enter the building to locate you. Routes to exits are clearly marked with overhead "Exit" signs and there is an Emergency Evacuation Map on the back of many office doors in Wilson and Newman Labs. Familiarize yourself with your exit route now, before there is an emergency.
Please be aware that, in accordance with New York State law, there is no smoking permitted inside Cornell buildings, or within 25 feet of any entrance to a Cornell University building. (Full text of Cornell smoking policy)
Common fire inspection violations
At least once annually all Cornell buildings are inspected for fire safety by the State of New York. Violations trigger a required second inspection to ensure that the problems have been mitigated. At CLASSE we try to avoid such problems from the start. The most common violations tend to be- Fire doors propped open (operationally, a "fire door" is any door with a "fire door" label on the narrow vertical hinge-side edge)
- In general, please try to get in the habit of closing doors to spaces you are leaving for more than a few minutes, especially at the end of a day
- Use of extension cords for permanent installations
- Plugging a power strip into another power strip
- Failure to leave 36" clearance in front of electrical panels such as breaker boxes
- Failure to leave 18" clearance for any sprinkler head
- Failure to leave 36" clear passageways for exit from any space
- Poor housekeeping, such as cords posing trip hazards
- Flammable materials stored on a shelf near the ceiling
Wilson Laboratory
In Wilson, the fire horn is intermittent: it will sound VERY LOUDLY, but pause for several seconds before sounding again. You will probably hear announcements to leave the building during these pauses. Once you hear the alarm, you must exit the building until an explicit announcement that it is safe to return. Due to the complex nature of the infrastructure at Wilson Lab, certain designated staff members are assigned to remain in the building to assist EH&S in the investigation of any fire alarm. The designated staff members are the On-Duty CESR Operator, Operations Managers and Fire Marshal.Fire Zones at Wilson Lab*
Wilson Laboratory is divided into fire zones which include all CLEO and CHESS areas, the tunnel, and the West Modular Unit (aka CHESS trailer). The alarms go to the Ithaca Fire Department. There are annunciators in the CESR control room and at Barton Hall for the Cornell Police. The East Modular Unit (Computer Group & Electronics Shop) and Center Modular Unit (Stockroom & eXploration station), and Newman Lab each have their own fire alarm systems which are linked to Cornell but not to the Wilson system.| Fire Alarm Zone | Location |
|---|---|
| Zone 1 | L1 (Tunnel) |
| Zone 2 | L2 (Tunnel) |
| Zone 3 | L3 (Tunnel) |
| Zone 4 | L4 (Tunnel) |
| Zone 5 | L5 (Tunnel) |
| Zone 6 | Cross Tunnel |
| Zone 7 | Synchrotron Hall (L0) & LS1 |
| Zone 8 | 1st Floor - Room 101 |
| Zone 9 | 1st Floor - CHESS, Electronic Lab, Stockroom |
| Zone 10 | 2nd Floor - Offices, Labs and Rm. 101 Sprinklers |
| Zone 11 | 6th Floor |
| Zone 12 | 3rd Floor - Offices and Labs |
| Zone 13 | LS3 and LS2 |
| Zone 14 | 4th Floor |
| Zone 15 | 5th Floor |
| Zone 16 | Gas Alarm (manual alarm in CHESS & Control Room) |
| Zone 17 | L0E (Machine Shop and Tech. Area) |
| Zone 18 | New Addition - All floors |
Tunnel
The unique hazards of the CESR tunnel require that it have its own fire safety procedures and precautions. The tunnel has both regular and beam phones. Crash cords and crash buttons, if activated, shut down most of the major accelerator systems in the tunnel which use 440 volts. The vacuum system ion pump power supplies, however, are not connected to the crash system, and instead must be shut off manually by using the on/off buttons or unplugging them. Since the crash system shuts down almost all accelerator systems, it is to be activated only in the event of an emergency involving a fire or an electrical injury. If a fire alarm sounds, leave the tunnel immediately. Exit through either the north exit, which is located by Tower Road, or through the south L0E exit through L0. Never take the cross tunnel, because it could become filled with smoke during a fire.Fire Preparedness, Prevention, & Precautions
- Be familiar with primary and secondary escape routes: do not use the elevators; use stairways instead
- Keep hallways, stairwells, aisles, and exit doors completely clear at all times; do not block exits!
- Know where fire extinguishers are located and how to use them
- Don't depend on someone else to pull the fire alarm
- Have a plan for quickly powering down equipment you are using so as to leave it in a safe and stable state
- Plan to have important personal effects nearby or on your person so you can evacuate quickly, without a need to return if the building is closed for an extended period of time
- Plan to remove any potentially contaminated personal protective equipment (e.g. gloves, lab coat) prior to departing your workspace
- Near a fire, stay low to avoid inhaling smoke
- Feel every door for heat before opening it
- Close open doors as you evacuate the building to prevent the fire from spreading
- If you are on fire, do not run: STOP, DROP, & ROLL: drop to the floor and smother the flames by rolling
- If someone else is on fire, wrap him or her in fire blanket to smother the flames
-
Do not smoke inside any campus building, nor within 25 feet of any entrance
- Know the flammability of the materials you are using and take appropriate precautions
- Do not use frayed electrical cords and do not overload circuits
- Do not plug an extension cord or power strip into another extension cord or power strip
- Exit signs must be lit and open to view
- Extension cords are only used for temporary needs; situations with insufficient outlets should be remedied by installing additional hardwired outlets
- Extension cords must not be strung through doorways, walls, over ceilings, etc.
- Extension cords, phone cords, cabling, and hoses must not be positioned so as to be tripping hazards
- Electric panels or junction boxes must all have proper covers
- Electrical receptacles and wiring must all be in good condition and not exposed
- Ceiling tiles must be in place to maintain the fire-stopping integrity of the ceiling
- Holes around wall or floor penetrations must be sealed with proper fire stopping material
- NOTHING should be hung from sprinkler piping
- Storage must be held back at least 18 inches from sprinkler heads
- Storage of chemicals, compressed gases, combustible or flammable materials must be done according to manufacturer's recommendations and good safety practice
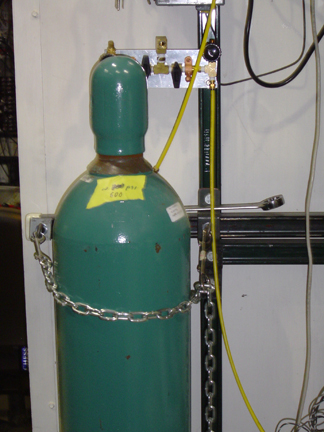
- Any gas cylinder must be anchored to a wall to prevent it from tipping over
- Lab and storage areas should be neat and uncluttered; access for inspection should be easy
- Portable heaters are discouraged, but if present need space; separate adequately from flammables
- Use the correct wattage bulb in lamps and light fixtures
Fire Extinguishers
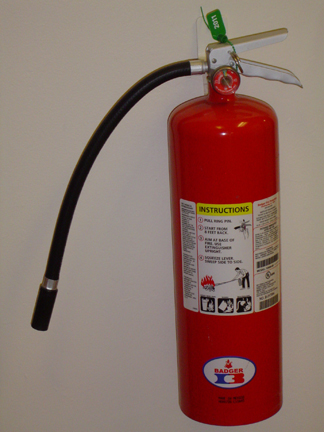 The use of a fire extinguisher can keep a small fire from spreading, assist in fighting a fire until help from the fire department arrives, and/or help provide an escape route. Fire extinguishers at CLASSE are generally located at door entrances and near stairwells. Do not attempt to use a fire extinguisher if you have not had training on fire extinguisher basics because you could injure yourself, others, or make the fire worse by improper use. Learn how to use them before a fire starts. Never put yourself in danger to fight a fire.
End of Fire Safety
Radiation Safety
Quick links to forms:- To request a permanent badge, fill out this online form.
- To report a badge mishap, fill out this online form.
- If you have a NetId, get your radiation dose report by clicking this link.
- If you do not have a NetId, get your dose report by filling out this form.
Radiation Overview
Research conducted at CLASSE involves radiation-producing equipment (RPE) and radioactive sources, so it is incumbent upon every student, employee, and researcher to understand how to avoid radiation hazards. Signs and alarms provide warning at hazardous locations, and interlock systems prevent close proximity to equipment actively producing ionizing radiation. Further protection is afforded by shielding material surrounding such equipment. Anyone who works in controlled areas wears a radiation badge, which can later be used to confirm lack of radiation exposure. The few who work occasionally in the vicinity of residual radioactivity or with radioactive sources should, while doing so, wear protective goggles and gloves as well as ring badges if appropriate. Further detailed information on radiation safety appears in the balance of this chapter; questions should be directed to the CLASSE Safety Director. Radiation is usually classified as either ionizing or non-ionizing. Ionizing radiation is energetic enough to remove electrons from atoms and disrupt molecules in living organisms. Some examples of ionizing radiation are x-ray, beta, gamma, and neutron radiation; these can be produced by radiation-producing equipment (RPE) or by inherently radioactive material (radioisotopes). Non-ionizing radiation includes visible light, radar, microwave, infrared, radio and television signals, and electric power fields (including magnetic fields), for which health effects are considerably more subtle. Most of the radiation hazard at CLASSE is from ionizing radiation, but care must also be taken near magnetic fields. It is beyond the scope of this Handbook to detail the physiological effects of ionizing radiation. On the one hand, we all receive low levels of radiation exposure from natural sources and medical imaging. On the other hand, it is well-documented that very high levels of radiation exposure can cause genetic damage, illness, and death. Health effects from doses significantly higher than natural background but smaller than from documented cases of high exposures have been difficult to prove. Increased doses are thought to correlate with increased incidence of cancers, but no threshold or clear relationship has been definitively shown to exist in this intermediate range of exposure. Ionizing radiation is invisible, and there are no immediate symptoms from even dangerous levels of exposure. It can take years or decades for cancers to develop from high doses. Hence the custom in radiation safety is to err on the safe side by using a variety of means to restrict human exposure levels considerably below known hazardous levels, and to measure and document this lack of exposure for physical spaces and all personnel who work near RPE and/or radioactive sources.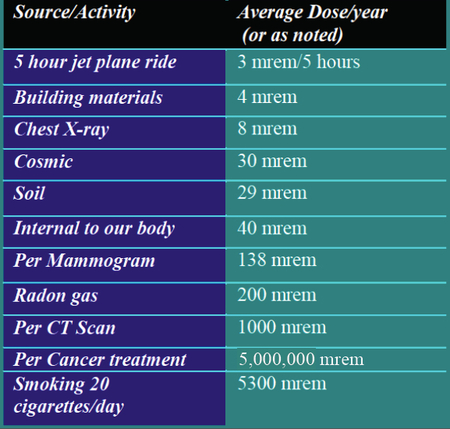 Americans receive an average annual dose of 620 mrem/yr, half of which is from natural background sources (approximately 300 mrem/yr, or just under 1 mrem/day) and half of which from medical imaging (up to hundreds of mrem per scan, depending on the type). Natural backgrounds are dominated by exposure to radon gas, but also include cosmic rays from extra-terrestrial sources and radioactivity in the soil, our bodies, and our foods.
Exposure to ionizing radiation is controlled at CLASSE by the following means:
 - Signage warns of areas of potential radiation exposure; sometimes areas are roped off temporarily
- Shielding generally separates you from active radiation sources; shielding can take the form of tunnel walls and the earth surrounding them, the large concrete blocks such as found in L0, lead bricks or portions thereof, lead and other metal sheets, protective goggles and gloves, and other strategically shaped and placed materials
- A system of gates, keys, and light-beams interlocked with radiation-producing equipment ensures that radiation areas are unoccupied while the RPE is on
- Radiation monitors interlocked with radiation-producing equipment serve to limit area and personnel radiation exposure
- Personal and area badges, which record exposures for 1- or 3-month periods; by monitoring these readings, occupational exposures of personnel and particular locations are tracked
Origins of Ionizing Radiation
The electrons accelerated in the CESR bending magnets emit x-rays. Most of these x-rays are absorbed by the vacuum chamber walls, the tunnel walls, or the magnets. Higher intensity x-rays are created for CHESS in undulators and wigglers placed into the CESR ring for this purpose. X-rays can also be created in the processing of RF cavities. Particles lost from any accelerator beam also cause radiation. Particles are lost when they collide with solid material or gas molecules or interact with another beam (as in CESR). They plow into the walls of the vacuum chamber and create a cascade of gamma rays and more electrons. Gamma rays are a higher energy cousin of x-rays. Some of the gamma rays hit atomic nuclei and knock out neutrons, most of which are stopped by thick concrete shielding. A few of the neutrons change some of the nuclei of accelerator components, such as targets and beam pipes, into radioisotopes. Radioisotopes, unlike RPE, can emit radiation after the accelerator is turned off. Fortunately, only a few locations at CLASSE have residual radioactivity at any detectable level. Areas of residual radioactivity usually include the linac, the linac snouts, the injection lines, the transfer lines, the inflector magnets, and occasionally at other places along the synchrotron or CESR. A survey for radiation is done every time the interlocks are to be turned off, and all areas above 2 mrem/hour at 30 cm are marked with signs. In addition to x-ray radiation from accelerated electrons and lost beam particles, ionizing radiation at CLASSE can originate from several types of devices operated at high voltage. These include electrostatic separators in CESR, electron guns, and field emission equipment such as RF cavities.Exposure to Ionizing Radiation
A key concept in radiation protection is ALARA (As Low As Reasonably Achievable), the concept that radiation exposures should be kept as low as is possible. Cornell policy aligns itself with the requirements of the Nuclear Regulatory Commission (NRC), which requires exposure to be limited to 5000 mrem per year for radiation workers (and, like Cornell, 100 mrem per year for non-radiation workers), as shown in the table below.| Regulator | Maximum allowed dose | |
|---|---|---|
| Radiation Workers | Non-radiation workers | |
| US Nuclear Regulatory Commission | 5000 mrem per year whole-body, 50000 mrem per year extremity | 100 mrem per year |
| Cornell University | 5000 mrem* per year whole-body (*notification at 1/40 annual limit per quarter (125 mrem) & investigation at 3/40 annual limit per quarter (375 mrem), pro-rated annual limit), 50000 mrem per year extremity | 100 mrem per year |
- Time: Exposure equals exposure rate multiplied by time. Spending as little time as possible in a radiation area, waiting as long as you can after radiation-producing equipment has been turned off, and planning ahead will reduce your exposure.
- Distance: Maximizing the distance between you and the radiation source will significantly reduce your exposure.
- Shielding: Use appropriate shielding to protect yourself from unnecessary radiation. Lead shielding and source containers provide extra protection.
Controlled, Uncontrolled, and Exclusion Areas
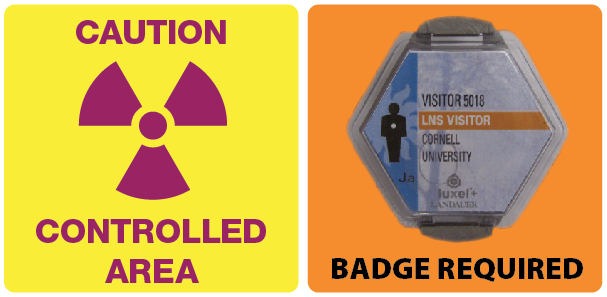
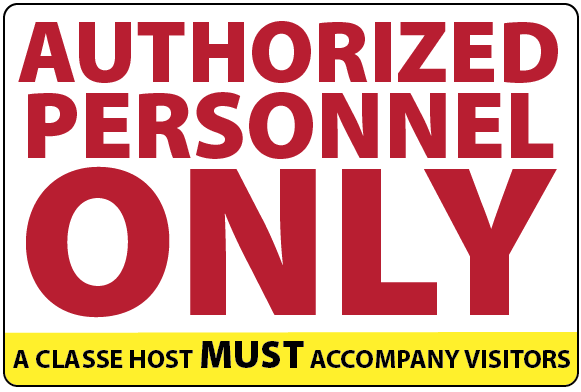 Using the Cornell EHS Radiation Safety Manual definitions, the lab is divided into uncontrolled areas, where there is little possibility of radiation exposure, and controlled areas, where there is some possibility of exposure. In uncontrolled areas, the potential radiation dose rate must be below two mrem per hour and 100 mrem per year. No precautions need to be taken, and there is no radiation danger. All offices, building entrances, and most of (but not all) the following spaces are uncontrolled: Newman Laboratory, the Physical Sciences Building third and fourth floors, and the second and third floors of Wilson Lab.
The following are the controlled areas:
Using the Cornell EHS Radiation Safety Manual definitions, the lab is divided into uncontrolled areas, where there is little possibility of radiation exposure, and controlled areas, where there is some possibility of exposure. In uncontrolled areas, the potential radiation dose rate must be below two mrem per hour and 100 mrem per year. No precautions need to be taken, and there is no radiation danger. All offices, building entrances, and most of (but not all) the following spaces are uncontrolled: Newman Laboratory, the Physical Sciences Building third and fourth floors, and the second and third floors of Wilson Lab.
The following are the controlled areas:- CESR control room
- CESR tunnel and cross tunnel
- Linac (LS1)
- All of L0, including the pathway from East to West
- LS2 (above the linac)
- Rooms 101/102
- All CHESS hutches & caves
- Sector 7 area, where signed
Interlock Systems
The major interlock systems at CLASSE are for CESR, ERL, and CHESS; each halts beam transport into certain areas if a perimeter is breached or certain required conditions are not met. Smaller systems can also have interlocks or "interlock chains" to guarantee proper procedures are followed prior to startup.CESR interlock system
The CESR interlock system is an arrangement of gates and light beams that detect anyone walking into a radiation area at the wrong time. Electronic message boards near each entrance display the access and machine conditions. Signs and sounds provide information about the local environment. Before beam is injected from the linac, the CESR operator searches and resets all the interlocked area to guarantee only people with keys are inside. The keys prevent the accelerator from turning on. If you find yourself inside a radiation area when the warning sounds and the radiation area announcement comes over the PA system, do whichever of these three things is quickest (pull the crash cord, push a crash button, or break a light-beam interlock by stepping through it) to prevent beam coming on. When the machine is running, the board reads "synchrotron on" or "CESR on," and you may not enter. If you enter, you will interrupt the light beams, which sounds a loud siren and automatically shuts off CESR. If you break an interlock, go to the nearest beam phone to explain who you are and where you are to the CESR operator. The board will read "interlocks set" when the machine is ready to run. You may enter the area only if the sign also says "TAKE A KEY," and only with a key (because the key must be used to access controlled areas. Every person in a group must take a key and carry it until exiting interlocked areas, at which point it must be returned to its original location. (CESR cannot be turned on until all keys are returned. If you accidentally take a key from the building, call the CESR operator immediately and return the key to Wilson as soon as possible.) Never share keys. White keys allow access to all areas. Their storage box is located in the control room. While you have a white key in your possession, it is impossible for the linac, synchrotron, or CESR to generate or transport beams. When taking a key, you should sign it out. If taking more than one key for a group, inform the CESR operator how many keys are being taken and write the names of the individuals receiving the keys on the sign-out sheet. If returning more than one white key, indicate the individuals for whom the keys are being returned on the sign-out sheet and inform the operator. Colored keys available for access to specific areas are located near those areas. For example, CHESS West keys, which are yellow, allow access to CHESS West and are located in the CHESS area. To find out more about colored keys and the areas to which they allow access, speak with your supervisor or a CESR operator, or ask to see the short video (?) on the interlock system. If the sign reads "AREA SAFE," then the machine is completely off and the entire experimental area has been surveyed for residual radioactivity. Once the area has been declared safe, no keys are necessary and all experimental areas are open, but you must still wear a radiation badge (discussed later in this chapter) and pay close attention to posted warnings. Radiation monitors outside the CESR exclusion area are interlocked to the linac and/or storage ring. If beam conditions deteriorate enough that significant radiation is leaking through (or over) the shielding walls, these monitors trip off the accelerator if the instantaneous dose rate exceeds 2 mrem/hr.CHESS interlock system
The CHESS interlock system is described here.Area Radiation Monitoring
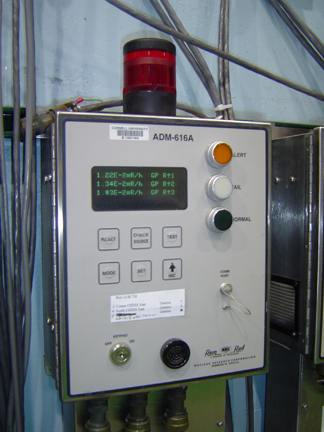 Electronic monitors in experimental areas check levels of high energy gamma, low energy gamma, x-ray and neutron radiation. If any monitor detects a radiation level that is too high, the red light on the monitor blinks and an alarm sounds, and the linac and/or CESR is automatically turned off. Anyone in an experimental area such as CHESS should immediately evacuate that area until an operator is able to reset the trip.
In addition to electronic monitors, area survey radiation badges check the level of radiation both inside and outside radiation areas twenty-four hours a day. Survey badges record the amount of radiation in any given area that is monitored.
There is one Radiation Logbook for CESR/CHESS and one for ERL, which are kept in the CESR and ERL control rooms, respectively. They contain records of radiation survey results, changes in shielding, and other changes that affect exposure levels. The Radiation Safety Technician also keeps several other logs associated with radiation monitoring.
Radiation Shielding
Radiation shielding is strategically placed and monitored; no one should move any lead bricks or shielding without express permission of the CLASSE Safety Committee. Shielding effectiveness is only guaranteed up to a height of eight feet above ground, so do not stand on ladders, chairs, or tables within the experimental areas.Request a badge
If your job entails routinely entering controlled areas, an assigned radiation badge with your name on it should be issued to you. To request a badge, fill out this online form.Radiation Badges

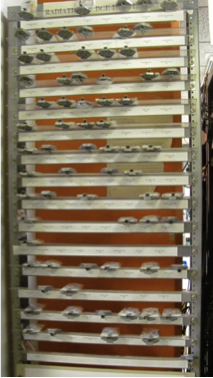 Personal radiation monitors provide the final check on the effectiveness of Lab's protective measures against ionizing radiation. Each employee, student, CHESS User, or visiting researcher with a need to pass through or work near radiation will be issued a radiation badge, similar to this visitor badge. When replaced it will be stored at one of five locations, depending on where you work most; at Newman Laboratory, G-Line (staff only), or in one of the CESR, CHESS, or ERL control rooms. Visitor badges can be signed out, providing full identifying and contact information, which we are required by law to collect for CHESS Users, short-term visiting researchers, and any CLASSE personnel who have temporarily misplaced an assigned badge.
A radiation badge does not protect you from radiation or give you an immediate reading of the radiation level. Instead, it records accumulated radiation exposure over a period of one to three months, and is read out afterwards by the badge vendor. (Each employee's exposure history is confidentially maintained by CLASSE and Cornell University.) Clip your radiation badge prominently to the front of your clothing between waist and neck only if you plan to enter a controlled area (it may not record exposure correctly if placed inside a pocket).
Virtually all of our radiation badges, worn by those whose work brings them into controlled areas, register below ten mrem for each two-month wear period. The radiation exposure anyone receives at CLASSE is much smaller than that already received from from natural sources (300 mrem annual dose from rocks, cosmic rays penetrating the atmosphere, radon, and natural radioisotopes in the human body). Radiation exposures from man-made sources are: dental x-ray (25 mrem, one-time dose), abdominal radiography (150 mrem, one-time dose), medical brain scan (2400 mrem, one-time dose), and commercial air flight crew member (450 mrem, annual dose from cosmic rays unshielded by the lower atmosphere). The exposures reported by the badge vendor have already been corrected for natural radiation sources by comparing them with reference badges that are stored on-site but away from radiation; hence reported exposures will almost always be lower than the expected dose from natural sources alone in that period, and should correspond to the exposure in the workplace alone.
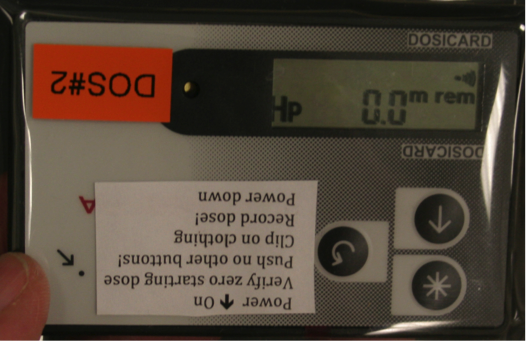 A second type of personal
radiation monitor, one that does provide immediate visual readout of the accumulated dose, is the dosimeter.
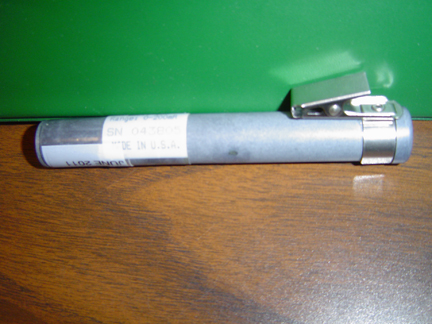 CLASSE uses both analog and digital dosimeters, as shown. Dosimeters are for use by a host or tour guide on behalf of visitors (see Giving Tours).
If you have had an assigned radiation badge at CLASSE (or elsewhere at Cornell) for more than one year, you can obtain your occupational radiation dose on record with EHS by clicking this link. Be aware that this dose is only the dose recorded by your radiation badge while you've worn it, and has already been adjusted to not include normal background radiation exposure. After you enter your NetId and password, a page with your information should appear (without the need for human intervention on the EHS end) after a short wait; with some browsers the pdf file does not appear but instead is downloaded automatically, so check your Downloads (or equivalent) folder.
Radiation Badge Mishaps
Radiation badges sometimes get lost or misplaced or mechanically damaged. Sometimes a user mistakenly wears a badge when getting a medical x-ray or traveling by air. You can mistakenly take someone else's badge from the rack or someone else can take yours. Rarely, badges report unusual readings due to damage or other malfunction (in this case, you will be informed of this after the badge has been processed). If anything unusual like this happens to your badge, please notify your supervisor or advisor if you are a Cornell staff or faculty member or student, the CHESS Operator if you are a visiting CHESS user, the CLASSE Safety Director, and the RSS immediately via the online Badge Mishap form (click on the preceding words). (If you were contacted first by someone else of a mishap, please respond via this form also.) It is essential that there be an accurate record of the circumstances and timing of the mishap to whatever specificity you can provide; it is also important that there be a record of your being informed of any problem with a badge. Where and when was the badge lost or irradiated? Do your best to reconstruct your activities on that day so that possible locations can be searched, and any exposures that may turn up later on a lost badge can be understood. If it can be agreed that a non-zero exposure on your badge was obtained while it was not on your possession, or not on the Cornell University campus, then the University's record of your occupational exposure should be corrected, and this form can be used to officially request such an action. If for some reason the online form does not work, please cut and paste the form below into your email compose window, fill it out, and send it to the CLASSE Safety Director, the RSS, and your supervisor:Personal Radiation Protection
If you work with radioactive materials or in radiation areas, you should be aware of some more personal safety protection devices:-
Portable survey meters: These are handheld monitors for gamma and x-ray radiation that provide instant readings. Remember to check the batteries before using one. The meters are available in the vacuum lab, the control room, the west RF transmitter, CHESS, and Newman 205. GM counters are professionally calibrated once a year. Some are used with special probes that give energy compensation and are thus highly accurate. Contact the Radiation Safety Specialist if you are unsure of which to use.
- Ring badge: Those who use intense sources to calibrate monitors, and others who demonstrate a need, can obtain ring badges from the Radiation Safety Specialist. Ring badge exposures will become part of your personal radiation records. You will be issued a set, one for each hand.
- Safety glasses and gloves: You should wear safety glasses and gloves if you are working around residual radioactivity. If you are handling sources, you may be required to wear them.
Pregnant Workers and Radiation Exposure
Because the human fetus has rapidly dividing cells and is highly sensitive to ionizing radiation, pregnant women should pay special attention to minimizing their ionizing radiation exposure. While CLASSE has developed a comprehensive Radiation Safety program of radiation monitoring, education, shielding, access controls, interlocks, and signage, it is nevertheless prudent for a pregnant worker at CLASSE to gather relevant information and understand the extra precautions available. To that end, CLASSE will provide confidential counseling and services upon request by any worker who is pregnant, or thinks she may be pregnant, and is concerned about exposure to radiation. The CLASSE Safety Director, CLASSE Safety Manager and/or the CHESS Safety Officer will generally provide these services, although with advance notice, counseling by a qualified staff member of the University Environment, Health and Safety Department can be arranged.
Topics for discussion and services include:
- Potential effects of radiation on a developing fetus.
- Badging requirements and dose limits from section 8.3 of the University Radiation Safety Manual.
- Historical radiation dose rates for relevant area badges and surveys, and typical personal badge readings for those sharing the individual's work area.
- Location and operation of radiation monitoring and accelerator interlocks in the individual's work area.
- Radiation survey of the individual's work area.
- Issuance of a dosimeter that will provide real-time readings for the individual's use.
- Instruction on use of a survey meter for real-time monitoring.
- The choice that a badgeholder has, at her discretion, to declare a pregnancy, which, if made, requires issuance of a fetal badge set.
- Whether or not a pregnancy is declared, a fetal badge set can be supplied if requested by the badgeholder with sufficient advance notice. This set consists of a control badge (which should not be worn), a whole-body badge (which should be worn between the neck and waist), and a fetal monitoring badge (which is placed over the abdomen, and, when not worn, stored with the control badge). If confidentiality is desired, the fetal monitoring badge may be worn underneath clothing, and when not worn, the control and fetal badges should be stored separately from other badges.
- All counseling and services are confidential. Identifying information will be limited to the few staff members with a need to know. The name of anyone receiving such services will not be posted in any widely accessible written or electronic logs.
Radioactive Source Handling
LEPP owns about forty-five sealed radioactive sources, and CHESS owns ten. All of these sources are registered or on a permit from the University. All LEPP sources are sealed so that no one can touch the radioactive material directly. They are solid, covered in a permanent casing. Sources are stored in a safe when not in use. Any improperly used or unattended sources will be immediately returned to the safe. The Radiation Safety Specialist (RSS) keeps an inventory of all sources, updating a logbook and card file each time a source is signed in or out. In cooperation with the Department of Environmental Health and Safety, the RSS handles ordering, receiving, moving, shipping, monitoring, and disposing of radioactive sources. The RSS also does periodic source surveys to ensure that all sources checked out are attended to and stored properly. If you are interested in using or ordering a radioactive source, see the CLASSE Sealed Source (RPH) and the RSS for a personal orientation. Use of radioactive sources is restricted to approved people and locations. Undergraduate students may only sign out sources through their advisors or supervisors. Remember to wear personal protective equipment, such as gloves, when using radioactive sources. Also remember to use the principles of time, distance, and shielding to reduce your exposure to radiation. If you believe a source may be leaking, either because it looks damaged or because radiation has been detected where it is unexpected, notify everyone in the area and seek assistance from the RSS.End of Radiation Safety
Magnetic Field Safety
The primary potential hazard from magnetic fields is the physical pull on objects in the workplace (tools, jewelry, etc.); this hazard can be minimized by not carrying unnecessary objects into proximity of such fields and adequately securing those that are carried. Secondarily, even relatively weak magnetic fields (just a few gauss) can affect devices implanted in the body such as pacemakers; in this case, maintaining a safe distance from magnetic objects (usually just a few feet) is necessary. Third, biological effects could be induced by long-term exposure to very high strength and/or high-frequency fields (although such damage has not been unambiguously proven); very few places at CLASSE exist where such fields exist except inside an exclusion area while radiation producing equipment is on and hence where personnel cannot be present anyway. The concepts of distance and time apply to magnetic fields: a field drops off quickly with distance from the object, and time you spend near known locations of magnetic fields should be minimized. Anywhere electric current flows, magnetic fields also exist; conversely, a time-varying magnetic field can induce electric current in a nearby conducting loop. Magnetic materials like iron (and many types of steel) can become magnetized and have magnetic fields without current flow.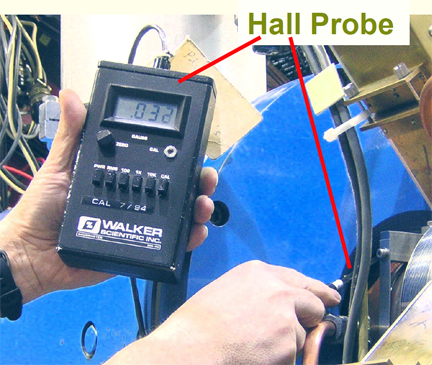 Most magnets used at CLASSE to steer, focus, or defocus the electron and positron beams contain both conducting coils as well as magnetic material; hence a residual magnetic field can remain after current is off. Ion pumps have magnetic fields supplied by permanent magnets, so the fields are present at all times. Contact the Safety Director to get a magnetic field measured with a Hall Probe (at right).
You may find useful related information in the EHS Magnet Safety Manual.
There are no federal regulatory limits on exposure to magnetic fields, so Cornell EHS has adopted prudent limits. Common units for magnetic fields are Tesla (T) and Gauss (G); 1 T = 10,000 G. For reference, the earth's magnetic field on its surface is about 0.6 G, some consumer electronic devices can generate magnetic fields up to 0.2 G up to an inch away, and medical MRI imaging typically involves a static magnetic field of up to 5 T (50,000 G). There is no evidence that short-term exposure to the static fields in MRI scans causes biological damage.
| Frequency (Hz) | Exposure | Applies to | Cornell Limit (T) | Cornell Limit (G) |
|---|---|---|---|---|
| Static (<1) | Instantaneous | Extremities | 5 | 50,000 |
| Static (<1) | Instantaneous | Whole Body | 2 | 20,000 |
| Static (<1) | 8-hour average | Extremities | 0.6 | 6000 |
| Static (<1) | 8-hour average | Whole Body | 0.06 | 600 |
| Static (<1) | Instantaneous | Magnetic Implant (e.g. Pacemaker) | 0.0005 | 5 |
| Static (<1) | Instantaneous | Any public area | 0.0005 | 5 |
| f=1-300 | Instantaneous | Hands and Feet | 0.6 / f | 6000 / f |
| f=1-300 | Instantaneous | Arms and Legs | 0.3 / f | 3000 / f |
| f=1-300 | Instantaneous | Whole Body | 0.06 / f | 600 / f |
| f=300-30,000 | Instantaneous | Whole Body | 0.0002 | 2 |
| f=50-60 | 8-hour average | Whole Body | 0.0005 | 5 |
| f=50-60 | 8-hour average | Magnetic Implant (e.g. Pacemaker) | 0.0001 | 1 |
| f > 30,000 | Instantaneous | Whole Body | Contact Safety Director |
Electrical Safety
Material here is for general electrical information only. Additional training and authorization is required before working on high voltage/power equipment. There is valuable information at the EHS Electrical Safety pages, especially a document detailing electrical hazard evaluation and electrical training guidance: Electrical Safe Work Practices (pdf). In addition, ECMA, an industry standards association, published a useful treatise on Safety of electronic equipment (pdf). A review article on Conduction of Electrical Current to and Through the Human Body is available through the National Institutes of Health website. A plain-English chapter on Electrical Safety appears in the Electronics Technician journal.Electrical Hazards
Electricity is an important tool, but it can be dangerous. Whether you sit at a computer terminal or rewire circuits in the tunnel, you are at risk of becoming the path of an electrical current. Simple safety practices such as checking to see that the work area is dry and uncluttered, an outlet is not overloaded, or that a cord is not frayed may save you from fire, shock, or electrical burns. Under normal conditions, any exposed conducting surface should be considered hazardous if the voltage is higher than 50 V. Note that CLASSE has adopted the Cornell EHS level of 50 V as defining hazardous voltage, but voltage alone is far from the whole story: circuits with low voltages can sometimes deliver hazardous current and/or stored energy. For example, superconducting magnets can operate with low voltage drops but high current and high stored energy, and low voltage buses can sometimes be capable of delivering high current. Due to high capacitance or inductance, even disconnected circuits can have high stored energy. Moreover, abnormal conditions (e.g. the contact area with or path taken through the body, ambient humidity, individual perspiration level, the presence of water on or near the circuit) can increase the hazard level for any given voltage or current. For DC voltages, currents above 25 mA at 50 V are considered hazardous under normal conditions. For common AC outlets (60 Hz, 120 V), current above 10 mA is considered hazardous under normal conditions. The health consequences of contact with common household outlet (120V, 60 hertz) AC current, under normal conditions, versus current (in milliAmperes, or mA) can include:- 1 mA: Usually harmless, but slight tingling or involuntary movement from the shock can cause injury.
- > 5 mA: Painful shock. Possible loss of muscle control.
- >10 mA: Victim may be unable to let go of source.
- >20 mA: Severe shock, nearly certain loss of muscle control, difficulty breathing.
- >75 mA: Possibly fatal.
- 15000 mA: Common fuse breaker opens circuit (i.e. too late to save a person)
Good Housekeeping
Poor housekeeping is the main reason that electricity is the number one cause of fires in the workplace nationwide. Although safety features such as circuit breakers, ground fault circuit interrupters, and insulators are designed to prevent electricity from becoming the heat source for fires, poor housekeeping may still cause a fire. Good housekeeping requires that you:- Clean up liquid spills near electrical equipment immediately and be sure that electrical equipment is thoroughly dry before applying power
- Store flammable liquids away from electrical equipment
- Keep electrical cords away from heat sources
- Do not overload outlets
- Do not plug a power strip into another power strip
- Keep paths to fire extinguishers clear
Two-Person Rule
Never work alone when you could be exposed to hazardous voltages (above 50V) or current (above 25 mA). A second person must stand as a backup. The backup person must be in the immediate area and attentive to the work in progress. He or she must know both where to shut off power and how to call for help. If you are unsure whether you qualify to act in a role of the second person, then consult your supervisor. He or she is responsible for assuring each person's qualifications, and will assign one person to do the work and the other to be the backup.Extension Cords
Damaged and improperly used extension cords cause thousands of electrical fires and injuries in homes and workplaces every year. Before using extension cords, inspect them for cracks, ripped insulation, and damaged or missing grounding prongs. Do not bend back or break off grounding prongs: they are important safety features that receive harmful stray currents. To prevent overheating or possible electrical shock, choose cords rated for current levels that exceed your needs by a safe margin. Never run extension cords through walls, windows, or doorways or behind walls, ceilings, or floors. Never connect extension cords in a series or splice them together. Remove the extension cord when you are finished. Extension cords are not to become permanent fixtures for regular use. If you are setting up or adding new equipment in an area without adequate outlets, the CLASSE Facilities Engineer can arrange to have capacity added.Personal Safety Protection
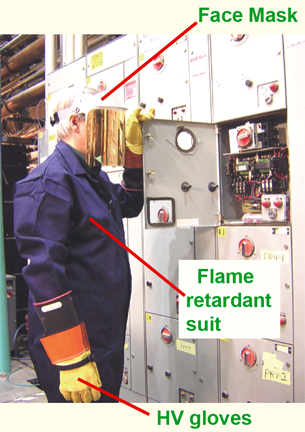 Wear proper safety protection when you work with electrical hazards. Gloves may be required (however, do not wear gloves when you are operating a revolving tool, such as a drill or saw). Safety glasses (prescription and non-prescription) and boots or shoes (of many types) are also available with purchase orders from the business office. Wear appropriate personal protective equipment when you are working with power tools, electricity of 50 volts or greater, or heavy equipment. Remember that watches and rings can cause fatal injury by acting as conductors. Remove all jewelry when you are working with power tools or near electrical hazards.
Know Your Equipment
Before beginning electrical work, check that your diagnostic equipment is in good working order, is properly calibrated, and covers the range necessary for the job. A small, hand-held digital voltage meter (DVM) is commonly used, but you must check the rating on the front of the DVM to ensure that the voltage with which you are working is under the meter's maximum rating. It is dangerous to use a meter on voltages that exceed its maximum rating. Use proper testing equipment and accessories when repairing AC or DC powered equipment. Choose probes and modules carefully because they are rated for different peak voltages. Remember that peak AC voltage is about one and a half times the normally quoted RMS (root mean square) voltage. For instance, the typical 480 volts RMS AC power exceeds the 600 peak voltage rating of some meters. If you are unsure of which probe to choose for the equipment you are planning to work on, then you should use a DVM (with a rating higher than the highest possible voltage in the equipment you are working on) to measure the voltage first. When you are in damp or wet areas, you must power line-operated equipment through a ground fault circuit interrupter (GFCI) . Test each GFCI before using it. Portable GFCIs are available from technical supervisors. Before bench-testing a line-operated chassis, bond metal test benches to the ground and use a circuit breaker to ensure that the current is limited. A ground-fault circuit interupter may provide additional protection. You may also need a second person with you to satisfy the two-person rule. Before testing or working on high voltage equipment or equipment capable of energy storage, note any posted warnings and then de-energize it with a grounding stick. The grounding stick, a metal wand with an insulated handle, is normally built in where needed (near outputs of DC power supplies, filter capacitors, etc.). Always disconnect the energy at its source before using a grounding stick, and, if possible, dissipate any stored energy. Be prepared to encounter stored energy when using a grounding stick. Wear safety glasses to protect your eyes from flying sparks while you securely attach the stick to the equipment. Keep the grounding stick in place so that voltages will not "float up", or come back, while you are working.Lock/Tag/Verify
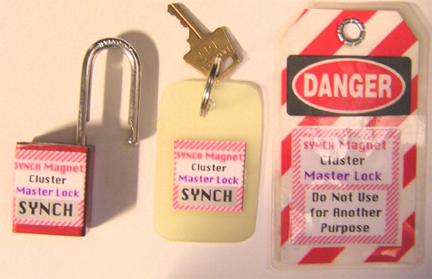 The Lock/Tag/Verify system is used to prevent equipment from being powered while someone is working on it. You must obtain the Wilson Lab LTV training session before using this procedure. Use the following steps when locking out machinery for maintenance:
 - Announce the shutdown
- Shut off the equipment
- Isolate the equipment from its energy source
- Apply a lock to the disconnect or circuit breaker, and use a tag that states your name, the date, and the reason for the lockout
- Dissipate any stored energy
- Verify that the equipment will not operate, returning the controls to the off position
- Remove all tools and other loose objects from the area; reinstall any guards
- Notify all affected workers
- Verify all controls are off
- Remove the lock and tag and restore power
Electrical Emergencies
For emergency contacts, see Emergency Numbers. Common sense and the following basic guidelines will help you avoid serious harm in electrical emergencies involving fire, shock, or burns.- Fire: See Fire Safety. If you see a fire, pull the nearest fire alarm. Switch off the power to the area if you can do so safely. In the CESR tunnel, it is often best to push a crash button or pull the crash cord to turn off power. If the fire is small and contained, and If you have been trained in fire extinguisher use, you may attempt to extinguish it; otherwise leave the area immediately and then notify the CESR Operator of the fire. If you attempt to put out a small, contained fire, use an extinguisher that is designated A-B-C, or B-C. (Never use just a Class A, or water extinguisher, on an electrical fire.) Always be on guard for the presence of hazardous voltages when extinguishing a fire. If the fire does not extinguish easily, leave the area and notify the CESR operator.
- Electrical Shock: If you find an unconscious person who is in contact with a power source, DO NOT, under any circumstances, touch the person or the wire itself. Disconnect the source of power first. Again, the best way to turn off equipment in the tunnel is to push a crash button or pull the crash cord. If you cannot turn off the source of power, then disconnect the victim from the source of power with a long, non-conductive object such as a broom or a rope. Designate a specific individual to call 911 and give the details of the accident. Once the unconscious person is disconnected from the source of power, use the ABCs of first aid to determine if the person is breathing. Stay with the victim, cover any wounds with sterile dressing, and wait for help to arrive.
- Burns: Treat electrical burns with care. If you or a co-worker has been burned, call 911 immediately for help. Refer to chapter ten for more emergency information.
End of Electrical Safety
Laser Safety
Laser Overview
Working with a laser requires the EHS Laser Safety Training and orientation by the CLASSE Laser Safety Officer. Anyone visiting or observing a lab with a working laser must be accompanied by a properly trained and authorized user.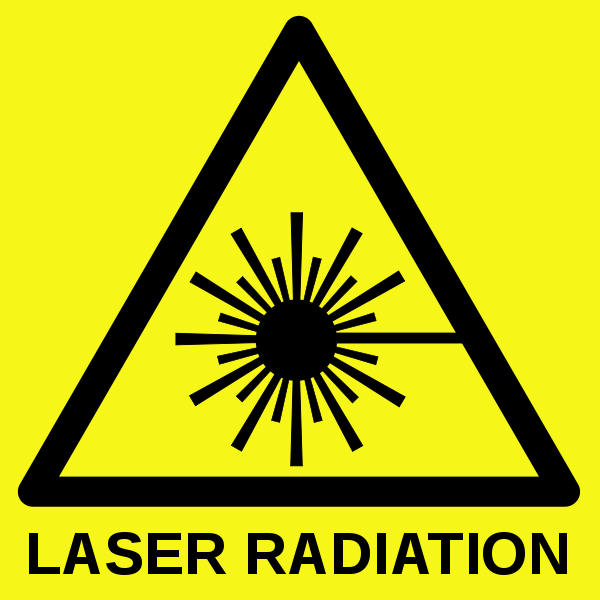 Three hazards are associated with lasers: toxic gas supplies, high voltages, and, most importantly, intense light beams. These hazards call for increased awareness and special precautions. The most serious threat from high intensity laser light is damage to the eyes. In the case of invisible wavelengths, you may be unaware that anything is wrong until after the damage is done. To prevent injury, the level of laser light should always be kept to the lowest practical level. Laser safety goggles should be appropriate for the wavelength of the laser in operation. Consult the EHS Laser Safety pages for information and guidelines.
Precautions and safety equipment depend upon the specific laser in use. By Federal law and international convention, all lasers must be classified according to one or both of two closely-related standards, each of which has four basic levels numbered from less (1 or I) to more (4 or IV) hazardous, and sub-levels (M, R, B, a, b) providing more detail about the nature of the hazard. A laser user must become acquainted with the classification and associated hazards and follow recommended precautions involving procedures and protective equipment.
Class 2 (II) lasers should be used whenever possible. Class 3R (IIIa) and higher should only be used when when a class 2 (II) laser is inadequate, and any installation must be approved by the Laser Safety Officer before operation.
CLASSE personnel operating a Class 3R (IIIa) laser [from a fixed station; i.e. not including laser pointers] or a laser rated more hazardous than Class 3R (IIIa) laser must take the EHS Laser Safety course at the recommended intervals. See the Training page.
Whenever a person may be exposed to either Class 3B (IIIb) or higher of laser light, the two-person rule must be observed. The second person verifies that the first person uses reasonable procedures and does not make careless mistakes.
The FDA Radiation Control for Health and Safety Act of 1968, 1040.10 separates lasers into the following hazard classes, which are based on power and/or potential to cause biological damage to eyes and/or skin. In the definitions below, "acute" means immediate (for visible light, faster than the human blink response of 0.25 sec, and potentially shorter times for other wavelengths) and "chronic" refers to exposure over a period of time of seconds to minutes. Distinctions are made between hazard level when viewing with or without optical equipment (the latter having the potential to concentrate power and therefore inflict more damage), and for visible or invisible wavelengths (i.e. whether the human blink response can be helpful in preventing eye damage). The designations do not cover hazard levels that exist when the device is disassembled during "service" (repair), when even more precautions should be taken.
- Class I: Not hazardous with or without optical instruments, because of low power and/or an interlocked enclosure; however, there are wavelength-dependent power limits for this class
- Class IIa: Chronic hazard only if viewed for more than 1000 seconds; applies to visible wavelengths only and power below 4 mW; emissions must be "not intended for viewing" (note that this class is sometimes erroneously referred to as "Class Ia", which does not exist)
- Class II: Not an acute hazard; applies to visible wavelengths only and continuous wave (CW) power below 1 mW
- Class IIIa: Either an acute viewing hazard (when viewed using optical instruments) or a chronic viewing hazard (when viewed without optical instruments for more than two minutes); CW power range is 1 to 5 mW and power density below 2.5 mW per cm^2
- Class IIIb: Acute hazard to the skin and eyes from direct radiation; CW power from 5-500 mW
- Class IV: Acute hazard to the skin and eyes from direct and scattered radiation, very likely to cause permanent damage; CW power above 500 mW
- Class 1: Not hazardous with or without optical instruments
- Class 1M: Hazardous only if viewing with optical instruments
- Class 2: Not an acute hazard; applies to visible wavelengths only and CW power below 1 mW
- Class 2M: Acute hazard only when using optical instruments; possible chronic hazard; applies to visible only
- Class 3R: Not an acute hazard; applies to visible and invisible, CW power range is 1-5 mW
- Class 3B: Acute hazard for direct or reflective viewing; not a hazard for diffuse reflection or to skin; applies to visible and invisible and medium power; CW power from 5-500 mW
- Class 4: Acute hazard for direct or indirect viewing; applies to visible and invisible and high power; CW power above 500 mW
General comments on laser use
Class 2 (or class II in the old classification system) lasers should be used whenever possible. The output of these lasers is limited to 1 mW, which is sufficient for many purposes (such as alignment), but they are considered safe due to the blink reflex, which limits exposure to about 0.25 s. Users of class 2 lasers should be aware, however, that intentional suppression of the blink reflex can lead to eye injury. Users should not stare into the beam. Alignment lasers may be required for alignment of an x-ray flightpath at CHESS, which is generally at about eye level; in such cases, special care should be taken to prevent exposure to unaware persons outside of the hutch. Although lasers producing 5 mW output (class 3R, or class IIIa in the old classification system) are commonly marketed as hand-held laser pointers in the United States, they are only considered safe when handled carefully and with restricted beam viewing. These lasers should only be used when class 2 lasers are inadequate. Due to the fact that these lasers are generally mounted in a fixed position, possibly at eye level, the risk of injury is much greater than with a hand-held laser. Use of class 3R and IIIa lasers in a fixed position should be treated as hazardous. A standard operating procedure will not be required, but the Laser Safety Officer (LSO) or his/her delegate should approve their installation. The laser output must be contained within a well-defined nominal hazard zone (NHZ), for example, an x-ray hutch or other room, and a sign must be posted outside the NHZ indicating the nature of the hazard. It will not be necessary to enclose the NHZ with a laser safety curtain for a class 3R or class IIIa laser, but it is the users responsibility to restrict laser radiation exposure to within the NHZ. Class 3B (IIIb) and class 4 (IV) lasers present significant hazards, and require special operating procedures and LSO approval before use. Lasers that are not labeled with a classification or output power cannot be used without approval from the LSO.Lasers at CHESS
See the page on Lasers at CHESS.Lasers for ERL
Lasers for ERL Phase 1 are located in Wilson Lab, Rooms 141A and 143, adjacent to the ERL control room. The laser beam, which undergoes several stages of amplification, shaping, and wavelength shifting on laser tables in the two rooms, is transported through the wall between 141A and 143 and later through the wall to L0 to another laser table, and from there to the electron gun nearby. The lasers range in classification up to class IV (4), and protective measures in both rooms assume the maximum hazard in either. Rooms 141A and 143 both have access restricted to authorized personnel and are signed accordingly. These rooms are protected by keypad entry locks; for unauthorized emergency access (e.g. by fire investigators), the doors can be forced open, and this action shuts down the lasers. A multi-point interlock system is in place, which, depending on where a trip originates, can shut down front-end laser components, close the beam stop between 141A and 143, and/or close the shutter between 143 and L0. Several crash buttons are located in both rooms. A laser system is also set up in the rear of Room 128 for the gun/photocathode studies to be conducted there. The laser room is located within the radiation exclusion area and is therefore interlocked to the light beam marking this boundary; in addition the door itself is interlocked to the laser system power. Equipment and required precautions are similar to those in Rooms 141A/143. In routine operation, light beams and optical elements not on laser tables are completely enclosed in sealed, opaque rigid tubing. On laser tables, beams are frequently transported inside clad optical fibers, and the two L0 laser tables are covered. However, frequent changes on the L0 laser tables occur; hence the table covers are interlocked with microswitches so as to close the shutters from room 143. Increased hazard exists during modifications to laser setups and alignment, for which a special bypass interlock mode and associated procedures exists. Authorized personnel have the generic EHS and ERL-specific laser training, and when necessary wear laser safety goggles appropriate for the wavelength and intensity.End of Laser Safety
Cryogenic Safety
Cryogens are very cold liquids kept at temperatures of -100 F (200 K, or -73 C) or below. Our most commonly used cryogens are liquid helium and liquid nitrogen. They have several uses at CLASSE, such as the CESR superconducting RF cavities (SRF), the CESR superconducting wiggler magnets, and test SRF cavities at the Horizontal Test Cryostat (HTC) testing area in the NW corner of L0 in Wilson Lab, and in Newman Lab. Liquid nitrogen is used in CHESS to cool some target samples. Two types of cryogens are commonly used at the lab: liquid helium (LHe) and liquid nitrogen (LN2). Both are non-flammable, odorless, and non-toxic. They can, however, pose burn, asphyxiation, fire, and explosion hazards if they are not treated with great care. Mitigation of these hazards, discussed more below, generally involves- Proper use of containers, material transfer apparatus, and thermal insulation
- Use of personal protective clothing (gloves, face shields, lab coats, etc.)
- Minimization of the quantity of cryogen involved for the purpose at hand
- Correct placement of pressure relief devices (no "trapped" liquid volumes)
- Use of cryogens in adequately ventilated spaces and properly sized vent lines
L0 Vent
There is a vent system in the L0 experimental hall that can quickly exhaust any contaminated air outside the building. The L0 Vent buttons are located on the CHESS control panel, the West Flare, and the CESR Control Room. If you know of a leak of toxic or explosive gas, or suspect a large venting of cryogenic liquids in the Wilson Lab experimental areas, inform a CHESS operator or CESR Operator immediately, who will activate the L0 venting system. The operator will likely request evacuation of all personnel from the affected areas.
All cryogens are used near their boiling points. This means they are rapidly evolving gases at all times. The following shows both the extremely low boiling points of cryogens and the enormous amounts of gas these liquids could produce if they were to boil. 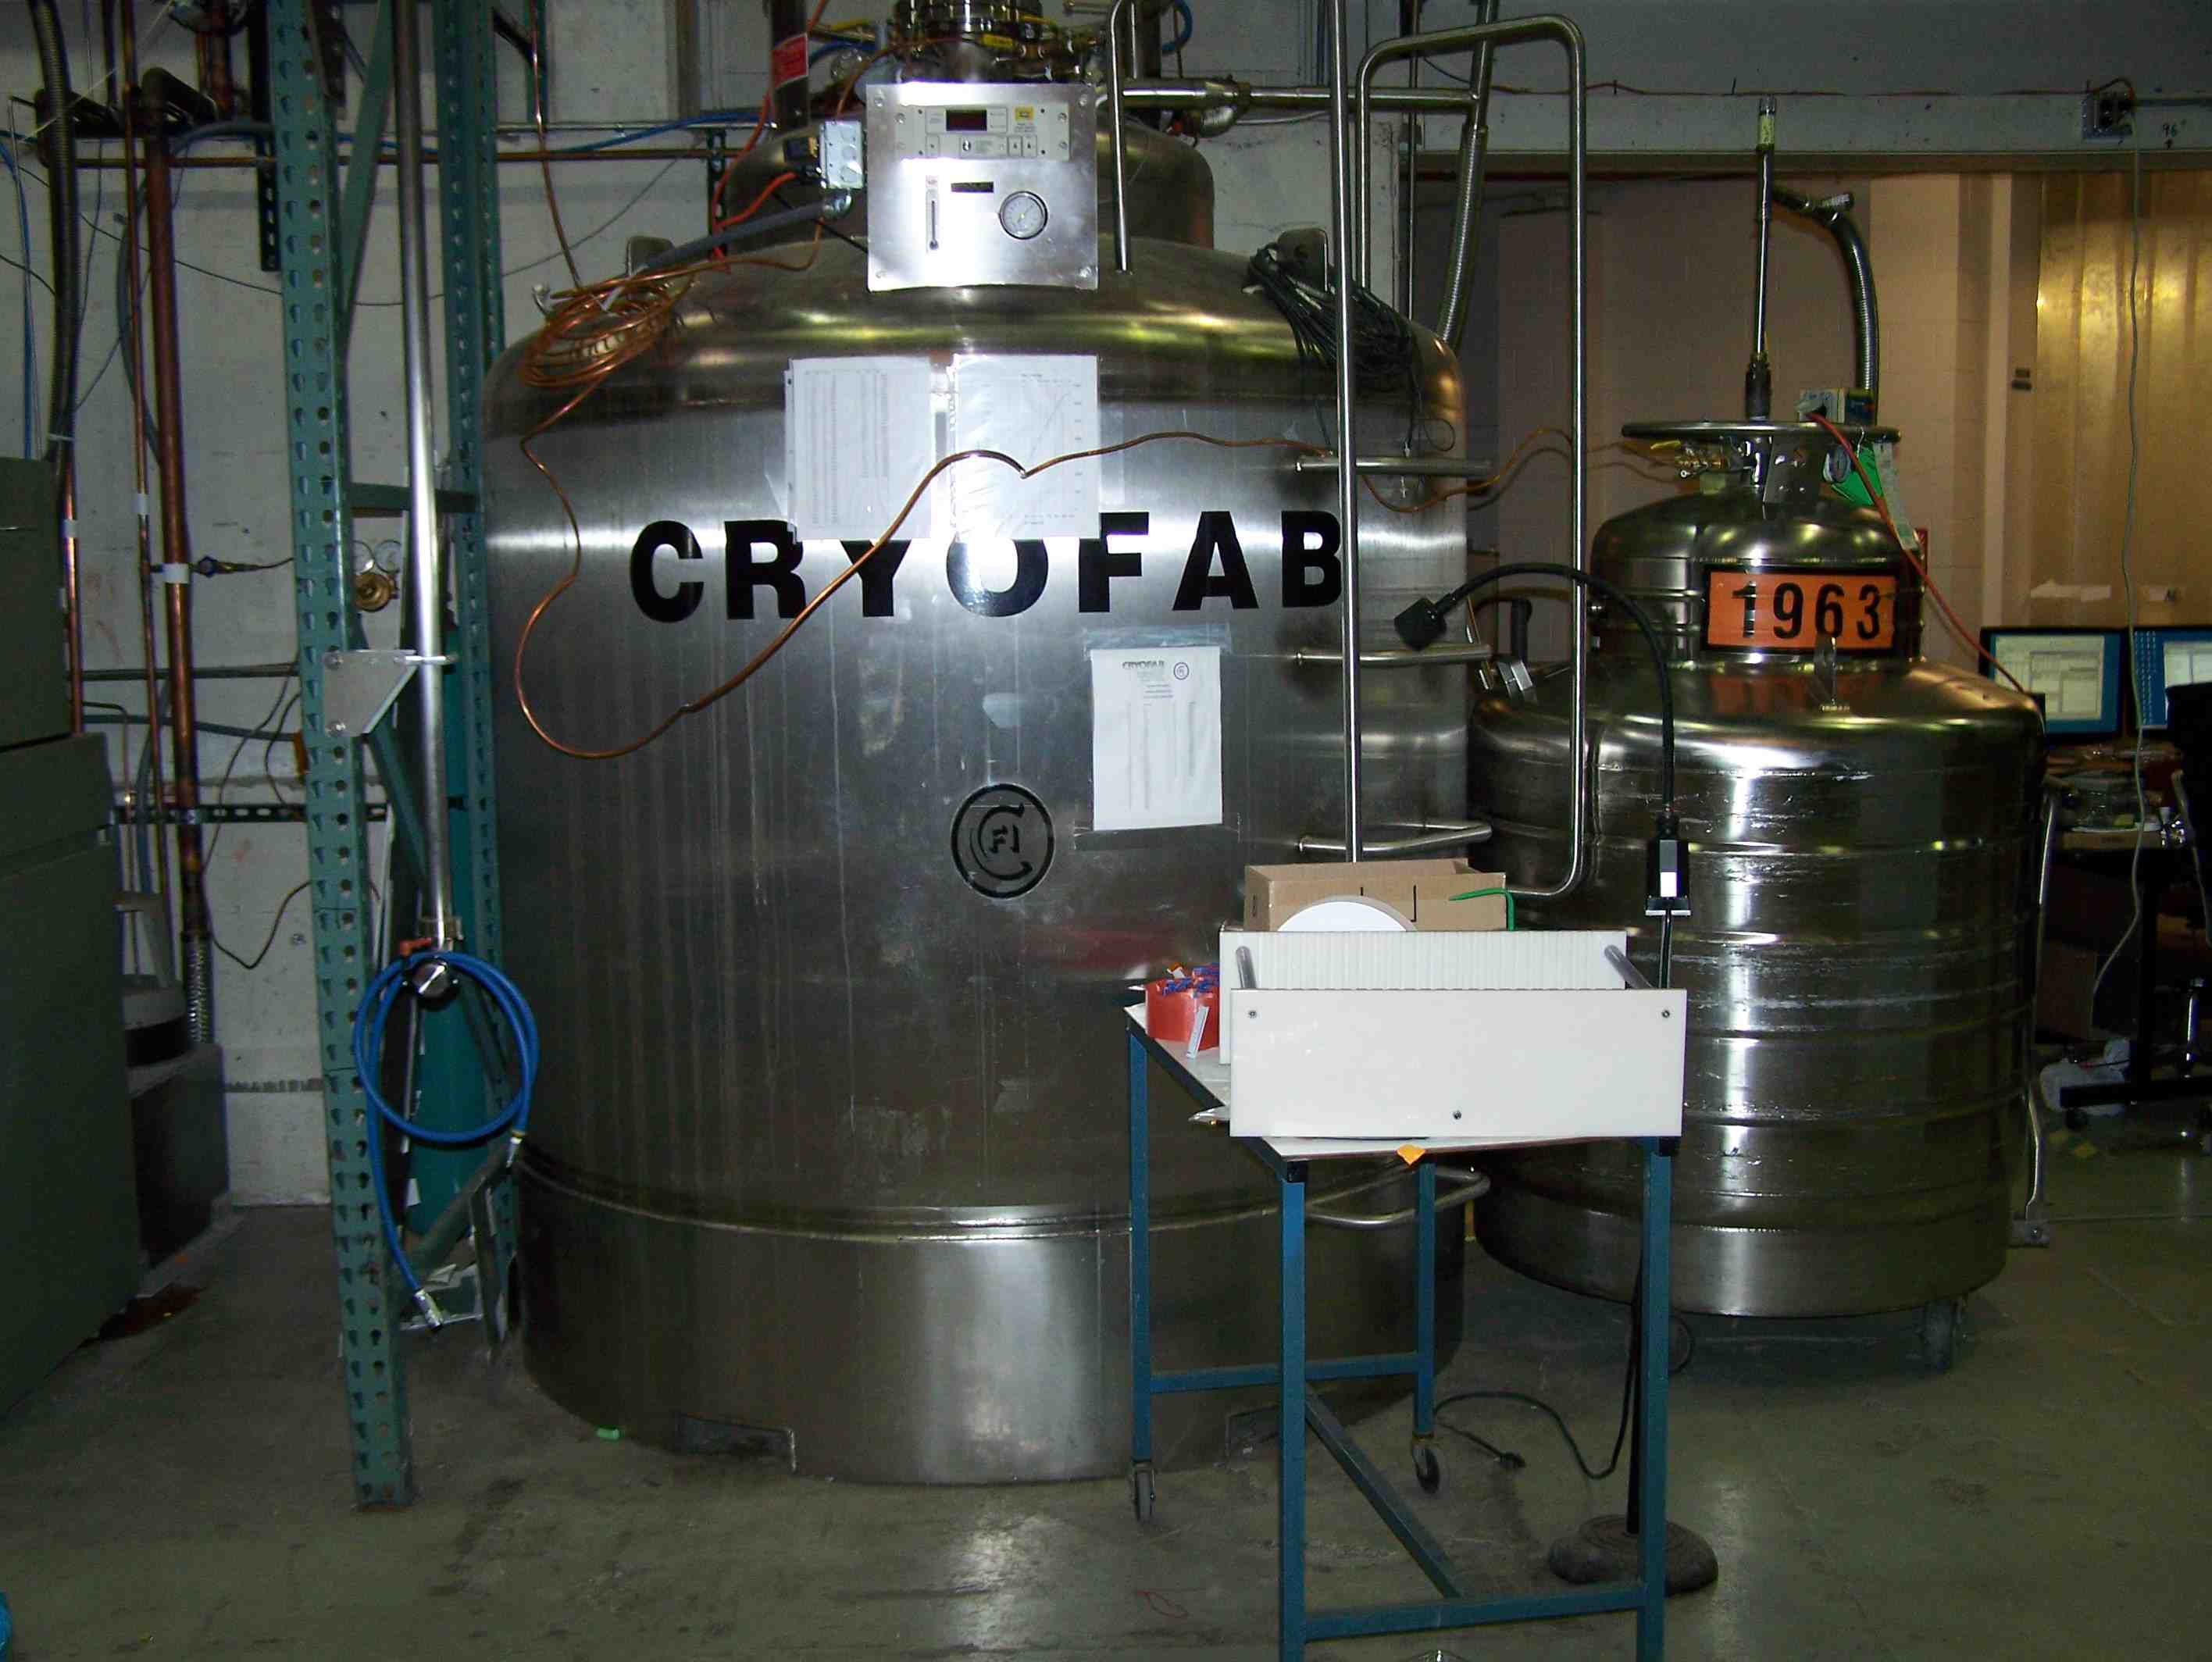 Like other cryogens, LHe is transported and stored in thermally insulated containers called dewars. Never tip LHe dewars when transporting them. Always move slowly and pull them only by their handles, not by the protective ring around the top. If you must crane-lift a dewar, attach the cables to the lifting lugs only.
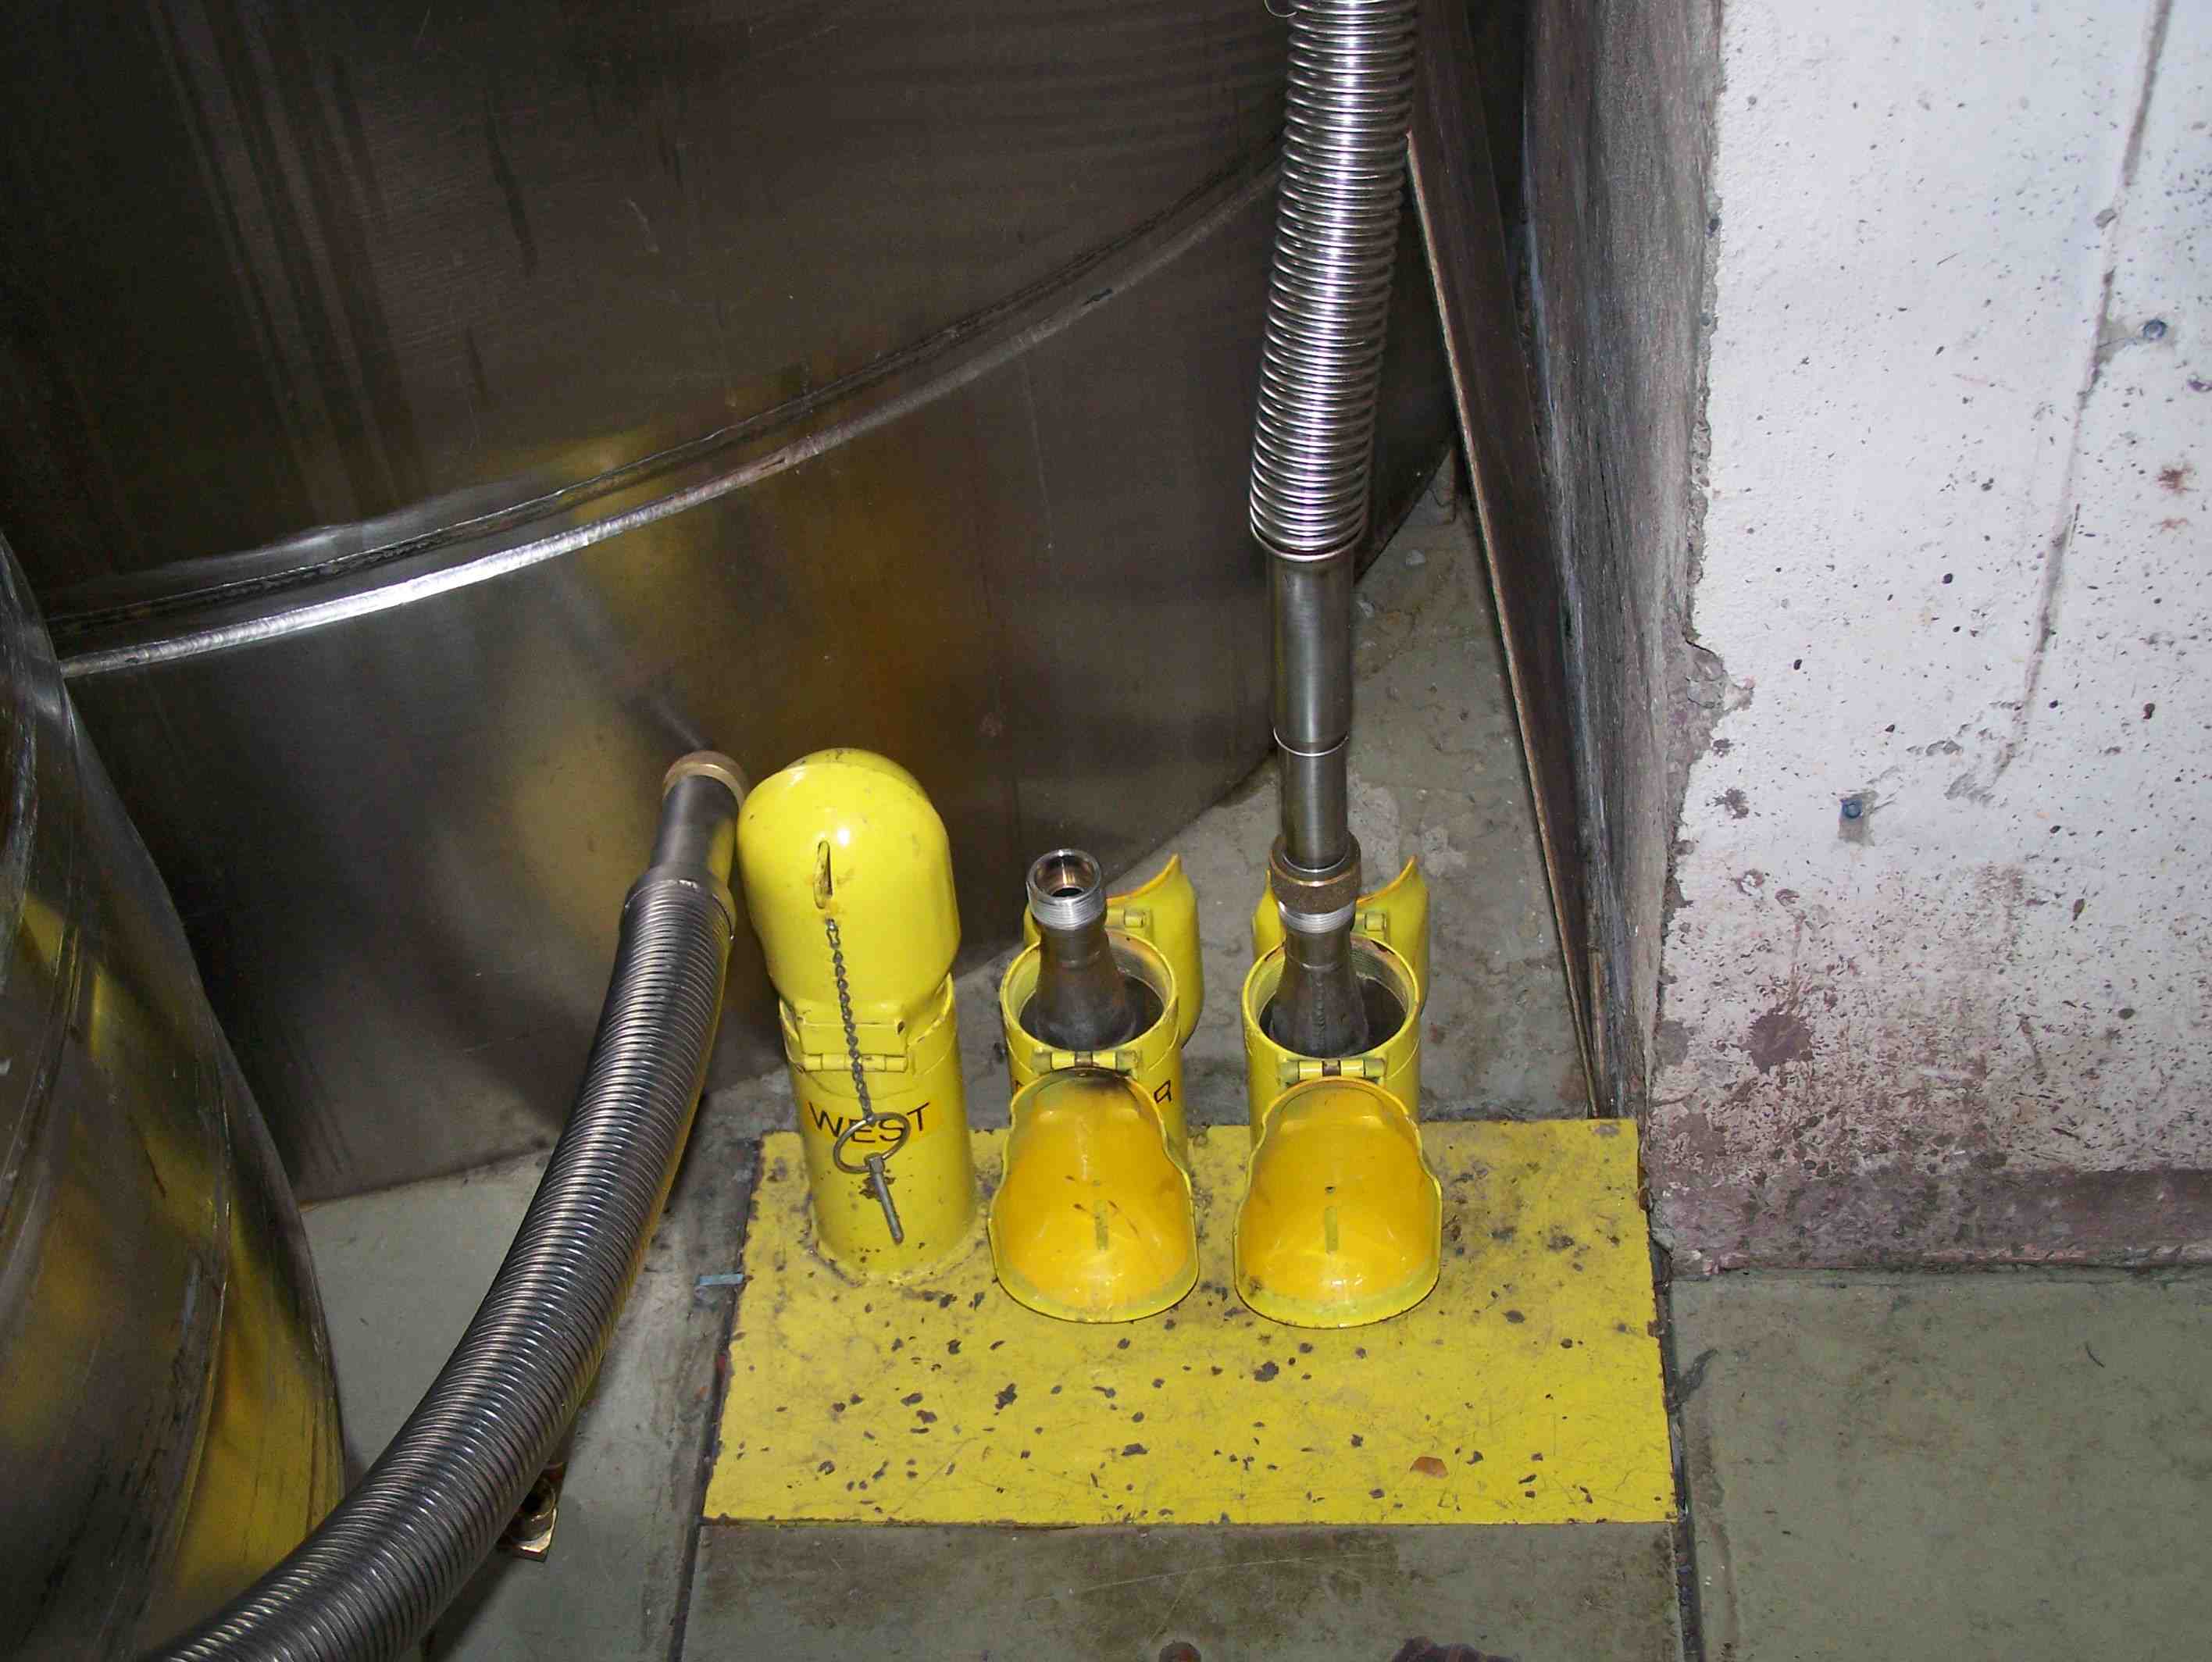 Transferring LHe requires detailed understanding of the procedure, including the use of vacuum-jacketed transfer lines, which can be quite cumbersome and awkward. You must receive on the job training by someone familiar with the transfer process before attempting a transfer.
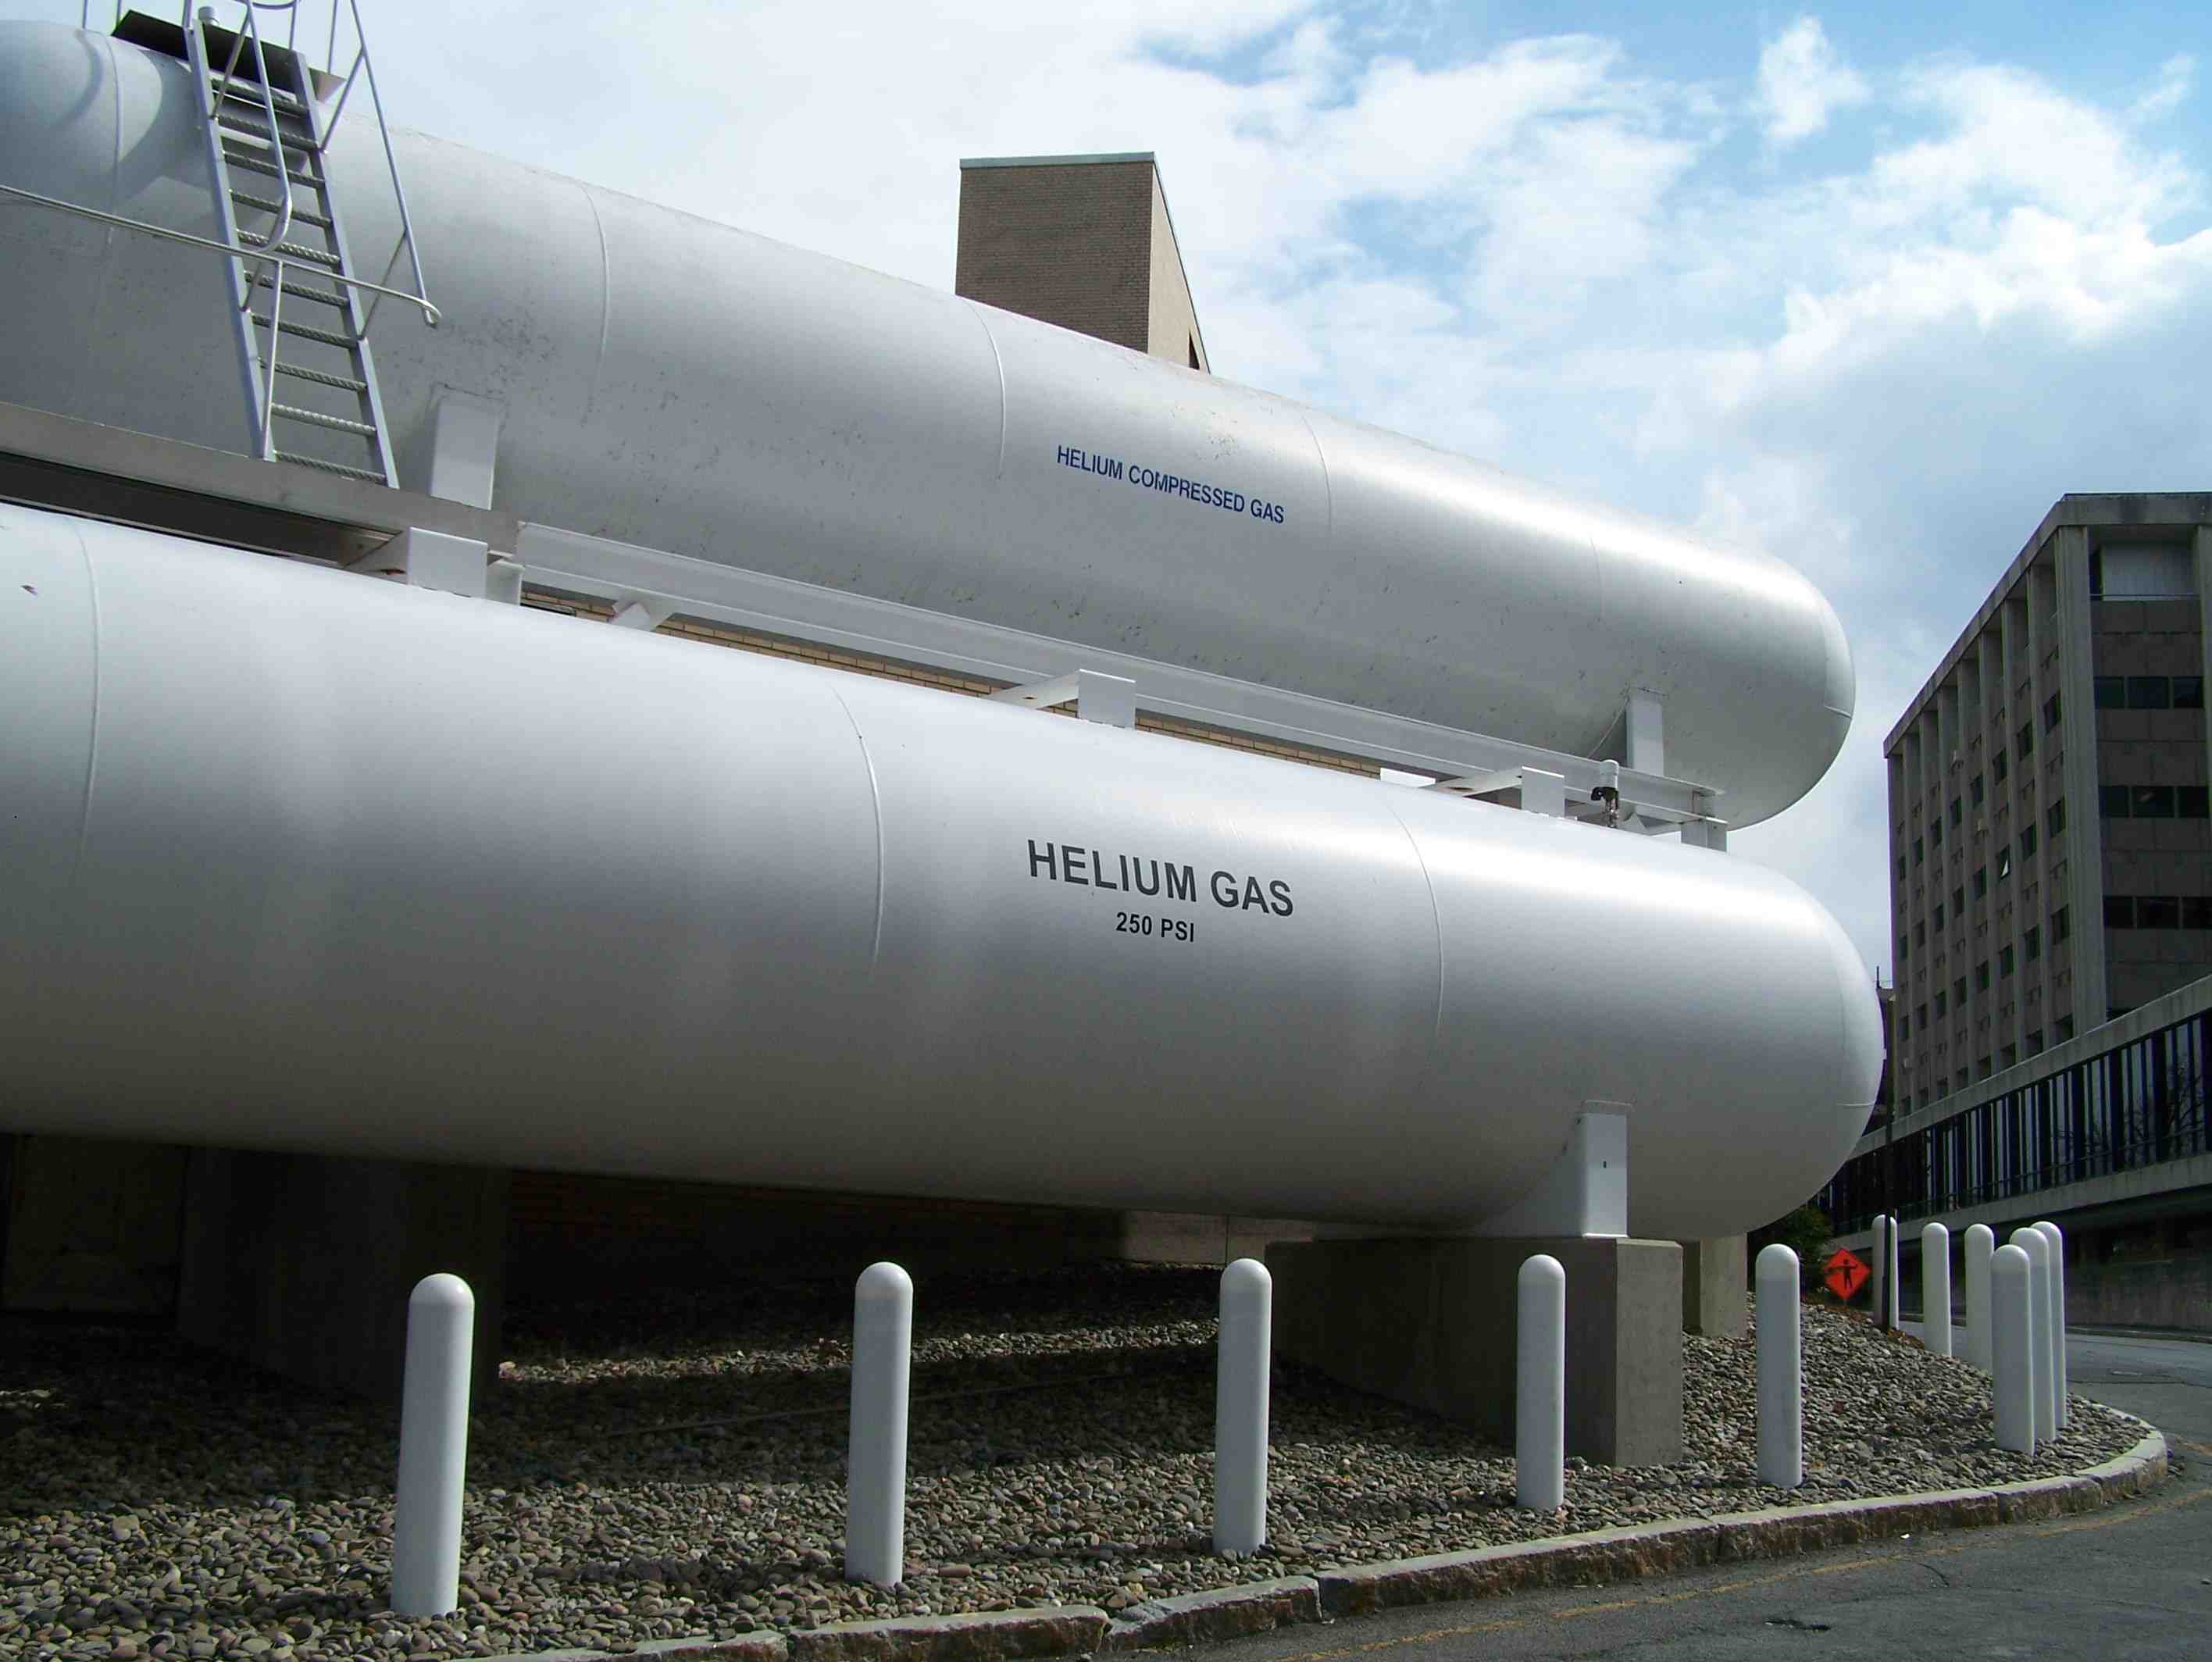 Both Wilson and Newman Laboratories have helium recovery/liquifaction systems which act to avoid helium loss by recooling evaporated helium into a liquid state. (In comparison, liquid nitrogen is relatively cheap, and no recovery system for nitrogen exists.) These systems contain refrigerators, large liquid helium reservoirs, liquid transfer lines, pumps, and large gaseous helium storage tanks which also act as a location for emergency pressure relief. These systems contain numerous safety features should be operated only by trained experts.
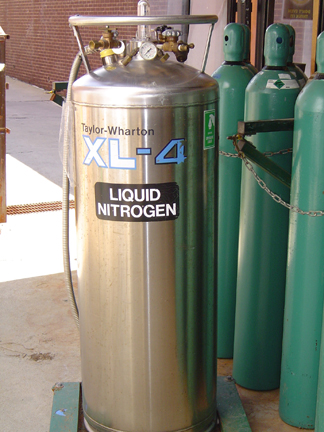 LN2 is sometimes used in the insulating jackets around LHe transfer lines and dewars to prevent rapid evaporation of LHe by radiant heating. LHe boils at a temperature of about 4 K and has a latent heat of about 20 joules per gram, whereas LN2 boils at about 80 K and has a latent heat of about 200 joules per gram. Room temperature is about 300 K. LN2 cools the thermal barrier necessary between LHe and room temperature.
Full LN2 portable dewars weigh about 600 pounds. Use caution when using and transporting them. Transport and tip them only with approved handcarts that can support their full weight. You should receive instruction from someone familiar with the process before filling or transporting a dewar.
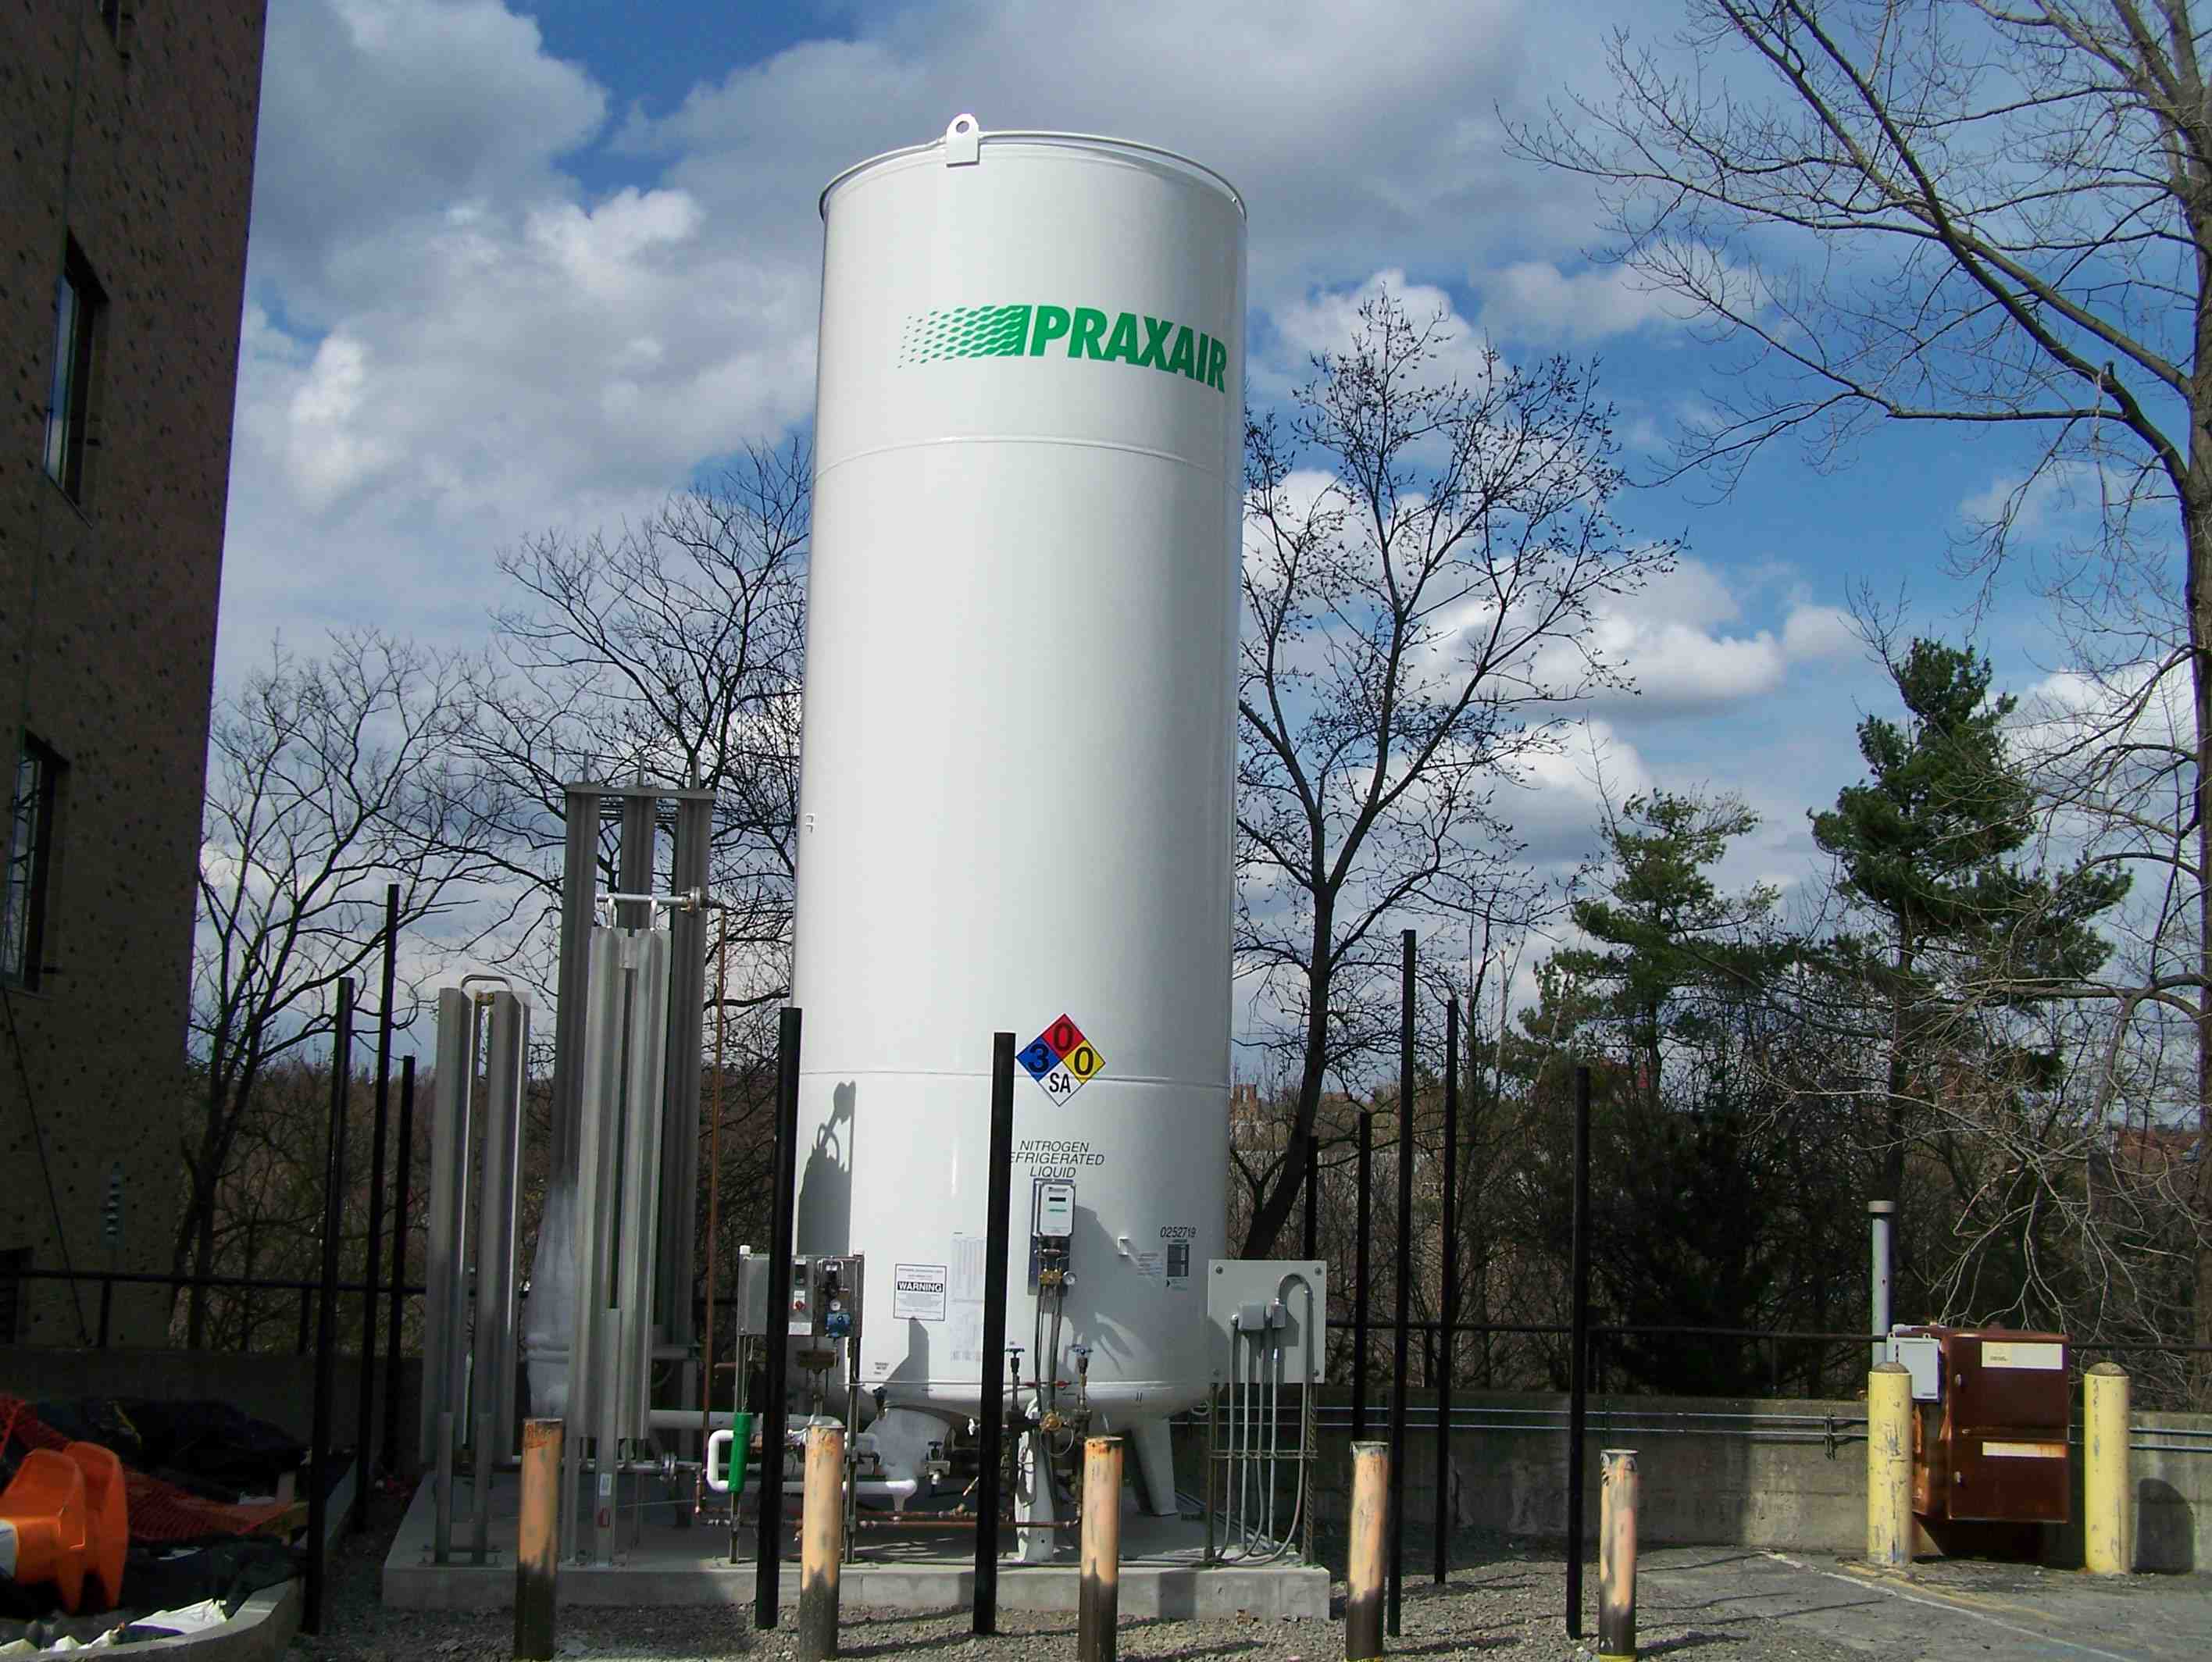 Whereas the cost of helium makes the CLASSE helium liquification and recovery economical, liquid nitrogen is purchased commercially and delivered to large storage tanks (emblazoned with the "PRAXAIR" logo) outside Newman and Wilson. Liquid from these tanks is then piped via insulated transfer lines
 to the locations where large quantities are frequently or continuously needed. Small quantities of liquid N2 are sometimes useful, and small dewars can be filled by hand. Such filling requires the use of appropriate protective attire (see below).
- Liquid Helium
- boiling point of 4.2 K, -269 C, -452 F
- volume ratio of liquid to warm gas is 1 : 757
- Liquid Nitrogen
- boiling point of 77.3 K, -196 C, -321 F
- volume ratio of liquid to warm gas is 1 : 696
Liquid Helium (LHe)
LHe is used for equipment and experiments at very low temperatures (around 4-5 K). LHe cools the CTA magnet in the L0 blue room, CESR wiggler magnets, and superconducting RF cavities in CESR, ERL, and the HTC, as well as those at Newman Lab. Like other cryogens, LHe is transported and stored in thermally insulated containers called dewars. Never tip LHe dewars when transporting them. Always move slowly and pull them only by their handles, not by the protective ring around the top. If you must crane-lift a dewar, attach the cables to the lifting lugs only.
 Transferring LHe requires detailed understanding of the procedure, including the use of vacuum-jacketed transfer lines, which can be quite cumbersome and awkward. You must receive on the job training by someone familiar with the transfer process before attempting a transfer.
 Both Wilson and Newman Laboratories have helium recovery/liquifaction systems which act to avoid helium loss by recooling evaporated helium into a liquid state. (In comparison, liquid nitrogen is relatively cheap, and no recovery system for nitrogen exists.) These systems contain refrigerators, large liquid helium reservoirs, liquid transfer lines, pumps, and large gaseous helium storage tanks which also act as a location for emergency pressure relief. These systems contain numerous safety features should be operated only by trained experts.
Liquid Nitrogen (LN2)
 LN2 is sometimes used in the insulating jackets around LHe transfer lines and dewars to prevent rapid evaporation of LHe by radiant heating. LHe boils at a temperature of about 4 K and has a latent heat of about 20 joules per gram, whereas LN2 boils at about 80 K and has a latent heat of about 200 joules per gram. Room temperature is about 300 K. LN2 cools the thermal barrier necessary between LHe and room temperature.
Full LN2 portable dewars weigh about 600 pounds. Use caution when using and transporting them. Transport and tip them only with approved handcarts that can support their full weight. You should receive instruction from someone familiar with the process before filling or transporting a dewar.
 Whereas the cost of helium makes the CLASSE helium liquification and recovery economical, liquid nitrogen is purchased commercially and delivered to large storage tanks (emblazoned with the "PRAXAIR" logo) outside Newman and Wilson. Liquid from these tanks is then piped via insulated transfer lines
 to the locations where large quantities are frequently or continuously needed. Small quantities of liquid N2 are sometimes useful, and small dewars can be filled by hand. Such filling requires the use of appropriate protective attire (see below).
Personal Protective Clothing
Avoid contact with cryogens or surfaces cooled to cryogenic temperatures to avoid cryogenic burns. Wear dry clothing when transporting or working near cryogens because the risk of cryogenic burns increases with wet skin or clothing. Wear long pants and long-sleeve shirts to avoid trapping any cryogens next to your body. You should also wear high-topped shoes, safety glasses or a face shield, and leather gloves. The gloves should be slightly large so you can remove them quickly in the event of a spill. Remove rings, watches, bracelets, and any other jewelry. Wear a waterproof tyvek suit, available in the stockroom, when there is a danger of being sprayed by cryogenic liquids. If you are burned by a cryogen or a surface cooled to cryogenic temperatures, seek medical attention immediately (for anything other than minor burns, call 911). While waiting for help to arrive, bathe the burned skin with warm, not hot, water. Remember that the skin may be both frozen and burned.Cryogens and Oxygen Depletion
Modest volumes of liquefied gases can displace much larger volumes of air when heated suddenly, leaving the air with a reduced oxygen supply. For this reason it is important to review the hazard in a given room or lab where cryogens are used and engineer appropriate safeguards. Examples where engineered controls were required include the liquid helium and liquid nitrogen used in the CESR tunnels and in the Newman SRF Processing Pits. Whenever cryogens are used in labs, rooms or other restricted volume areas, the volume of the cryogen used and the maximum delivery rate need to be compared to the volume of the use area and its ventilation rate. A simple summary should be discussed with the Safety Director. Although the details of the use of cryogens are usually evaluated when there is a system design, there are guidelines that should be observed from the beginning of the design and included in the Safety Plan. Some of these include- All normal exhausts of evaporated cryogens are vented outside the building or into a large, well-ventillated volume such as L0 at Wilson Lab
- Stored volumes and supply rates are limited to only what is needed
- All reasonably anticipated events that result in a venting of cryogen are engineered to vent outside the limited volume area. These would include quenches, simple vacuum failures, simple operational errors, and warm ups. This is usually accomplished by having a set of pressure relief systems that discharge into an appropriately sized and engineered vent line
- There is adequate ventilation
- Cryogenic storage vessels and delivery lines are protected against casual damage
- No trapped cryogenic volumes
Other Cryogenic Hazards
Cryostats are insulated containers that help maintain equipment at cryogenic temperatures. Each must be equipped with an adequate pressure relief system on any closed volume such as the insulating vacuum, any LN2 jacket, and the LHe vessel. Maximum working pressure of the cryostat must not be exceeded. Some dewars and cryostats use flexible "pigtails" which must be secured to prevent them from whipping around while cryogens are first being transferred through them. Surprisingly, LHe and LN2, which are not flammable in their natural states, can pose fire hazards as cryogens. Because cryogens are so cold, they can cause oxygen from the surrounding air to condense on transfer lines as they flow through them. Concentrated oxygen is a fire hazard, so use insulated transfer lines to prevent condensation.End of Cryogenic Safety
Compressed Gas Safety
Compressed Gas Cylinder Safety
Many of the compressed gases used at CLASSE can be hazardous. While most gases are used in areas equipped to minimize hazards, be aware of the following dangers:-
 pressure: is the cylinder secure? are connecting gas lines leak checked?
- toxicity: (check the SDS)
- flammability: pyrophoric and explosive (check the SDS)
- reactivity: corrosive and oxidizers (check the SDS)
- asphyxiation: would oxygen concentration dip to a dangerous level if the entire cylinder emptied into the room?
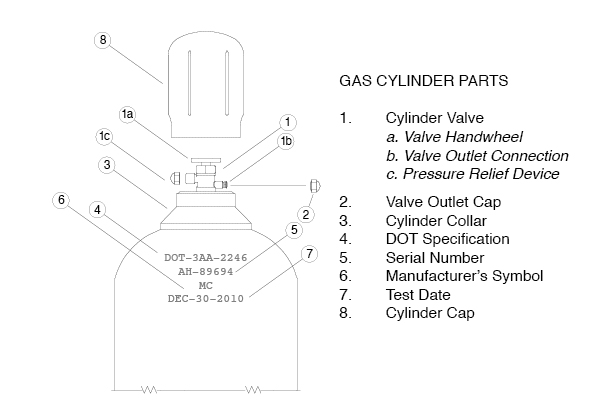
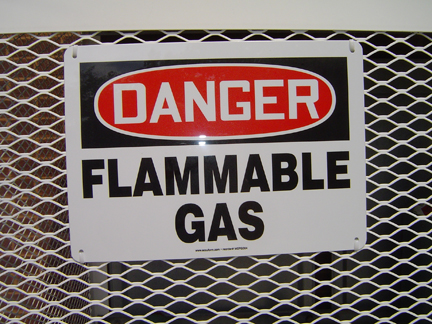
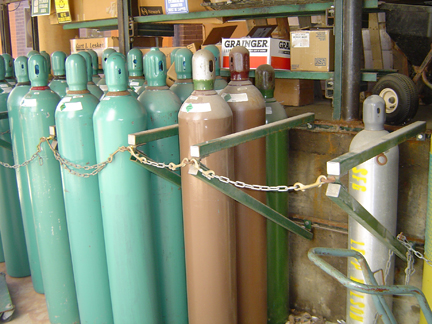 Generally gas should be ordered through the standard blanket-order contract, which should cover the vast majority of applications; speciality gases not available on the blanket-order system should be pre-approved with the CLASSE Safety Director to assure that proper training and controls are in place for storage and use. Gas cylinders not currently in use should be stored, capped and secure, outside Wilson Lab (just outside L0E) or in B29 Newman. Full stored cylinders are separated by flammable vs. non-flammable contents. Within each category, empties should be segregated as well. At Wilson, empty and full cylinders containing flammable gases are stored in cages on the driveway ramp; empty and full cylinders containing non-flammable stock gases are stored near the loading dock door.
Large-scale gas storage
A 13,000 gallon liquid nitrogen tank near the Wilson loading dock serves as the primary source of low pressure dry nitrogen (as well as of liquid nitrogen). Between the driveway and L0E there is a 25,000 gallon tank used for helium gas storage for the cryogenics system. Liquid nitrogen is stored for Newman Lab in a 6000 gallon dewar which is located nearby, adjacent to Olin Lab. Cylinders are also stored outside at Newman Lab near the loading dock. At PSB, gas cylinders in use are stored in designated areas near the laboratories; nonflammables in an interior hallway adjacent to all the third floor labs, and flammables in a separate room in the northeast corner. Gas systems are concentrated in several areas of Wilson Lab. Other small systems are located throughout Wilson and Newman Labs.Accelerator Gas Safety
Sulfur hexafluoride (SF6), which is both non-toxic and non-flammable, is the only gas used in the accelerator. It is a heavy gas that is used to stop electrical arcs from occurring. It is kept in a thirty-five-pound tank in the LS2 hallway east of the control room and is piped in copper tubing to the klystron tubes and into the Linac waveguides.L0 Vent
There is a vent system in the L0 experimental hall that can quickly exhaust any contaminated air outside the building. The L0 Vent buttons are located on the CHESS control panel, the West Flare, and the CESR Control Room. If you know of a leak of toxic or explosive gas, or suspect a large venting of cryogenic liquids in the Wilson Lab experimental areas, inform a CHESS operator or CESR Operator immediately, who will activate the L0 venting system. The operator will likely request evacuation of all personnel from the affected areas.Vacuum Lab Gas Safety
Several small containers of low-pressure gases are used in the vacuum lab. Some of the gases kept are hydrogen, carbon monoxide, methane, carbon dioxide, nitrogen, xenon, oxygen, neon, argon, and helium. Because the quantity of the gases used in the vacuum lab is so small, they pose little or no health or safety hazard. Most of these gases are used to check calibrations and for vacuum tests.Welding Areas
Newman Lab, Wilson Lab, and the Annex all contain welding areas. Several different gases are used for cutting, soldering, and welding. These gases include oxygen, propane, nitrogen, argon, acetylene, argon/helium, and carbon dioxide. : EHS Hot Work/Welding page Always keep combustibles away from oxygen gas because the combination is highly flammable. Always perform welding in an area where others are unlikely to be exposed to the harmful intense light from arcs, erecting opaque screens and/or placing signage warning of the hazard Make sure the welded object is allowed to cool before anyone can come into contact with it, attaching signage if it will be left unattended.End of Gas Safety
Chemical Safety
Chemical Overview
OSHA "Right to Know" and Lab Chemical Safety laws require all employers to provide information and training to employees to ensure that they are apprised of the hazards of chemicals present in their work area. The EPA requires us to dispose of our chemical waste in an environmentally responsible way; Cornell EHS assists us in doing so. The purpose of this chapter is to provide information on how to safely and responsibly purchase, store, use, and dispose of chemicals and where to find the resources you will need. CLASSE follows the federally mandated rules spelled out in the OSHA Hazard Communication Standard and those of the Cornell EHS Chemical Hygiene Plan; both are available in hard copy in the business offices of both Wilson (Room 305) and Newman (Room 134) laboratories (in addition to the links above). The plan stipulates that:- Training programs will prepare employees to work safely with chemicals
- Labels on incoming containers must not be removed or defaced
- Safety Data Sheets (SDS) that are received with the products will be maintained and available to lab personnel
- Information will identify the hazards associated with a chemical
Chemical Training
If you and your supervisor agree your work involves significant use of chemicals, you may be asked to take one or more training sessions either at EHS, CLASSE, or both. When we must use substantial quantities of dangerous chemicals such as in cleaning and etching high vacuum components and niobium super-conducting RF cavities, we use special facilities to do this work safely in our Chem Room in Newman Lab. Anyone who uses or works at CLASSE must receive special training from a CLASSE Chem Room Technician.Safety Data Sheets
Safety Data Sheets (SDS) provide information about chemicals and other products. Each sheet includes information about one product's ingredients, usage, hazards and emergency procedures. Supervisors must provide any relevant SDS as part of preparing an employee or student to use a new product or chemical. Workers must read them to be prepared to use the product safely. As an example, examine this sulfuric acid SDS. Note that SDS do not all look alike because different manufacturers provide them. SDS binders are located in the first floor receiving area in Wilson Lab and in the business office of Newman (Room 134) Lab. Smaller sets of chemicals commonly used in those locations are kept in the Newman chemical room (B50D) and some of the shops. When looking up a product, try the brand name and/or the product type. For example, Acme Ant Gel may be under Acme and/or under Ant Gel. Cornell EHS provides links to many searchable SDS websites on its SDS page. You can also locate them via web search engine, or at the SIRI site or the local CHESS site. If you cannot find the SDS you need, EHS can get it for you upon request. After reading an SDS and learning about the hazards associated with a chemical or other product, be sure to discuss with your supervisor, or the area supervisor, your own plans for using the product and what precautions you plan to take. If you plan to use a chemical you've used before, but in a different location, please check with the supervisor of that area in order to ensure safety. If you have not used the chemical before, you or your supervisor must discuss your plans with the CLASSE Safety Director.Chemical Warning Labels
OSHA requires that manufactured chemical products come labeled with the chemical name, hazard warnings, handling precautions, and manufacturer's name and address. Leave these labels in place and do not obscure or deface them.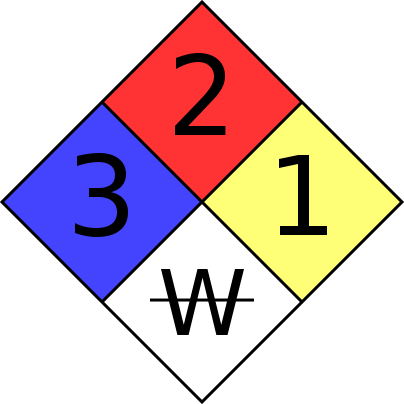 There is a standard for such labels established by the NFPA (National Fire Protection Association). Quoting from the NFPA 704 FAQ on what is sometimes known as "the NFPA Diamond": "The standard provides a readily recognized, easily understood system for identifying specific hazards and their severity using spatial, visual, and numerical methods to describe in simple terms the relative hazards of a material. It addresses the health [left, blue], flammability [top, red], instability [right, yellow], and related [bottom, white] hazards that may be presented as short-term, acute exposures that are most likely to occur as a result of fire, spill, or similar emergency." Each colored diamond is numbered as 0 (no hazard), 1, 2, 3, or 4 (most hazardous). An example appears at right and a guide is shown below.
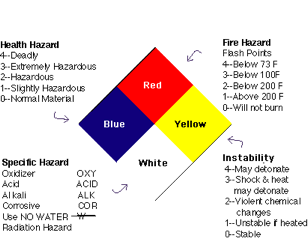
Common Chemicals and Hazardous Materials
No matter how harmless a chemical may appear, it can be dangerous. More accidents happen with common chemicals than with chemicals used for special purposes. Some examples of the hazards involving the following chemicals that are commonly used at the Lab: Methanol, isopropanol, ethanol, and acetone are all common chemicals that are used throughout CLASSE for cleaning equipment as well as other purposes. All of them are flammable and can be explosive if used improperly. Excessive exposure by inhalation, skin contact, or ingestion can cause serious health consequences. They should be used in either a fume hood or a well ventilated area. Gloves and eye protection are required when working with these chemicals. None of these are drain-disposable. All must be treated as hazardous waste and disposed of by Cornells EHS. Lead metal, unlike the "lead" in leaded gasoline, cannot be absorbed through the skin. However, it is harmful if inhaled or ingested because it gets into the blood stream. It is a cumulative poison that may cause decreased physical fitness, fatigue, sleep disturbance, headaches, abdominal pain, kidney damage, brain damage, and other severe conditions. Never cut, sand or machine lead bricks without special training. Always wear gloves (leather or rubber) and protective footwear when handling lead and wash your hands afterward. Sweep up any chips created by machining lead and give them to the rigging crew or EHS for recycling. Beryllium: Beryllium is a silver-gray metal that has been produced for various industrial uses since the late 1950s. Inhalation of beryllium particles can cause a serious illness in certain people. This illness is chronic beryllium disease, or CBDan irreversible and sometimes fatal scarring of the lungs. Do not touch Beryllium-containing components with bare hands.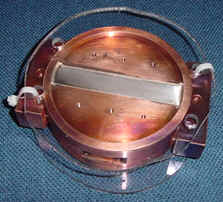 Articles that may contain Beryllium include (but are not limited to):
 - X-ray transparent containers, in particular as a part of specimen holders.
- X-ray windows on detectors (Bicron, Amptek), or beamline components such as flight tubes.
- High heatload compatible components.
- Ceramics used in electronics devices and other equipment.
- Springs, switches and relays.
- High-strength non-sparking tools.
Protective Clothing
Every chemical is potentially hazardous, so take simple precautions if you use any. Do not wear contact lenses, shorts, skirts, or open-toed shoes. Restrain long hair. You must wear appropriate protection when you work with chemicals. Possible protective clothing you should use includes aprons, lab coats, boots, acid gloves, safety glasses, and face shields. After using reusable items, such as acid gloves, wash them thoroughly for the protection of the next user.Eye Wash and Shower
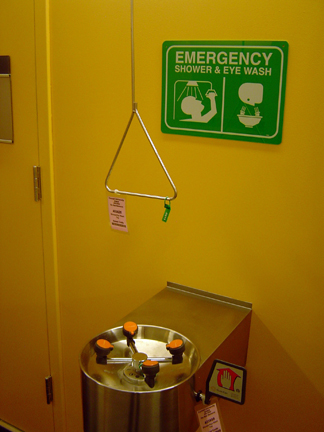 Eye washes and/or showers are located at several locations in Wilson Lab, Newman Lab, and the Physical Sciences Building. If you are working with hazardous chemicals, read the SDS to find out if eyewashes and showers might be useful in the event of a spill, and familiarize yourself with the nearest such station's location and operation. The wearing of appropriate protective clothing should, in most cases, prevent the need for such situations.
Chemical Purchase and Disposal
If you plan to purchase any chemicals, keep in mind that disposal of both unused and waste chemicals costs money. Purchase only the quantities of chemicals you need. These chemicals have hazards associated with them. Obtain, read, and understand the SDS for the chemical before you purchase it. Use that information to plan and prepare to use it safely. Discuss your plan with your supervisor and a Chem Room Technician, or the CLASSE Safety Director. Give copies of the SDS to anyone who will be working with it and put a copy in the SDS binders. As the purchaser, you are responsible for storing chemicals safely and labeling them correctly. Never leave chemicals in unlabeled containers. Aside from presenting unknown dangers to those working around the chemicals, identification and disposal of the chemicals involves a costly analytical process. Disposal of chemicals requires environmental responsibility. Never pour anything down a sink or throw anything away before checking the chemical's SDS and Section 7 of the Cornell Chemical Hygiene Plan (available in the Newman and CHESS Chem Rooms, the Business Office, and near the Wilson loading dock). Chemicals clearly identified as non-hazardous in the plan should be marked "Non-Hazardous" and put directly in the dumpster. Custodians are not allowed to dispose of any chemical. For hazardous chemicals that must be disposed of by EHS, follow the EHS instructions: obtain a Cornell Hazardous Waste tag from the Newman or Wilson chemical rooms or by requesting one from this email address, fill it out (leaving top copy with the waste) and make the pickup request online from EHS. Store the chemical in secondary containment with a copy of the SDS nearby. EHS should pick it up within 3 days. If you still have questions, check with your supervisor, the Newman or CHESS Chemical Room Technicians, the CLASSE Safety Director, or EHS. Procedures for purchase and disposal of chemicals (and compressed gases) are different for the Physical Sciences Building. All materials not delivered through the building loading dock must be registered with the Safety Manager and bar-coded. Empties are dealt with by placing the bar code on this form and sending it as instructed on that form.The Chemical Room (Newman B50D)
Only employees who have the permission of their supervisor, have been specifically trained, and have received permission from a Chemical Room Technician may use the chemical room at Newman Lab. You must wear eye protection to enter the Newman Chem Room, and may enter only if either (a) a trained staff member is present, or (b) you have the appropriate training specific to this space. Work in the chemical room is limited to established procedures with specific chemicals. Acids used in large quantities include nitric, phosphoric, hydrofluoric, and sulfuric acids. Solvents used in large quantities include methanol, acetone, and isopropanol. Choose the least hazardous chemical you can that will do the job. Purchase or use only what you need. Before you start, become familiar with the information on the Safety Data Sheets. Do not put yourself or others at unnecessary risk.End of Chemical Safety
Biological Safety
Biological hazards at CLASSE are restricted to CHESS. Specific practices for CHESS appear below; general resources are the CDC publication "Biosafety in Microbiological and Biomedical Laboratories (5th Edition)", available here, and the set of EHS BioSafety Manuals (access restricted to those with a Cornell NetId). Biohazards are separated into four safety classifications: BSL-1, BSL-2, BSL-3, and BSL-4. BSL-1 is the lowest level and requires minimal precautions. BSL-2 hazards, agents of moderate potential hazard to personnel and the environment, do not have to be contained in the biohazard facility. However, those BSL-2 hazards such as the Cocksackie virus or the more commonly known Hepatitis B virus, are generally used only in the biohazard facility. BSL-3 hazards, agents which may cause serious or potentially lethal disease as a result of exposure by inhalation, include viruses such as Mycobacterium tuberculosis. CHESS prohibits the presence of BSL-3 or the more hazardous BSL-4 materials, the latter of which are dangerous and exotic agents which pose a high individual risk of life-threatening disease. The CHESS F1 station and the accompanying access room, control room, and biohazard room constitute the CHESS biohazard facility. This facility provides a place for CHESS users to work with biological samples that require up to BSL-2-level precautions. Some BSL-2 work can be approved for the cold room. When biohazards are transported into the lab, they must be double-sealed and stored in sturdy containers that are clearly marked with a biohazard symbol.Biohazard Procedures at CHESS
- Biohazardous agents which may be used at CHESS are restricted to small amounts of viruses of classification BSL-2 or below. Use of these materials must be approved in advance by the CHESS User Safety Subcommittee and CLASSE Safety Committee. The safety binder at the ops desk will have a list of the approved viruses for a user's current visit.
- All users of biohazards must have received appropriate training, either at the user's home institution (P.I. certifies training) or at CHESS (cognizant Safety Officer certifies training). Users should verify training at the time they sign out radiation badges.
- The cognizant Safety Officer, or designee, will check in biohazards, inform the CHESS operator about them, and write on the safety whiteboard: station, nature of hazard, Safety Officer's name and phone number.
- BSL-2 procedures (see below) are to be followed for handling BSL-2 viruses (this document is provided to all users of such materials and is also available in the safety binder at the ops desk and on-line in the "Procedures" section). Note particularly:
- Viral materials must be checked in and out.
- BSL-2 materials are restricted to certain areas (usually the F-1 station), which are labeled with biohazard signs. Access to these areas is restricted to those who need to be there.
- Surfaces, equipment, and personnel must be protected from contact with infectious material. Absorbent paper for covering surfaces is stored in F-1.
- Bleach or other suitable disinfectant must be on hand in any areas where biohazards will be handled, also a sharps container and biohazard bags.
- In the case of a small, contained spill, users can clean it up themselves. For a larger spill, or other emergency, or incomplete cleanup of a small spill, users will notify the CHESS operator, who will call in the cognizant Safety officer.
- Emergency procedures are in the safety binder at the operator's desk.
- A container for biohazardous waste is located in the F-1 prep area. At the conclusion of the experiment, all biohazardous waste must be placed in biohazard bags or sharps containers, labeled, and placed in this container for later pickup by EHS. A supply of labels are kept with the container; more can be obtained from EHS.
- Hazardous materials must be checked out by the safety officer on completion of the experiment.
Spills of virus-containing material
- Small spill on benchtop, table, or floor
- Wear protective equipment (lab coat, gloves, goggles).
- Cover spill with paper towels soaked in disinfectant.
- For BSL-2 viruses, allow 20 minutes for all virus to be inactivated.
- Use paper towels to wipe up spill, working from edges inward.
- Clean spill area with fresh towels soaked in disinfectant.
- Place all used towels in a biohazard bag.
- Larger spill on benchtop, table, or floor
- Block access to area of spill.
- Inform CHESS operator, who will contact cognizant Safety Officer if necessary.
- Clean up spill, as above. For a large volume of spilled material, pour additional disinfectant on it after covering area with paper towels.
- When cleanup is complete, remove barrier around area and inform operator.
- Small spill on equipment in hutch
- Clean up as much as possible, as for spill on benchtop.
-
- Turn off and remove lamp.
- Larger spill on equipment, or other difficult-to-clean items
- Block access to area of spill.
- Have CHESS operator contact Safety Officer and/or EHS for help in cleaning up spill.
- Exposure of personnel to virus
- Inform CHESS operator.
- If medical attention is required, contact Gannett Clinic or Cayuga Medical Center.
Procedures for BSL-2 materials at CHESS
In general, NIH/CDC guidelines for dealing with BSL-2 material should be followed. Relevant practices for areas in which viruses will be handled include:- No eating, drinking, smoking, applying contacts or cosmetics; no pipetting by mouth.
- Wear appropriate personal protective equipment (PPE) - at least gloves and lab coat.
- Wash hands after removing gloves or handling biohazardous material.
- Restrict personnel access while work with biohazards is in progress.
- Decontaminate work surfaces at least once a day.
- Use a biosafety cabinet when there is danger of creating infectious aerosols.
- Crystals of the virus will be brought to CHESS in a double-sealed, appropriately labeled container, as required by the DOT for transport of infectious materials. Crystallization trays or sealed capillaries, containing unfrozen crystals, will be surrounded with absorbent material and sealed within a sturdy outer container. Frozen crystals will be contained in vials enclosed in a Dewar or dry shipper; the container will be secured so that it cannot tip over.
- Virus crystals will be usually be kept in the F-1 station. However, they may also be stored in another room, such as the cold room or the chemistry lab, if necessary (e.g. if crystals must be mounted in the cold or if they are being used at the A-1 or F-2 stations). The cognizant Safety Officer, or his/her designate, is to verify the nature and amount of viral materials brought by the user.
- Biohazard warning signs will be placed on the doors of all rooms in which crystals will be stored or used. Access to areas in which crystals will be handled will be restricted to the investigators, the CHESS and MacCHESS operators, and members of the CHESS User Safety Subcommittee and CLASSE Safety Committee. If other personnel require access to such an area, the crystals shall be first contained in a suitable box, except for a crystal actually mounted on the oscillation camera.
- Table and bench tops in the storage and mounting area will be covered with plastic-backed absorbent paper, which is soft enough so that any dropped capillary or crystal will not bounce off, and absorbent enough to soak up any spills. When crystals are actually being manipulated, it is recommended to cover the immediate area with absorbent paper wetted with disinfectant, so that any dropped crystal will be inactivated.
- In the hutch, any surfaces on which a capillary or crystal might fall will be covered with plastic-backed absorbent paper. If frozen crystals are being used, any equipment which could be contaminated in case of failure of the cryosystem (e.g. the rotation stage) should be protected by a plastic shield which can be removed and decontaminated. Freezing of crystals directly into the cold stream is permitted, provided coverage of surfaces and equipment is adequate to catch any viral material which could be dropped in the mounting process. A germicidal lamp will be available in the hutch, in case decontamination is needed.
- Mounting of crystals into capillaries, or freezing of crystals into liquid nitrogen (or other substance such as propane), will be performed in the room where the crystals are stored, or in the F-1 Biosafety Cabinet. The Biosafety Cabinet is to be used when there is a possibility of creating aerosols during the mounting process. Flammable materials such as propane are not to be used in the Biosafety Cabinet.
- Loaded goniometer heads will be carried from the storage and mounting area into the hutch enclosed in sealed, non-breakable containers. If such a container is dropped, any spill of viral material will be contained within it. Crystals frozen in the storage and mounting area will be transported to the hutch in a container of liquid nitrogen which is enclosed in an outer container to catch any spills.
- Because of the containment procedures given above, any spill (e.g. a dropped crystal or a broken capillary) should be limited to an absorbent paper-covered surface or the interior of a container. The users will clean up the spill, using bleach or other suitable disinfectant to decontaminate any places (e.g. absorbent paper or the inside of the outer container) where viral material might have landed. Broken capillaries are to be placed in a "sharps" container for later disposal. In the unlikely case of a spill which involves unprotected surfaces or equipment, or in which an aerosol may have been produced, the cognizant Safety Officer will be consulted to determine appropriate decontamination procedures. A reminder of procedures to follow in case of spills will be posted in the crystal mounting and storage area, and in the hutch.
- Used capillaries are to be placed in a "sharps" container. Used frozen crystals are to be either disposed of in a biohazard bag (use disinfectant solution to wash a crystal out of a cryoloop into a small container and put the container in the bag, if the loop is to be salvaged) or stored in a Dewar, still frozen, for possible later use.
- At the completion of their experiments, the users will roll up the absorbent paper and dispose of it in a biohazard bag. All surfaces which could have been contacted by virus will be washed with a suitable disinfectant, e.g. bleach or alcohol. The materials used for this cleanup, e.g. paper towels, will also be disposed of in the biohazard bag. Biohazard bags and sharps containers of used capillaries will be placed in a biohazard container (provided by CHESS) for later pickup by Cornell EHS. The cognizant Safety Officer, or designate, is to verify that no biohazardous materials have been left at CHESS, except in the biohazard container.
End of Biological Safety
Facilities
CLASSE activities occur in several facilities at Cornell University:- Wilson Synchrotron Laboratory
- Main building: offices, labs, CHESS, L0, L0E, LS1, LS2, shops, utililties, CESR linac, ERL Phase 1a
- West Modular Unit (aka "CHESS Trailer"): CHESS offices
- Center Modular Unit (Stockroom & eXploration station): Education & Outreach (western half), Stockroom (eastern half)
- East Modular Unit (Computer Group & Electronics Shop): Electronics shop (southern half), Computer Group (northern half)
- Annex (across Dryden Road)
- CESR Tunnel
- East & West Flares
- Cross-tunnel
- Numbered ring locations: L0, L1 (NE of L0), L2, L3 (aka North Area), L4, L5
- CHESS G-line
- Newman Laboratory: offices, labs
- Newman Accelerator Building: SRF laboratory
- Physical Sciences Building, third (offices & laboratories) & fourth (offices) floors
(Link to high resolution Wilson 1st floor plan (4.4MB))
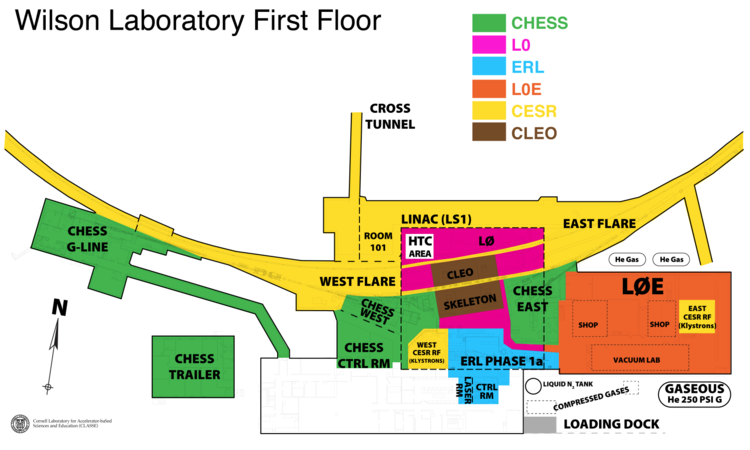
(Link to high resolution Newman Lab Basement plan (6.8MB))
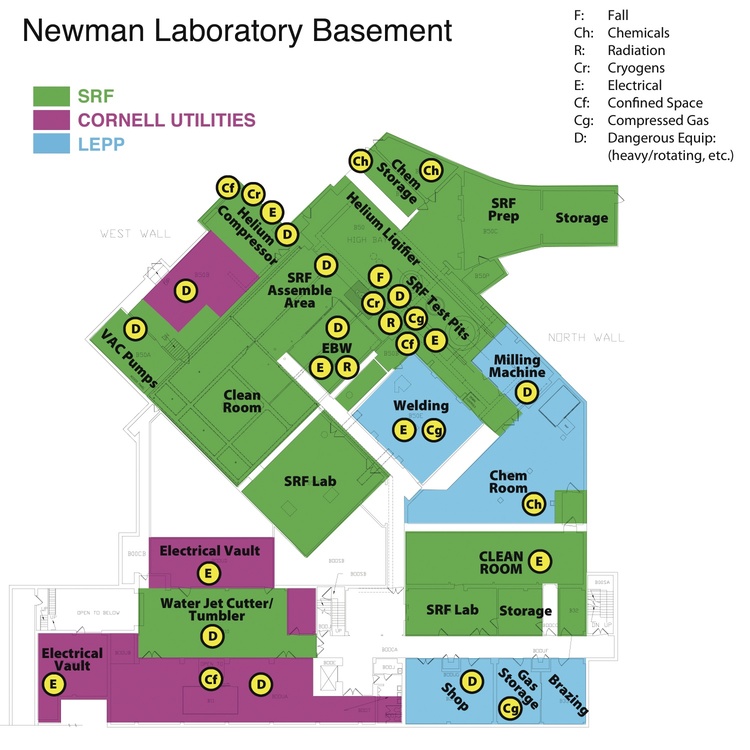
End of Facilities
Safety Documents
Official CLASSE Safety documents (aside from this Handbook) are now accessed from an Electronic Data Management System (EDMS) developed at CERN by Invenio. Links to categories of CLASSE safety documents appear below. To access a document, first click on the category link below, and then on the "PDF" link a few lines under the title of interest. This will load a copy of the PDF file, viewable by Adobe Reader and other viewers. The Search function on each page can assist you in locating desired titles, authors, or keywords. Some entries contain multiple documents: in order to access one of the auxilliary documents, first click on the title, and then on the "Files" tab, which should bring up a list of other files, and click on the one you want.- Safety Procedures
- Safety Notes
- Safety Plans
- Safety Presentations
- Permits & Applications
- Safety Committee Meeting Minutes (restricted to Safety Committee & CLASSE Administration)
- Incident Reports (restricted to Safety Committee & CLASSE Administration)
Who's Who in CLASSE Safety
CLASSE Safety Committee: (click to email) Katie Jacoby, M. Billing, G. Codner, H. Conklin, D. Dale, R. Gallagher, B. Heltsley, D. Jusic, M. Ray, D. Richter, J. Sears, D. Widger, CLASSE Director & Associate Director (ex-officio) CHESS Safety Subcommittee: (click to email) D. Richter (chair), K. Finkelstein (vice-chair), M. Szebenyi, A. Kellicutt, A. Woll, CHESS Director (ex-officio)| Safety Contact | Name (click to email) | Phone: (607) 25- |
|---|---|---|
| CESR Director of Operations | Mike Forster | 5-8777 |
| CESR Operator Supervisor | Dragana Jusic | 5-8705 |
| CESR Technical Director | Dave Rice | 5-8786 |
| CESR Technical Services Supervisor | Mike Ray | 5-8238 |
| Chemical Room (Newman) | ||
| Newman | Holly Conklin | 5-5737 |
| Newman | Terri Gruber | 5-5311 |
| CHESS Associate Director | ||
| CHESS Chemical Rooms | Katie Moring | 4-4930 |
| Backup | Dana Richter | 4-1227 |
| CHESS Director | Joel Brock | 5-9006 |
| CHESS Operations Manager | Chris Conolly | 5-0913 |
| CHESS Safety Officer | Dana Richter | 4-1227 |
| CHESS User Administrator | Kathy Dedrick | 5-0920 |
| CLASSE Administration | Katie Jacoby | 5-4158 (N), 5-3733 (W) |
| CLASSE Director | Ritchie Patterson | 5-4374 |
| Compressed Gases | Ken Powers | 5-4882 |
| Cryogenics | Dan Sabol | 5-3124 |
| Facilities Engineer | Richard Gallagher | 5-0695 |
| Fire Marshal (Wilson, Newman, Annex) | Richard Gallagher | 5-0695 |
| Forklifts, Cranes, Rigging | Clay Ball | 5-4882 |
| Hazard Assessment Signage Program (HASP) | ||
| LEPP | Richard Gallagher | 5-0695 |
| CHESS | Dana Richter | 4-1227 |
| PSB | Keane Leitch | 5-8773 |
| Laser Safety Officer | Adam Bartnik | 5-4150 |
| LEPP Director | David Rubin | 5-3765 (P), 5-8183 (W) |
| Machine Shops | John Kaminski | 5-5019 |
| Newman Lab | James Sears | 5-7462 |
| Physical Sciences Bldg (3rd & 4th floor) | Brian Heltsley | 5-4929 (W), 5-5743 (P), 277-3260 (H), 351-4143 (Cell) |
| Physical Sciences Building: Building Manager | Todd Pfeiffer | 5-1731 |
| Physical Sciences Building: Safety Manager | Keane Leitch | 5-8773 |
| Radiation Permit Holders | ||
| CESR | David Rice | 5-8786 |
| ERL | Bruce Dunham | 5-4790 |
| Newman | Matthias Liepe | 4-8937 |
| Permitted [hot] Sources | David Rice | 5-8786 |
| Registered [smaller] Sources | Brian Heltsley | 5-4929 (W), 5-5743 (P), 277-3260 (H), 351-4143 (Cell) |
| 1 Portable x-ray source | Marian Szebenyi | 5-5717 |
| 2 Portable x-ray sources | Peter Revesz | 5-0915 |
| 1 Hutch-based x-ray source | Ken Finkelstein | 5-0914 |
| Radiation Safety Specialist (RSS) | Dwight Widger | 5-5558 |
| Safety Committee Chair | Katie Jacoby | 5-4158 (N), 5-3733 (W) |
| Safety Director | Brian Heltsley | 5-4929 (W), 5-5743 (P), 277-3260 (Home), 351-4143 (Cell) |
| Superconducting RF Group | Georg Hoffstaetter | 5-5197 (N), 4-8981 (W) |
| Vacuum Group | Brent Johnson | 5-4882 |
Glossary
accelerator : an apparatus that accelerates elementary particles to higher energies. At Wilson Lab, this usually refers to the linac, the synchrotron, and the storage ring together; each is individually an accelerator, as is the ERL : an apparatus that accelerates elementary particles to higher energies. At Wilson Lab, this usually refers to the linac, the synchrotron, and the storage ring together; each is individually an accelerator, as is the ERL |
acute hazard  : as defined by the EPA, "conditions that create the potential for injury or damage to occur ... as a result of an instantaneous or short duration exposure..." : as defined by the EPA, "conditions that create the potential for injury or damage to occur ... as a result of an instantaneous or short duration exposure..." |
ALARA  : "As low as is reasonably achievable" means making every reasonable effort to maintain exposures to radiation as far below the dose limits specified by the Nuclear Regulatory Commission and New York State Department of Health as is practical : "As low as is reasonably achievable" means making every reasonable effort to maintain exposures to radiation as far below the dose limits specified by the Nuclear Regulatory Commission and New York State Department of Health as is practical |
Annex  : a supplemental work area for Wilson Lab, located just across Dryden Road : a supplemental work area for Wilson Lab, located just across Dryden Road |
beam  : in general, a term for any flow of elementary particles created by an accelerator; at Wilson Laboratory this can refer to the electron or positron beams in CESR or ERL, or the X-ray beams used in CHESS (e.g. "beam time") : in general, a term for any flow of elementary particles created by an accelerator; at Wilson Laboratory this can refer to the electron or positron beams in CESR or ERL, or the X-ray beams used in CHESS (e.g. "beam time") |
biohazard facility  : the enclosure in L0, inside CHESS East, that includes a bio-hazard room, access room, control room, dark room, and F1 station; it provides an appropriate environment for safe handling of biologically hazardous viral materials : the enclosure in L0, inside CHESS East, that includes a bio-hazard room, access room, control room, dark room, and F1 station; it provides an appropriate environment for safe handling of biologically hazardous viral materials |
cave  : a room-sized enclosure for CHESS optics, located upstream of any hutch; shielding of its walls and door contain X-ray radiation during CHESS running. Only CHESS staff access caves, not CHESS users : a room-sized enclosure for CHESS optics, located upstream of any hutch; shielding of its walls and door contain X-ray radiation during CHESS running. Only CHESS staff access caves, not CHESS users |
CESR  : (Cornell Electron Storage Ring) the facility which circulates electrons and positrons in opposite directions after being accelerated by the CompleteHandbook and CompleteHandbook : (Cornell Electron Storage Ring) the facility which circulates electrons and positrons in opposite directions after being accelerated by the CompleteHandbook and CompleteHandbook |
CHESS  : (Cornell High Energy Synchrotron Source) the facility which uses high energy X-rays from CESR for a broad range of research : (Cornell High Energy Synchrotron Source) the facility which uses high energy X-rays from CESR for a broad range of research |
CLASSE  : (Cornell Laboratory for Accelerator-based ScienceS and Education) the laboratory umbrella inclusive of LEPP and CHESS laboratories and the ERL project : (Cornell Laboratory for Accelerator-based ScienceS and Education) the laboratory umbrella inclusive of LEPP and CHESS laboratories and the ERL project |
CLEO  : the detector (and collaboration) that studied electron-positron annihilations produced by CESR for three decades; its skeleton remains in L0 : the detector (and collaboration) that studied electron-positron annihilations produced by CESR for three decades; its skeleton remains in L0 |
CMS  : (Compact Muon Solenoid) the large particle physics detector acquiring data at CERN's Large Hadron Collider for the purpose of exploring the TeV energy scale; also, the large, multi-institution collaboration operating the experiment. Cornell is an active member group within CMS. : (Compact Muon Solenoid) the large particle physics detector acquiring data at CERN's Large Hadron Collider for the purpose of exploring the TeV energy scale; also, the large, multi-institution collaboration operating the experiment. Cornell is an active member group within CMS. |
continuous wave (CW)  : an electromagnetic wave of constant amplitude and frequency; a CW laser produces a continuous beam, as opposed to a pulsed laser : an electromagnetic wave of constant amplitude and frequency; a CW laser produces a continuous beam, as opposed to a pulsed laser |
controlled area  : area where radiation from CLASSE activities could potentially exceed two mrem in one hour or 100 mrem in one year (i.e. continuous exposure to 0.05 mrem/hr for 2000 hours, a "working year"); a radiation badge must be worn by any CLASSE personnel here, and a dosimeter carried by any host who is accompanied by visitors. Signage should conspicuously mark entry into such an area. : area where radiation from CLASSE activities could potentially exceed two mrem in one hour or 100 mrem in one year (i.e. continuous exposure to 0.05 mrem/hr for 2000 hours, a "working year"); a radiation badge must be worn by any CLASSE personnel here, and a dosimeter carried by any host who is accompanied by visitors. Signage should conspicuously mark entry into such an area. |
crash button | crash cord  : a cord used to shut off power to most equipment in the CESR tunnel in an emergency; located at shoulder height along the tunnel wall : a cord used to shut off power to most equipment in the CESR tunnel in an emergency; located at shoulder height along the tunnel wall 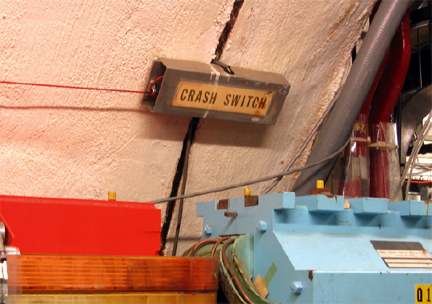 |
declaration sheet  : a CHESS form that must be completed by an experimenter before beam time is allotted; it describes any hazardous materials to be brought to Wilson Laboratory : a CHESS form that must be completed by an experimenter before beam time is allotted; it describes any hazardous materials to be brought to Wilson Laboratory |
dewar  : a thermally insulated container used to hold ultra-cold refrigerants such as liquid nitrogen or liquid helium : a thermally insulated container used to hold ultra-cold refrigerants such as liquid nitrogen or liquid helium  |
digital volt meter  : (or DVM) a hand-held diagnostic device with digital readout used in electrical work to measure voltage and other electrical properties of a circuit : (or DVM) a hand-held diagnostic device with digital readout used in electrical work to measure voltage and other electrical properties of a circuit 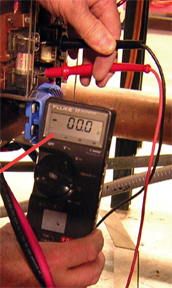 |
dosimeter  : a hand-held personal radiation monitor that displays (in analog or digital format) accumulated radiation exposure in real time : a hand-held personal radiation monitor that displays (in analog or digital format) accumulated radiation exposure in real time   |
| dump button | EHS  : Cornell's Department of Environment, Health and Safety, located at 395 Pine Tree Road, Suite 210 (near East Hill Plaza, adjacent to the car wash), phone (607)(25)5-8200 : Cornell's Department of Environment, Health and Safety, located at 395 Pine Tree Road, Suite 210 (near East Hill Plaza, adjacent to the car wash), phone (607)(25)5-8200 |
EPA  : (Environmental Protection Agency) an agency of the federal government charged with protecting human health and the environment : (Environmental Protection Agency) an agency of the federal government charged with protecting human health and the environment |
ERL  : (Energy Recovery Linac) a proposed design for an x-ray source in which electrons produced by a laser impinging on a photocathode are accelerated and decelerated with SRF technology; see also Phase 1 : (Energy Recovery Linac) a proposed design for an x-ray source in which electrons produced by a laser impinging on a photocathode are accelerated and decelerated with SRF technology; see also Phase 1 |
exclusion area  : controlled area where access is prohibited while radiation-producing equipment (or sealed source) is in use, for which (at CLASSE) an interlock system prevents powering said equipment if personnel are present or its perimeter is violated or otherwise found to be insecure : controlled area where access is prohibited while radiation-producing equipment (or sealed source) is in use, for which (at CLASSE) an interlock system prevents powering said equipment if personnel are present or its perimeter is violated or otherwise found to be insecure |
Geiger-Mueller counter  : hand-held monitor with real-time visual and audible readout of instantaneous exposure rate to gamma and x-ray radiation; does not record accumulated exposure : hand-held monitor with real-time visual and audible readout of instantaneous exposure rate to gamma and x-ray radiation; does not record accumulated exposure 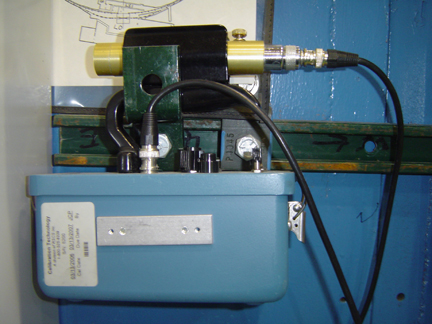 |
GeV  : (billion (Giga) electron volts) a unit of energy used to characterize an individual elementary particle; a single proton at rest has energy of about 1 GeV; each electron or positron in CESR has between 1.5 and 6 GeV : (billion (Giga) electron volts) a unit of energy used to characterize an individual elementary particle; a single proton at rest has energy of about 1 GeV; each electron or positron in CESR has between 1.5 and 6 GeV |
ground-fault circuit interrupter  : (GFCI) a device present in many alternating current circuits, protects against electrical shock by interrrupting the current if sufficient leakage to ground is detected : (GFCI) a device present in many alternating current circuits, protects against electrical shock by interrrupting the current if sufficient leakage to ground is detected |
grounding stick  : a metal wand with a non-conducting handle and a grounding strap used to de-energize high-voltage equipment : a metal wand with a non-conducting handle and a grounding strap used to de-energize high-voltage equipment |
hutch  : (also, "station") a room-sized enclosure for CHESS experiments; shielding of its walls and door contain X-ray radiation during exposures of experimental samples. A hutch is accessed by CHESS users; if the sliding door is open, beams are prevented from entering the hutch. A hutch is downstream of a cave : (also, "station") a room-sized enclosure for CHESS experiments; shielding of its walls and door contain X-ray radiation during exposures of experimental samples. A hutch is accessed by CHESS users; if the sliding door is open, beams are prevented from entering the hutch. A hutch is downstream of a cave 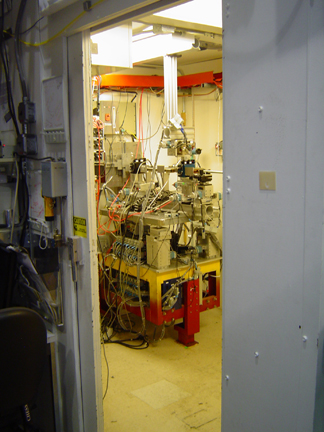 |
interaction point  : (also, "IP") the location where particle bunches collide in particle physics experiments; e.g. the CLEO detector : (also, "IP") the location where particle bunches collide in particle physics experiments; e.g. the CLEO detector |
interlock system  : a system of keys and light beams that monitors access by people into a exclusion area and prevents an accelerator from turning on if people remain inside or enter such an area : a system of keys and light beams that monitors access by people into a exclusion area and prevents an accelerator from turning on if people remain inside or enter such an area |
ionizing radiation  : a flow of elementary particles or electromagnetic waves energetic enough to remove electrons from atoms and disrupt molecules in living organisms; see non-ionizing radiation; can originate from cosmic rays, decays of radioisotopes, particle accelerators, medical scans : a flow of elementary particles or electromagnetic waves energetic enough to remove electrons from atoms and disrupt molecules in living organisms; see non-ionizing radiation; can originate from cosmic rays, decays of radioisotopes, particle accelerators, medical scans |
kirk key  : a one-lock, one-person lockout system which prevents equipment from being operated if the key is missing from its lock : a one-lock, one-person lockout system which prevents equipment from being operated if the key is missing from its lock |
L0  : the large experimental hall (Rm #150) on the first floor of Wilson Laboratory housing the south end of the synchrotron and CESR, the CLEO detector pit and skeleton, CHESS East, the ERL Phase 1a prototype, and other facilities : the large experimental hall (Rm #150) on the first floor of Wilson Laboratory housing the south end of the synchrotron and CESR, the CLEO detector pit and skeleton, CHESS East, the ERL Phase 1a prototype, and other facilities |
L0E  : the large hall (Rm #151) on the first floor of Wilson Laboratory just east of L0, housing the vacuum lab, machine shops, lab space, office and work areas, and other facilities : the large hall (Rm #151) on the first floor of Wilson Laboratory just east of L0, housing the vacuum lab, machine shops, lab space, office and work areas, and other facilities |
LEPP  : (Laboratory for Elementary-Particle Physics) one of the two primary research arms of CLASSE, encompassing accelerator R&D (w/SRF, ERL, CESR) and particle physics at the energy frontier (CMS, ILC) : (Laboratory for Elementary-Particle Physics) one of the two primary research arms of CLASSE, encompassing accelerator R&D (w/SRF, ERL, CESR) and particle physics at the energy frontier (CMS, ILC) |
linac  : (linear accelerator) an accelerator with a straight trajectory; the 100-foot injector in LS1 of electrons and positrons into the synchrotron and a portion of the ERL Phase 1a project are both linacs : (linear accelerator) an accelerator with a straight trajectory; the 100-foot injector in LS1 of electrons and positrons into the synchrotron and a portion of the ERL Phase 1a project are both linacs |
Lock/Tag/Verify (LTV)  : a system of locks and tags used to prevent equipment from being powered-on while a person is working on or near it (see Cornell EHS LTV page) : a system of locks and tags used to prevent equipment from being powered-on while a person is working on or near it (see Cornell EHS LTV page) 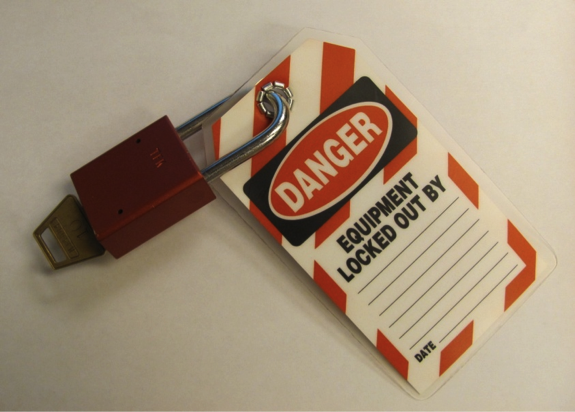 |
LS1  : the long and narrow hall (Rm #152) on the first floor of Wilson Laboratory just north of L0, housing the linac for the synchrotron, starting in room 101 and ending in the East flare : the long and narrow hall (Rm #152) on the first floor of Wilson Laboratory just north of L0, housing the linac for the synchrotron, starting in room 101 and ending in the East flare |
LS2  : the long and narrow hall (Rm #252) on the second floor of Wilson Laboratory one floor above LS1, starting in the CESR control room and ending in the hallway behind L0E : the long and narrow hall (Rm #252) on the second floor of Wilson Laboratory one floor above LS1, starting in the CESR control room and ending in the hallway behind L0E |
SDS  : (Safety Data Sheets) safety-related information, in a standardized format, about chemicals and other materials, which includes a list of ingredients, safe use instructions, hazards, exposure symptoms, and emergency procedures; locate them via search engine, or at the SIRI site or the local CHESS site : (Safety Data Sheets) safety-related information, in a standardized format, about chemicals and other materials, which includes a list of ingredients, safe use instructions, hazards, exposure symptoms, and emergency procedures; locate them via search engine, or at the SIRI site or the local CHESS site |
mrem  : (millirem; one-thousandth of a rem, a metric unit) unit of accumulated ionizing radiation exposure, adjusted for its potential for biological damage; an alternate unit is the Sievert (Sv); 100 mrem = 1 mSv : (millirem; one-thousandth of a rem, a metric unit) unit of accumulated ionizing radiation exposure, adjusted for its potential for biological damage; an alternate unit is the Sievert (Sv); 100 mrem = 1 mSv |
non-ionizing radiation  : a flow of elementary particles or electromagnetic waves that is not ionizing radiation; includes radar, microwave, infrared, radio, television signals, magnetic fields, and electric power fields : a flow of elementary particles or electromagnetic waves that is not ionizing radiation; includes radar, microwave, infrared, radio, television signals, magnetic fields, and electric power fields |
NRC  : (Nuclear Regulatory Commission) the federal agency which regulates and licenses radioactive materials to protect public health and safety : (Nuclear Regulatory Commission) the federal agency which regulates and licenses radioactive materials to protect public health and safety |
OSHA  : (Occupational Safety and Health Administration) the federal agency responsible for workplace safety : (Occupational Safety and Health Administration) the federal agency responsible for workplace safety |
Phase 1  : an R&D phase of the ERL project, located along the south wall of L0 : an R&D phase of the ERL project, located along the south wall of L0 |
pulsed laser  : a laser which delivers its beam in concentrated pulses (as opposed to a CW laser); the instantaneous power can be much greater than the average power, and can hence pose a greater safety challenge : a laser which delivers its beam in concentrated pulses (as opposed to a CW laser); the instantaneous power can be much greater than the average power, and can hence pose a greater safety challenge |
radiation  : a flow of elementary particles or electromagnetic waves which can be ionizing or non-ionizing : a flow of elementary particles or electromagnetic waves which can be ionizing or non-ionizing |
radiation badge  : a clip-on badge worn on clothing that records accumulated ionizing radiation exposure over an extended period of time (usually one or two months), after which it is returned to a vendor for evaluation of the dose; exposure records are maintained by the CLASSE Radiation Safety Specialist (RSS) and EHS : a clip-on badge worn on clothing that records accumulated ionizing radiation exposure over an extended period of time (usually one or two months), after which it is returned to a vendor for evaluation of the dose; exposure records are maintained by the CLASSE Radiation Safety Specialist (RSS) and EHS  |
radiation-producing equipment  : (RPE) any apparatus capable of producing ionizing radiation when it is powered on and for which this radiation ceases to be generated when it is powered off; examples include any accelerator, an RF cavity, or an x-ray tube : (RPE) any apparatus capable of producing ionizing radiation when it is powered on and for which this radiation ceases to be generated when it is powered off; examples include any accelerator, an RF cavity, or an x-ray tube |
RPH  : Radiation Permit Holder, a Cornell EHS designation, responsible for administration and operation/use of RPE or sealed sources; CLASSE has several RPH's : Radiation Permit Holder, a Cornell EHS designation, responsible for administration and operation/use of RPE or sealed sources; CLASSE has several RPH's |
RSS  : CLASSE Radiation Safety Specialist (see Who's Who), responsible for maintenance, calibration, and advice on radiation measurement devices in CLASSE as well as all aspects of radioactive source administration : CLASSE Radiation Safety Specialist (see Who's Who), responsible for maintenance, calibration, and advice on radiation measurement devices in CLASSE as well as all aspects of radioactive source administration |
radioactive source  : a packaged, usually sealed, concentrated amount of a specific radioisotope manufactured for the purpose of generating a particular type and energy of ionizing radiation : a packaged, usually sealed, concentrated amount of a specific radioisotope manufactured for the purpose of generating a particular type and energy of ionizing radiation |
radioactivity  : the radiation emitted by radioisotopes : the radiation emitted by radioisotopes |
radioisotope"  : an unstable chemical element with the same number of protons and electrons as its stable partner but with a different number of neutrons; when it decays with a characteristic half-life, it emits radiation as it decays to lighter elements, which themselves might also be radioisotopes : an unstable chemical element with the same number of protons and electrons as its stable partner but with a different number of neutrons; when it decays with a characteristic half-life, it emits radiation as it decays to lighter elements, which themselves might also be radioisotopes |
RF cavity  : (radio-frequency cavity, part of an RF system) A specially-shaped, hollow metal volume that delivers energy to an electron and/or positron beam when stimulated by electromagnetic fields that oscillate at high frequency : (radio-frequency cavity, part of an RF system) A specially-shaped, hollow metal volume that delivers energy to an electron and/or positron beam when stimulated by electromagnetic fields that oscillate at high frequency  |
RF System : (radio-frequency system) a support system for an accelerator which supplies energy to particles via an RF cavity : (radio-frequency system) a support system for an accelerator which supplies energy to particles via an RF cavity |
residual radioactivity  : radioactivity in material near or part of an accelerator, induced by errant high energy beam particles, creating radioisotopes which remain even after the accelerator has been turned off : radioactivity in material near or part of an accelerator, induced by errant high energy beam particles, creating radioisotopes which remain even after the accelerator has been turned off |
ring badge  : a special radiation badge designed to be worn on one or more fingers of a radiation worker concerned about localized exposure : a special radiation badge designed to be worn on one or more fingers of a radiation worker concerned about localized exposure |
| search button | station enable key  : when removed, makes it impossible to open the (X-ray) beam stops on that particular CHESS station : when removed, makes it impossible to open the (X-ray) beam stops on that particular CHESS station |
SRF  : Superconducting RF Cavity or system; also, the group which develops, builds, & maintains such systems : Superconducting RF Cavity or system; also, the group which develops, builds, & maintains such systems |
synchrotron  : a circular ring of magnets, RF cavities, vacuum pumps and other components to accelerate particles in a circle; at CLASSE, most people refering to "the synchrotron" mean the older accelerator built in the late 1960's currently used to accelerate positrons and electrons and inject them into CESR (also a synchrotron) : a circular ring of magnets, RF cavities, vacuum pumps and other components to accelerate particles in a circle; at CLASSE, most people refering to "the synchrotron" mean the older accelerator built in the late 1960's currently used to accelerate positrons and electrons and inject them into CESR (also a synchrotron) |
transfer line  : a beam line for particle transfer from the synchrotron into CESR : a beam line for particle transfer from the synchrotron into CESR |
two-person rule  : No operation involving a known risk shall be carried out by any person working alone; risk shall be considered eliminated only after two competent people have agreed to this judgment : No operation involving a known risk shall be carried out by any person working alone; risk shall be considered eliminated only after two competent people have agreed to this judgment |
uncontrolled area  : area where the potential radiation dose rate from CLASSE activities is below two mrem per hour and 100 mrem per year; no radiation badge or dosimeter are needed here : area where the potential radiation dose rate from CLASSE activities is below two mrem per hour and 100 mrem per year; no radiation badge or dosimeter are needed here |
vacuum system  : the collective assembly of vacuum pipes, vacuum pumps (hundreds), pressure gauges, and other instrumentation that provide a virtually unobstructed (by molecules of air, water, or other materials) path for a beam in an accelerator : the collective assembly of vacuum pipes, vacuum pumps (hundreds), pressure gauges, and other instrumentation that provide a virtually unobstructed (by molecules of air, water, or other materials) path for a beam in an accelerator |
Edit | Attach | Print version | History: r15 < r14 < r13 < r12 | Backlinks | View wiki text | Edit wiki text | More topic actions
Topic revision: r15 - 28 Jul 2020, dww3
-
 Safety/Handbook Web
-
 Create New Topic
-
 Index
Index
-
 Search
-
 Changes
-
 Notifications
-
 RSS Feed
-
 Statistics
-
 Preferences
- Webs
-
 ACC
ACC
-
 ACL
ACL
-
 Bunch
Bunch
-
 Private
-
 BusinessOffice
-
 CBB
CBB
-
 NSF
NSF
-
 CBETA
CBETA
-
 CESR
CESR
-
 Private
-
 CHESS
CHESS
-
 FMB
FMB
-
 Maia
Maia
-
 XIMG
XIMG
-
 CHEXS
CHEXS
-
 CLASSE
-
 Inventory
-
 Communications
-
 CLEO
CLEO
-
 AC
AC
-
 Administration
-
 RunMan
-
 SW
SW
-
 CMSPhase2MREFC
-
 Computing
-
 Blogs
Blogs
-
 Newsletter
-
 Obsolete
-
 Cosmology
-
 Private
-
 DarkPhoton
-
 ERL
ERL
-
 Private
-
 EngineeringDesignDrafting
-
 G2
G2
-
 HEP
HEP
-
 DBSWorkshop
-
 SWIG
SWIG
-
 HLLHCCMSMREFC
-
 HMF
HMF
-
 HumanResources
-
 Private
-
 ILC
ILC
-
 Americas
-
 CesrTA
-
 Proposal
-
 DampingRings
-
 AreaLeaders
-
 CTA09
CTA09
-
 ILCDR06
-
 ILCDR07_KEK
-
 ILCDR08
-
 S3TaskForce
-
 Private
-
 CesrTA
-
 WWS
WWS
-
 MacCHESS
-
 Main
Main
-
 People
-
 PhotocathodeBrightBeams
-
 REU
REU
-
 Private
-
 SRF
SRF
-
 PCsrfcn1
-
 Safety
-
 Handbook
-
 Private
-
 ExternalResources
-
 Sandbox
-
 TestWeb
-
 Testauth
-
 System
-
 Theory
-
 Communications
-
 Documents
-
 Phase2MREFC
-
 WebDev
-
 Private
-
 XLEAP
XLEAP
 Copyright © by the contributing authors. All material on this collaboration platform is the property of the contributing authors.
 Ideas, requests, problems regarding CLASSE Wiki? Send feedback


